Struggling to drill through ceramic without cracking it? Ever found yourself frustrated by shattered tiles or mugs? In this article, you’ll discover the secrets to mastering the art of drilling through ceramic like a pro.
Imagine effortlessly creating neat holes in ceramic pots or tiles without the fear of breakage. No more ruined DIY projects or wasted materials. With the right techniques and tools at your disposal, you’ll be able to tackle drilling through ceramic surfaces with confidence.
Ready to unlock the tips and tricks that will make your ceramic drilling projects a breeze? Stay tuned to learn how to achieve clean and precise results every time.
Key Takeaways
- Ceramics Properties: Ceramics are hard, brittle, and abrasive materials that require specific techniques to drill through without causing damage.
- Understanding Composition: Ceramics can be clay-based, have glazes, grain orientation, and density variations, which all impact drilling outcomes.
- Choosing the Right Drill Bit: Select carbide-tipped or diamond-tipped drill bits for ceramics and ensure the size matches the hole diameter for precise drilling.
- Preparing the Surface: Clean the surface, mark the drilling point, use masking tape, create pilot holes for hard ceramics, and secure the ceramic for stability.
- Drilling Process Steps: Mark the drilling point, select the right drill bit, set up protective measures, create a pilot hole, and secure the ceramic piece for accurate drilling.
- Finishing and Polishing: Clean the drilled hole, smooth the edges with sandpaper, use polishing compounds for a glossy finish, seal if necessary, and inspect for any imperfections.
Understanding Ceramics
When working with ceramics, it’s essential to understand the material’s properties to successfully drill through it without causing damage. Ceramics are hard, brittle materials made through heating non-metallic minerals at high temperatures. Unlike softer materials like wood or plastic, ceramics require specific techniques to avoid cracking or shattering during drilling. Here’s what you need to know about ceramics before you start drilling:
Characteristics of Ceramics
- Hardness: Ceramics are known for their hardness, which makes them challenging to drill through compared to softer materials. Their hardness comes from the compact structure of the material, composed of tightly bonded molecules.
- Brittleness: One crucial aspect of ceramics is their brittleness. This means that they are prone to cracking or breaking under stress, especially when subjected to sudden force or pressure.
- Abrasive Nature: Ceramics can be abrasive, which poses additional challenges when drilling. The abrasive particles within the material can wear down drill bits quickly if not handled correctly.
Composition of Ceramics
- Clay-Based: Many ceramics are clay-based, which contributes to their strength and heat resistance. Different types of ceramics may contain varying amounts of clay, affecting their drilling characteristics.
- Glazes: Some ceramic surfaces are glazed, adding an extra layer of hardness and complexity when drilling. The glaze can be tougher than the ceramic body itself, requiring specific drilling techniques.
- Grain Orientation: Ceramics have a grain structure that can influence drilling outcomes. Understanding the orientation of the grains in the material can help you drill more effectively without causing cracks.
- Density Variations: Variations in density across a ceramic surface can affect drilling. It’s essential to adjust drilling speed and pressure based on these variations to prevent damage.
By grasping these fundamental aspects of ceramics, you’ll be better equipped to approach drilling through ceramic surfaces successfully. Next, we’ll delve into actionable tips and techniques to help you drill through ceramics with precision and confidence.
Choosing the Right Drill Bit
Selecting the proper drill bit is crucial when drilling through ceramic surfaces. Here’s how to choose the right one:
Recommended Products

PRECISION: Features Bosch’s unique product design with a precision tip to help solve any bit wandering orbit walking
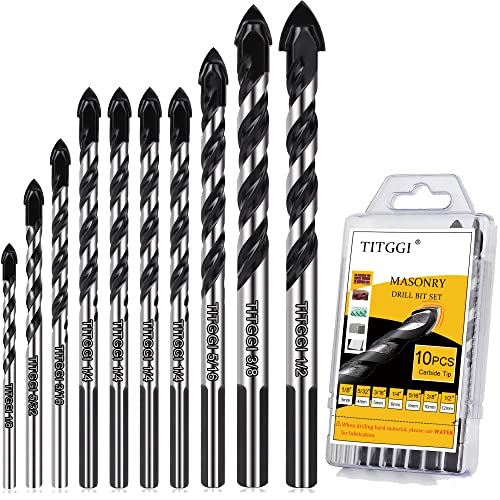
HIGH QUALITY DRILL BIT SET; TITGGI Masonry drill bit set, industrial strength carbide drill bit tip, excellent abrasion resistance, make the drilling much more easier. this cement drill bits can easily penetrate various material (glass, ceramic, cement, wood, brick, travertine, hard plastic, etc.)

THREE FLAT SHANK PROVIDES SUPERIOR GRIP
Consider using a carbide-tipped drill bit
Carbide drill bits are ideal for drilling through ceramic due to their hardness. They can withstand the abrasiveness of ceramics, ensuring durability during the drilling process.
Opt for a diamond-tipped drill bit for hard ceramics
For extremely hard ceramics like porcelain or tiles, diamond-tipped drill bits are the best choice. The hardness of diamonds allows for effective drilling without damaging the ceramic surface.
Use a spear-point drill bit for precision
When precision is essential, a spear-point drill bit is recommended. Its pointed tip helps to create a clean and accurate hole in ceramic materials.
Choose the right size of the drill bit
Select a drill bit size that matches the diameter of the hole you need in the ceramic. Using the correct size prevents unnecessary stress on the ceramic surface and ensures a proper fit for any fixtures or fasteners.
Avoid using regular drill bits
Standard drill bits may not be effective for drilling through ceramic, as they can easily break or chip the material. It’s best to use specialized drill bits designed for ceramics to achieve the best results.
Ensure the drill bit is suitable for rotary drilling
Verify that the drill bit you choose is compatible with rotary drilling machines. Using the correct type of drill bit for your drilling equipment is essential for successful ceramic drilling.
By following these guidelines, you can choose the right drill bit for your ceramic drilling project, ensuring precise and clean holes without damaging the ceramic surface.
Preparing the Ceramic Surface
When drilling through ceramic, preparing the surface correctly is crucial to ensure a successful outcome. Here’s how you can get the ceramic surface ready before you start drilling:
Clean the Surface
Before you begin drilling, make sure the ceramic surface is clean and free from any dust, dirt, or other particles. Use a mild detergent and water to gently clean the area where you plan to drill. This step helps ensure that the drill bit can make precise contact with the ceramic surface.
Mark the Drilling Point
Next, use a marker or a piece of tape to mark the exact spot where you want to drill. This marking will guide you during the drilling process and help you maintain accuracy. Double-check the position to avoid any errors before proceeding.
Use Masking Tape
To prevent slippage and protect the ceramic surface from potential damage, consider placing a piece of masking tape over the area you marked for drilling. The tape provides a bit of extra grip for the drill bit and helps reduce the chances of the drill bit slipping or causing scratches on the ceramic.
Employ a Pilot Hole for Hard Ceramics
For hard ceramics, it’s advisable to create a pilot hole before using the actual drill bit. A pilot hole serves as a starting point and helps prevent the drill bit from skidding across the smooth ceramic surface. Start with a smaller-sized drill bit to create the pilot hole.
Secure the Ceramic
To ensure stability while drilling, secure the ceramic piece in place using clamps or a vise. This step prevents the ceramic from moving during the drilling process, ensuring precise and accurate drilling results. Make sure the ceramic is firmly held to avoid any accidents.
By following these steps to prepare the ceramic surface before drilling, you’ll enhance the drilling process’s efficiency and increase the likelihood of achieving clean and accurate holes without damaging the ceramic material.
Drilling Process
To successfully drill through ceramic surfaces, you need to follow a precise drilling process. Here’s a step-by-step guide to help you navigate the drilling procedure effectively:
- Marking the Drilling Point
Before you commence drilling, mark the exact spot where you want the hole. This ensures accuracy and helps prevent any errors during the drilling process. - Selecting the Right Drill Bit
Choose the appropriate drill bit based on the type of ceramic you are working with. Carbide-tipped bits are ideal for general ceramic drilling, while diamond-tipped bits are better suited for hard ceramics. Spear-point bits come in handy for precision drilling tasks. - Setting Up Protective Measures
Prior to drilling, take necessary precautions to protect the ceramic surface. Use masking tape to create a barrier around the drilling area. This helps prevent chipping and protects the surface from potential damage. - Creating a Pilot Hole
For hard ceramics, it’s advisable to create a pilot hole before drilling the main hole. This pilot hole serves as a guide for the drill bit, making it easier to drill through the ceramic material without causing cracks or fractures. - Securing the Ceramic Piece
To ensure stability and precision during drilling, securely hold or clamp the ceramic piece in place. This prevents unnecessary movement, reducing the risk of slip-ups or inaccuracies while drilling.
By following these steps meticulously, you can enhance the efficiency and accuracy of the drilling process, ultimately achieving successful outcomes when drilling through ceramic surfaces.
Finishing and Polishing
After successfully drilling through ceramic, you’re now ready to focus on finishing and polishing to ensure a professional-looking outcome. Here are some essential steps to help you achieve a smooth and refined surface:
Cleaning the Drilled Hole
Once the drilling is complete, it’s crucial to clean the drilled hole thoroughly. Use a soft brush or cloth to remove any ceramic dust or debris from the hole. This step is essential to prepare the surface for further finishing.
Smoothing the Edges
To smoothen the rough edges left from drilling, you can use sandpaper with a fine grit. Gently sand the edges of the hole in a circular motion to achieve a polished finish. Be cautious not to apply too much pressure to avoid damaging the ceramic.
Using Polishing Compounds
To give your drilled hole a glossy appearance, you can apply a polishing compound. These compounds are specifically designed for ceramics and can help you achieve a professional finish. Apply the polishing compound on the drilled hole and buff it with a soft cloth for a shiny look.
Sealing the Surface
Depending on the type of ceramic and its purpose, you may consider sealing the drilled hole. Sealing helps protect the ceramic from stains or moisture penetration. Choose a high-quality ceramic sealant appropriate for your ceramic type and follow the manufacturer’s instructions for application.
Final Inspection
Once you’ve finished the polishing and sealing processes, take a close look at the drilled hole. Ensure that the surface is smooth, polished, and free of any imperfections. This final inspection will help you identify any touch-ups needed before finalizing your ceramic drilling project.
By following these finishing and polishing steps, you can enhance the appearance and durability of your drilled ceramic surface. Remember to handle the ceramic piece with care during the finishing process to achieve the best results.
Conclusion
Drilling through ceramic surfaces requires attention to detail and the right tools. By following the proper steps outlined in this article, you can achieve a polished and professional finish. Remember to clean the hole, smooth edges with sandpaper, use polishing compounds, seal the surface, and inspect your work for quality. These final touches will enhance the durability and aesthetics of your ceramic surface. Happy drilling!
Frequently Asked Questions
What are the key challenges when drilling through ceramic surfaces?
Drilling through ceramic surfaces can be challenging due to the hardness and brittleness of the material. Using improper drill bits or techniques can lead to cracking, chipping, or uneven holes.
Why is selecting the right drill bit important for drilling ceramic surfaces?
Choosing the correct drill bit, such as a carbide-tipped or diamond-tipped bit designed for ceramics, is crucial for achieving clean and precise holes without damaging the material.
What preparation steps are essential before drilling into ceramic surfaces?
Before drilling, it is essential to mark the drilling spot accurately, secure the ceramic surface to prevent slipping, and apply gentle but consistent pressure while drilling to avoid sudden breaks.
What are the recommended finishing techniques after drilling through ceramic surfaces?
After drilling, it is important to clean the hole thoroughly, smooth the rough edges using fine sandpaper, apply polishing compounds for a glossy finish, seal the surface to enhance durability, and inspect the work for any imperfections.