Ever struggled with relocating a hefty drill press all by yourself? Imagine the daunting task of shifting a large, cumbersome machine without proper guidance. How can you move it safely and efficiently without breaking a sweat or risking injury?
Key Takeaways
- Assess the weight and size of the drill press before moving to prepare the necessary equipment and manpower.
- Clear pathways and ensure entry and exit points are wide enough to accommodate the drill press.
- Secure appropriate lifting and moving equipment such as pallet jacks or hand trucks based on the machine’s weight.
- Prioritize safety by disconnecting electrical connections and assessing structural integrity before relocation.
- Plan and prepare by assessing space, securing lifting equipment, and establishing safety measures before moving the drill press.
- When disassembling for relocation, follow a systematic approach, secure the power supply, remove components carefully, and organize parts for easy reassembly.
Assessing the Task of Moving a Large Drill Press
Before you embark on moving a large drill press, it’s crucial to assess the task properly. This assessment will help you plan and execute the relocation process safely and efficiently. Here’s a step-by-step guide to help you evaluate the job at hand:
Determining the Weight and Size of the Drill Press
Start by finding out the exact weight and dimensions of the drill press you intend to move. Knowing this information will assist you in preparing the necessary equipment and manpower for the task.
Assessing the Pathways and Obstacles
Survey the route along which you plan to move the drill press. Check for any obstacles, narrow passages, stairs, or uneven surfaces that may pose challenges during the relocation process. Clearing the pathways beforehand can prevent accidents or damage.
Verifying the Accessibility of Entry and Exit Points
Ensure that the entry and exit points, such as doors, corridors, and elevators, are wide enough to accommodate the drill press. Measure these spaces to guarantee a smooth transition without the risk of getting stuck.
Securing Proper Lifting and Moving Equipment
Based on the weight and size of the drill press, acquire or rent appropriate lifting and moving equipment like pallet jacks, hand trucks, or dollies. Having the right tools will make the relocation task more manageable and reduce the risk of injuries.
Checking for Electrical and Structural Considerations
Before moving the drill press, ensure that electrical connections are safely disconnected to prevent any electrical hazards. Additionally, assess the structural integrity of the floors and pathways to support the weight of the drill press during transit.
By carefully assessing these crucial aspects of moving a large drill press, you can better prepare yourself for a successful and secure relocation process. Remember, proper planning and evaluation are key to ensuring the safety of both yourself and the equipment during the move.
Planning and Preparation
Before moving a large drill press, it’s crucial to have a well-thought-out plan in place. Here are the essential steps to ensure a smooth relocation process:
Recommended Products
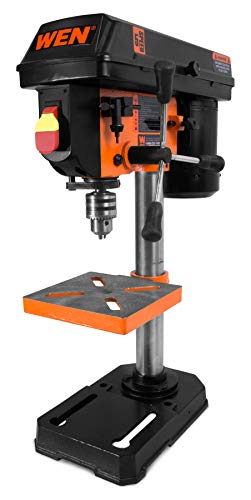
Features a 2.3A induction motor, an 8-inch swing, and a 2-inch spindle travel
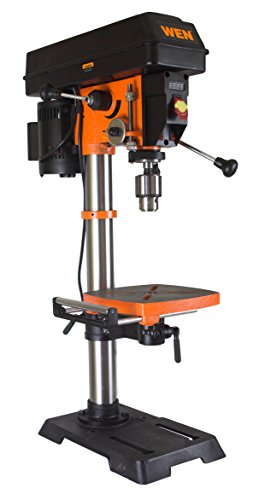
Features a 6.2-amp induction motor, a 12-inch swing, and a 3-1/8-inch spindle travel

POWERFUL 6.2A MOTOR: Equipped with a powerful 6.2A induction motor (most 12-IN drill press motors are only 5A), provide you constant power to drill through all kinds of material
Assessing Space and Pathways
Measure the dimensions of the drill press and the available pathways. Ensure there is enough space to maneuver the equipment without any obstacles. Clear out clutter or obstructions along the intended route.
Securing Lifting Equipment
Depending on the weight and size of the drill press, you may need lifting equipment such as a forklift, pallet jack, or hoist. Make sure the equipment is in good working condition and suitable for the task at hand.
Ensuring Safety Measures
Prioritize safety by wearing appropriate personal protective equipment (PPE) such as gloves, safety goggles, and steel-toed boots. Secure loose clothing to avoid entanglement with the machinery.
Checking Electrical Requirements
If the drill press is powered by electricity, assess the location of power outlets and ensure they can support the equipment’s voltage and current requirements. Consider using extension cords if needed.
Establishing Entry and Exit Points
Identify the best entry and exit points for the drill press. Choose doors or pathways that provide ample space for maneuvering the equipment in and out of the building without causing damage to the surroundings.
Inspecting Structural Integrity
Before moving the drill press, conduct a visual inspection of the floors, ramps, or elevators to ensure they can bear the weight of the equipment. Reinforce weak areas if necessary to prevent accidents.
By meticulously planning and preparing for the relocation of a large drill press, you can mitigate risks and ensure a successful transfer. Remember to prioritize safety at every step of the process to safeguard yourself and the equipment.
Disassembling the Drill Press
When disassembling a large drill press for relocation, it’s crucial to follow a systematic approach to ensure a safe and successful transfer. Here are the essential steps you should take:
Recommended Products

Square Hole Drill Bit Kit: Comes with 1 square hole drill bit adapter and 7 square hole drill bits, drill diameters: 1/4" (6.4mm), 5/16" (8mm), 3/8" (9.5mm), 2/5" (10mm), 1/2" (12.7mm), 5/9" (14mm), 5/8" (16mm) and hand drill clamp diameters range from 38 to 55mm/1.5 to 2.2" for easy installation and use.

SAFELY PERFORM VEHICLE MAINTENANCE: The RELUXGO Universal Drill Press Support Block Plate Tool Set Kit, 30 Ton – Bearing and Bushing Repair Removal Installation is a system that allows you to repeat configurations and is infinitely adjustable to fit irregularly shaped objects; Offers an adjustable and stable support base for vehicle hubs and other complicated shapes to allow bearings to be pressed in or out accurately
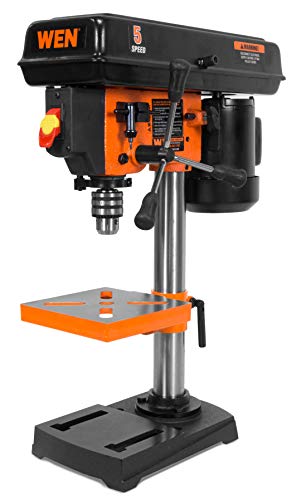
Features a 2.3A induction motor, an 8-inch swing, and a 2-inch spindle travel
1. Secure the Power Supply
- Locate the power source: Before starting the disassembly process, make sure to locate the power supply and disconnect the drill press from the electrical outlet. This step is vital to prevent any accidents during the disassembly.
2. Remove the Chuck and Drill Bit
- Loosen the chuck: Start by loosening the chuck using the chuck key. Remove the drill bit from the chuck and set it aside in a safe place. This step will make the drill press lighter and easier to handle during disassembly.
3. Dismantle the Table and Accessories
- Remove the table: Unscrew the bolts holding the table in place and carefully lift it off the drill press. Additionally, remove any accessories attached to the table, such as clamps or supports, and keep them together for safekeeping.
4. Detach the Motor and Head Assembly
- Unscrew the motor: Depending on the drill press model, you may need to detach the motor from the head assembly. Unscrew any bolts or screws securing the motor to the head, ensuring it is safely disconnected.
5. Disassemble the Column and Base
- Separate the column: Loosen the bolts connecting the column to the base of the drill press. Slowly lift the column off the base while ensuring stability and support to prevent any accidents or damage.
- Organize components: As you disassemble the drill press, keep track of all loose parts, bolts, and hardware. Store them in clearly labeled containers or bags to avoid misplacement and ensure easy reassembly at the new location.
By meticulously following these steps to disassemble your large drill press, you’ll streamline the relocation process and reduce the risk of damage or injury. Remember to take your time, stay organized, and prioritize safety throughout the disassembly to ensure a smooth transfer.
Safely Transporting the Components
When transporting a large drill press, ensuring the safety of each component is crucial. Proper handling and securing of the disassembled parts will help prevent damage and ensure a successful move.
Recommended Products

Professional Moving Blanket -- 40" x 72" moving & packing blankets that provide exceptional damage protection from scratches, dirt, and moisture when moving or transporting furniture, appliances, and other valuable large items. It's also handy to pad moving boxes when shipping fragile items.

Professional-grade: Oversized, 72" x 40" premium quality moving pads that provide exceptional damage protection from scratches, nicks, dirt, and moisture when moving or transporting furniture, appliances, and other valuable large items

Professional Moving Blanket: Come with 3 Packs of 40x72inch heavy-duty moving pads, perfect size to cover and protect even your large items.
Securing the Components
- Prioritize securing smaller parts like the chuck, table, and motor by wrapping them in protective materials such as bubble wrap or moving blankets.
- Store the smaller components in labeled boxes or containers to easily identify and access them during reassembly.
- Use sturdy packing materials to prevent any shifting or damage during transit.
- Place bolts, screws, and other hardware in clearly labeled bags and attach them securely to their respective components.
Moving the Head Assembly
- Remove the head assembly carefully, ensuring it’s properly supported to avoid any sudden movements.
- Consider using straps or ropes to secure the head assembly in place and prevent swinging during transport.
- Keep the head assembly upright to maintain the internal mechanisms’ alignment and integrity.
Handling the Column and Base
- When disassembling the column and base, use caution to prevent any bending or structural damage.
- Secure the column and base on a durable dolly or cart to facilitate easier transportation.
- Consider using additional padding or support underneath the column and base to absorb any shocks or vibrations during transit.
- Arrange the disassembled components in the moving vehicle strategically to evenly distribute the weight and prevent shifting.
- Stack lighter components on top of heavier ones to create a stable and secure load.
- Use straps or tie-downs to secure all parts in place and prevent them from shifting or falling during transit.
By following these guidelines and taking the necessary precautions, you can transport your large drill press safely and efficiently. Planning and attention to detail will help ensure that each component reaches its destination intact, ready for reassembly.
Reassembly at the New Location
Now that you’ve safely transported your disassembled drill press components to the new location, it’s time to reassemble them. Follow these straightforward guidelines to ensure a smooth transition and proper setup of your heavy equipment.
Organize Components Methodically
- Group Components: Gather all the disassembled parts in an organized manner. Keep related components together to streamline the reassembly process.
- Verify Parts: Before starting, double-check that you have all the necessary parts and tools for reassembly to avoid any delays or complications.
Step-by-Step Reassembly Process
- Assembly Sequence: Begin by reassembling your drill press in reverse order of disassembly. This means starting from the bottom up, reattaching the base, column, head assembly, motor, table, chuck, and other components.
- Secure Fasteners: Ensure all fasteners, such as bolts and screws, are securely tightened but avoid over-tightening to prevent damage to the components.
Calibration and Testing
- Leveling: Once fully assembled, use a level to ensure the drill press is properly balanced and adjusted to prevent operational issues.
- Test Run: Before using the drill press for any work, perform a test run to confirm that all components are functioning correctly and that adjustments are made as needed.
- Power Connection: Safely reconnect the power supply following manufacturer guidelines to avoid electrical hazards during operation.
- Stability Inspection: Verify that the drill press is stable on the new surface to prevent accidents or equipment damage during use.
By following these reassembly steps meticulously, you’ll have your drill press back in full working order at the new location, ready for your projects. Remember, safety is paramount, so take your time and ensure each step is completed accurately to avoid any issues down the line.
Conclusion
You now have a solid understanding of how to move a large drill press efficiently and safely. By following the systematic disassembly and reassembly processes outlined in this guide, you can relocate your equipment with confidence. Remember to prioritize organization, step-by-step procedures, calibration, and safety to ensure a smooth transition to the new location. With these guidelines in mind, you’ll be able to relocate your drill press successfully and have it up and running in no time. Happy drilling!
Frequently Asked Questions
What are the key challenges in relocating a heavy drill press?
Moving a heavy drill press poses challenges such as weight, size, and fragility. Disassembling correctly, ensuring components’ safety, and secure transportation are crucial for a successful relocation.
Why is it important to follow safe relocation practices for a heavy drill press?
Safe relocation practices ensure the equipment’s integrity and functionality post-relocation. Improper handling can lead to damage, malfunctions, or safety hazards, impacting the drill’s performance.
What is the systematic disassembly process for a heavy drill press?
The systematic disassembly involves documenting the process, labeling components, using proper tools, disconnecting power sources, and securing loose parts for safe removal and transportation.
How should one approach the reassembly process at the new location?
Reassemble the drill press systematically by following a step-by-step process, referring to documentation or manuals if needed, organizing components logically, and ensuring proper calibration and functionality post-assembly.
What precautions should be taken to ensure stability and safety after reassembling a drill press?
After reassembly, conduct thorough testing, ensure all components are securely fastened, calibrate the equipment according to manufacturer guidelines, and implement safety measures to prevent accidents or malfunctions.