Ever tried to hang a shelf on a cinder block wall, only to struggle with drilling through the tough surface? You’re not alone. Many DIY enthusiasts face the challenge of drilling into cinder blocks without the right tools or techniques. But fret not, as we’ve got you covered!
Imagine effortlessly drilling into cinder blocks like a pro, without the need for specialized equipment. In this article, we’ll walk you through simple yet effective steps to tackle this common dilemma using just a regular drill. No more frustration or wasted time trying to figure it out on your own.
Key Takeaways
- Ensure safety by wearing protective gear such as goggles and a dust mask when drilling into cinder blocks.
- Select a masonry drill bit suitable for concrete surfaces, ensuring it matches the intended hole diameter.
- Mark drilling points accurately on the cinder block and secure the drill bit properly in your regular drill.
- Drill steadily and clear dust periodically to maintain efficiency during the drilling process.
- Prioritize preparation steps including gathering necessary tools, checking block composition, and accurate marking before drilling.
- Follow specific techniques like starting with the right drill bit, drilling at a slow speed, and cleaning the hole post-drilling for successful results.
Overview of Drilling into Cinder Block with a Regular Drill
So, you’re ready to tackle the challenge of drilling into cinder block walls using just a regular drill. Let’s break down the process for you, step by step, to ensure you nail this task without a hitch. Here’s how you can effectively drill into cinder blocks with the tools you already have:
Preparing Your Workspace
Before you start, ensure that you have the necessary safety gear at hand. It’s crucial to wear protective goggles and a dust mask to shield your eyes and respiratory system from debris.
Choosing the Right Drill Bit
Select a masonry drill bit specifically designed to bore into concrete surfaces like cinder blocks. Ensure the drill bit is suitable for the diameter of the hole you intend to create.
Marking Your Drilling Points
Use a pencil or chalk to mark the exact spots on the cinder block where you want to drill. Double-check the markings to prevent any errors before proceeding.
Setting Up Your Drill
Insert the masonry drill bit securely into your regular drill. Make sure the bit is straight and firmly attached to avoid accidents during operation.
Drilling into the Cinder Block
Hold the drill steady and perpendicular to the cinder block surface. Start drilling at a slow speed to create a pilot hole. Gradually increase the speed as you penetrate deeper into the block.
Clearing the Dust
Periodically withdraw the drill to remove accumulated dust from the hole. This step helps maintain the efficiency of the drilling process and prevents blockages.
Finishing Up
Once you’ve reached the desired depth, carefully withdraw the drill from the hole. Clean any remaining debris around the area and ensure a clean finish for your project.
Necessary Tools and Materials
To drill into a cinder block effectively, you will need the following tools and materials:
- Safety Gear: You should always prioritize safety when working with power tools. Ensure you have safety glasses, ear protection, and a dust mask to protect yourself from debris and noise.
- Regular Drill: Use a high-quality regular drill with a hammer function. Make sure it’s comfortable to hold and can withstand the demands of masonry work.
- Masonry Drill Bit(s): Invest in quality masonry drill bits specifically designed for drilling into concrete, bricks, or cinder blocks. These bits have a carbide tip for durability and efficient drilling.
- Marker or Pencil: To mark the drilling points accurately on the cinder block, use a marker or pencil. This step is crucial to ensure precision in your drilling.
- Measuring Tape: Having a measuring tape on hand will help you measure and mark the exact drilling locations, ensuring your holes are properly aligned.
- Level: A level will assist you in ensuring that your markings are straight and aligned, resulting in a neat and professional finish.
- Screwdriver or Center Punch: To create a starting point for drilling, use a screwdriver or a center punch to make a small indentation at each marked point on the cinder block.
- Vacuum or Brush: It’s essential to clear away the dust created during drilling. Keep a vacuum or a brush nearby to clean the drilling area periodically.
- Anchor Screws or Wall Plugs: If you plan to hang something on the cinder block wall, have anchor screws or wall plugs ready to secure your fixture firmly in place.
Having these tools and materials ready before you begin drilling into the cinder block will ensure a smooth and successful drilling process.
Recommended Products

PROFESSIONAL CARBIDE DRILL BIT SET:This masonry drill bit set includes 12PCS carbide drill bit, suitable for cement, brick, ceramic, tile, wood, plastic, marble, etc
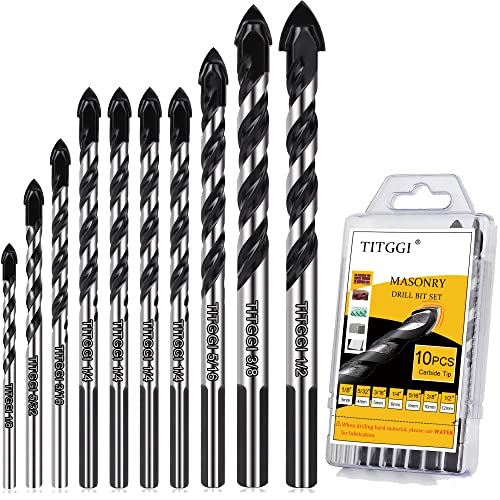
HIGH QUALITY DRILL BIT SET; TITGGI Masonry drill bit set, industrial strength carbide drill bit tip, excellent abrasion resistance, make the drilling much more easier. this cement drill bits can easily penetrate various material (glass, ceramic, cement, wood, brick, travertine, hard plastic, etc.)

2 cutter carbide tip of masonry drill bit set maximizes carbide surface contact for longer bit life.
Preparation Steps before Drilling
To ensure a successful drilling experience into a cinder block with your regular drill, you need to take some essential preparation steps. Here’s what you need to do before starting the drilling process:
- Gather the Necessary Tools and Materials:
- Collect all the required tools and materials mentioned in the previous section, such as safety gear, a regular drill with a hammer function, quality masonry drill bits, a marker or pencil for accurate markings, a measuring tape, a level, a screwdriver or center punch for creating starting points, a vacuum or brush for cleaning dust, and anchor screws or wall plugs for hanging items.
- Ensure Safety Measures:
- Put on your safety gear, including goggles to protect your eyes from debris, a mask to prevent inhaling dust, and gloves to keep your hands safe during the drilling process.
- Check the Block Composition:
- Before drilling, ensure you are aware of the composition of the cinder block. Some blocks may contain reinforcing bars or cavities that could affect the drilling process.
- Select the Right Masonry Drill Bit:
- Choose a masonry drill bit of the appropriate size for the job. The drill bit should be designed specifically for drilling into masonry materials like cinder blocks.
- Mark Drill Points Accurately:
- Use a marker or pencil to mark the drilling points on the cinder block. Double-check the markings to ensure they are accurate and align with your project requirements.
- Secure Your Workspace:
- Make sure the cinder block is securely positioned and won’t move during drilling. You can use clamps or supports to stabilize the block if necessary.
By following these preparation steps diligently, you’ll set yourself up for a smooth and successful drilling process into the cinder block with your regular drill. Remember, preparation is key to achieving the desired results without any hiccups along the way.
Recommended Products
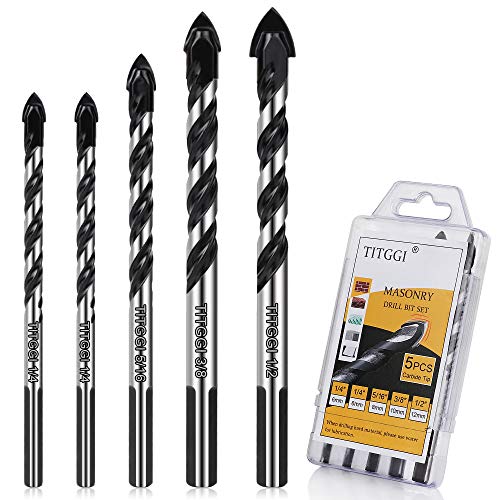
HIGH QUALITY DRILL BIT SET; TITGGI Concrete drill bit, Industrial strength carbide drill bit tip, excellent abrasion resistance, make the drilling much more easier. this masonry drill bit can easily penetrate various material (glass, ceramic tile, marble, wood, travertine, ceramic, stone, concrete, brick, hard plastic, cement, etc.)

【10PCS Masonry Drill Bit Set】Includes 10 commonly used sizes from 5/32" to 1/2" for different drilling needs. A practical carbide drill bit set for installing wall anchors, screws, shelves, fixtures, bathroom hardware, kitchen accessories, and general home repair projects.

10 pcs of masonry drill bits with the following tip diameters: 1/8, 5/32, 3/16, 1/4 (*4), 5/16, 3/8 and 1/2.
Techniques for Drilling into Cinder Block
When drilling into cinder block, you’ll need to follow specific techniques to ensure successful results. Here are the steps you should take:
Recommended Products

Optimized U-Flute Design - Removes dust faster, keeping the carbide tip cooler for ultimate strength and durability. Made for aggressive starts that produce clean, fast holes.
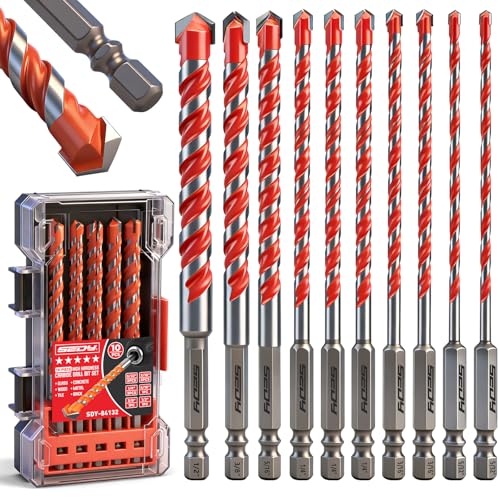
HIGH HARDNESS - Engineered with premium YG6X carbide tips, these masonry drill bits deliver exceptional hardness and long-lasting durability, maintaining sharp cutting edges for powerful performance in concrete, brick, and demanding drilling applications

Patent pending 4-flute design for fast dust removal
1. Start with the Right Drill Bit
Begin by selecting a masonry drill bit that is suitable for drilling into concrete surfaces. A carbide-tipped masonry bit is ideal for cinder blocks as it can withstand the hardness of the material.
2. Mark Your Drilling Points Precisely
Using a pencil or marker, mark the exact spots on the cinder block where you want to drill. Ensuring accurate markings will help you create clean and precise holes.
3. Secure the Cinder Block
To prevent the block from moving during drilling, secure it in place using clamps or a sturdy surface. This stability is crucial for maintaining control and accuracy while drilling.
4. Drill at a Slow Speed
When starting to drill, begin at a low speed to establish a groove in the cinder block. Gradually increase the speed as needed, but avoid going too fast to prevent damaging the block or the drill bit.
5. Apply Even Pressure
Maintain a steady and consistent pressure on the drill to ensure a smooth drilling process. Uneven pressure can lead to wobbling or deviating from the marked point.
6. Use Water as Lubricant
To reduce friction and prevent overheating, you can use water as a lubricant while drilling into the cinder block. This technique helps extend the life of your drill bit.
7. Clean the Hole
Once you’ve drilled the hole, remove any debris or dust from it using a vacuum or compressed air. A clean hole is essential for properly installing anchors or fasteners.
By applying these techniques and following the step-by-step instructions, you can effectively drill into cinder blocks with a regular drill. Remember to prioritize safety and precision throughout the process for optimal results.
Post-Drilling Actions
After successfully drilling into the cinder block, you’ll need to take a few post-drilling actions to ensure a clean finish and maintain the longevity of your work. Here are the essential steps to follow:
1. Remove Dust and Debris
- Once you’ve completed the drilling process, use a brush or a vacuum to remove any dust and debris from the hole. This step is crucial as it helps prepare the hole for the installation of anchors or screws.
2. Inspect the Hole
- After clearing the dust, inspect the drilled hole for any irregularities or leftover debris. Ensuring that the hole is clean and free from obstructions will help you achieve a secure and stable anchoring point.
3. Insert Anchors or Fasteners
- Depending on your project requirements, insert anchors or appropriate fasteners into the hole. Make sure they fit snugly to provide sturdy support for the intended fixtures.
4. Tighten Screws or Bolts
- Secure the screws or bolts into the anchors by using a screwdriver or a wrench. Ensure that they are tightened adequately to hold the fixtures firmly in place.
5. Test Stability
- Once everything is in position, give the fixtures a gentle tug to test their stability. This step will confirm whether the drilling and anchoring were done correctly.
- Finally, clean up the work area by removing any tools, debris, or dust. A tidy workspace not only enhances safety but also gives a professional finish to your project.
By following these post-drilling actions diligently, you’ll complete the drilling process effectively and ensure that your fixtures are securely attached to the cinder block. Remember, attention to detail during these steps can significantly impact the durability and overall success of your DIY project.
Conclusion
You’ve now learned the essential steps for successfully drilling into cinder block walls with a regular drill. By prioritizing safety, using the correct tools, and following the outlined techniques, you can achieve professional results in your DIY projects. Remember to select the right masonry drill bit, drill at a slow pace, and clean up thoroughly after drilling. By taking these precautions and following the post-drilling procedures, you’ll ensure a secure and durable attachment for your fixtures. Keep these tips in mind for your next project, and enjoy the satisfaction of a job well done!
Frequently Asked Questions
How do I effectively drill into cinder block walls using a regular drill?
To drill into cinder block walls effectively, you need to use the right tools and follow these steps: choose the correct masonry drill bit, mark drilling points precisely, secure the block, drill at a slow speed, apply even pressure, use water as a lubricant, and clean the hole afterward.
What should I do after drilling into a cinder block wall?
After drilling, remove dust and debris, inspect the hole, insert anchors or fasteners, tighten screws or bolts, test stability, and clean up the work area.
Why is it important to follow safety measures when drilling into cinder block walls?
Following safety measures ensures your well-being and the success of your DIY project. It minimizes the risk of accidents and damage to the wall or your tools.