Ever found yourself stuck with a broken extractor jammed in a stubborn screw? Frustrating, isn’t it? Imagine trying to finish a project, only to hit this roadblock. But fret not, as we’ve got your back! In this article, we’ll walk you through the simple yet effective steps to drill out that broken extractor like a pro.
Picture this: You’re in the middle of a DIY task, and suddenly the extractor breaks off inside the screw, leaving you puzzled and annoyed. It happens to the best of us. But instead of giving up or calling for help, why not empower yourself with the knowledge and skills to handle this issue confidently?
Key Takeaways
- Extractors are useful tools for removing broken screws but can break and get stuck, complicating the extraction process.
- Reasons for extractor breakage include excessive force, incorrect size, and poor quality extractors.
- To drill out a broken extractor, you’ll need tools like a drill machine, drill bits, center punch, lubricant, safety gear, and pliers or an extractor.
- Steps to drill out a broken extractor include preparing tools and workspace, marking the center, drilling, extracting the broken extractor, and testing with a new screw.
- Safety measures for drilling out a broken extractor include wearing safety gear, preparing the workspace, following drill machine safety guidelines, and utilizing proper drilling and extracting techniques.
- After drilling out the broken extractor, inspect the screw hole, test with a new screw, and verify the successful extraction process to ensure a secure fit for the new screw.
Understanding Extractors and Breakage
Extractors are handy tools designed to remove broken screws, bolts, or other fasteners from materials. They come in various sizes and configurations to suit different extraction needs. Despite their usefulness, extractors can break off inside the fastener, leading to a frustrating situation.
When a broken extractor gets stuck in the material, it complicates the extraction process and requires a different approach. Understanding why extractors break can help you prevent this issue in the future and tackle the current challenge effectively.
Some common reasons for extractor breakage include:
- Excessive force: Applying too much pressure while trying to remove the fastener can cause the extractor to break.
- Incorrect extractor size: Using an extractor that is too small or too large for the fastener can lead to breakage.
- Poor quality extractors: Utilizing low-quality or worn-out extractors increases the likelihood of breakage during the extraction process.
To avoid extractor breakage, ensure you use the correct size extractor for the fastener, apply steady and controlled force during extraction, and invest in high-quality extractors.
In the next section, we’ll dive into practical steps for drilling out a broken extractor to help you overcome this common DIY challenge. Stay tuned for expert techniques to handle this situation with confidence.
Tools Required for Drilling Out a Broken Extractor
When dealing with a broken extractor, having the right tools is crucial for a successful extraction process. Here are the essential tools you’ll need to effectively drill out a broken extractor:
Recommended Products
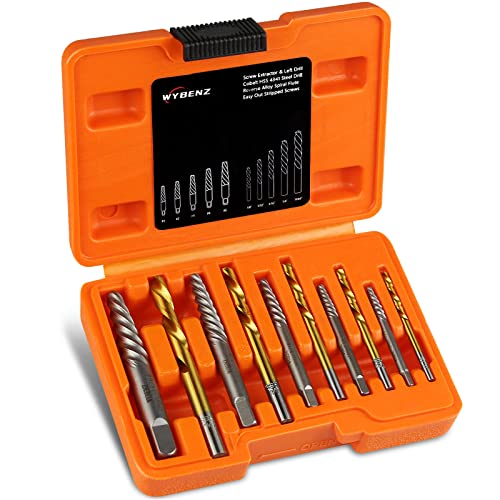
Save Time and Effort: Broken bolt extractor kit are used to remove stuck, broken or screwed tools. The stripping bolt remover and extractor easily removes damaged screws, studs, bolts and other accessories.

★ Diverse Sizes - 10+4 pieces Extractor Screw Extractor Set. Working sizes - 19/64",1/4",3/16",2*5/32",2*1/8". Spiral screw extractors include 2*1#, 2*2#, 3#, 4#, 5#. Impact drive for all kinds of job applications.
【14-Piece Full Set】5 cobalt HSS left-hand drill bits + 5 alloy steel spiral screw extractors, plus 2 extra 5/32" and 2 extra 1/8" bits, covers 1/8"–19/64" common sizes, fits impact drivers and most tools for most removal needs, no extra accessories needed
1. Drill Machine:
You’ll need a reliable drill machine that offers variable speeds for control. Ensure it’s equipped with a chuck that can accommodate the drill bits needed for the extraction process.
2. Drill Bits:
Invest in high-quality drill bits that are specifically designed for tough materials like hardened steel. Opt for spiral flute extractor bits for better grip and efficient extraction.
3. Center Punch:
A center punch is essential for creating a starting point on the broken extractor, allowing the drill bit to stay on target during drilling. This helps prevent the bit from wandering off center.
4. Lubricant:
Using a lubricant while drilling can reduce friction and heat buildup, prolonging the life of your drill bits and making the extraction process smoother. Choose a lubricant suitable for metal drilling.
5. Safety Gear:
Safety should be your top priority. Wear protective gear such as safety goggles to shield your eyes from metal particles and gloves to protect your hands during the extraction process.
6. Pliers or Extractor:
In some cases, you may need pliers or an extractor tool to further loosen and remove the broken pieces after drilling. These tools can help you grip and extract the remnants of the broken extractor.
Having these essential tools at hand will enable you to tackle the challenge of drilling out a broken extractor with confidence and efficiency. Remember to work methodically and patiently to ensure a successful extraction process.
Step-by-Step Guide on Drilling Out the Broken Extractor
Let’s delve into the step-by-step process of drilling out a broken extractor from a stuck screw. Follow these clear instructions to effectively remove the broken extractor and successfully complete your DIY project.
Recommended Products

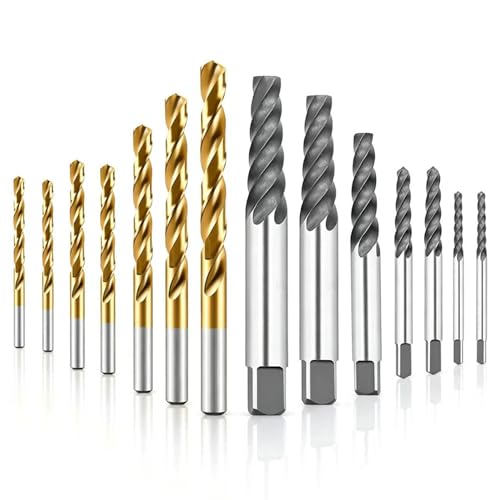
11PCS SCREW EXTRACTOR SET - Extractor kit includes 5 pcs left-handed drill bits, 5 pcs spiral screw set and a quick adapter. The bottom of the drill bits and the extractors have a unified 1/4 size design can be used more conveniently with an adapter to connect hand tools or electric tools, improving the efficiency of handling most maintenance work.

High-Speed Steel HSS 4341 is suitable for low and medium hardness materials such as plastics, wood, aluminium, copper, iron and thin stainless steel. Not suitable for high hardness materials, such as thick stainless steel, high carbon steel and alloy steel

APPLY TO MOST DRILLS : 6 pieces screw extractors work with any drill and all the screw size or bolt (3-12mm), These extractor tools are used to reverse the damaged screw counterclockwise until it is released
Prepare the Tools and Workspace
- Gather the Necessary Tools: Before starting, ensure you have the essential tools at hand. You’ll need a drill machine, appropriate-sized drill bits, a center punch, lubricant for easing the process, safety gear to protect yourself, and pliers or an extractor for removal.
- Secure Your Workspace: Find a stable and well-lit area to work in. Clear any clutter that may obstruct your movement during the extraction process.
Mark the Center and Drill
- Use the Center Punch: Position the center punch accurately on the broken extractor’s center. Gently tap the punch with a hammer to create a small indentation on the surface for precise drilling.
- Select the Correct Drill Bit: Choose a drill bit slightly smaller in diameter than the broken extractor. This selection prevents the bit from damaging the material surrounding the stuck screw.
- Start Drilling: Fit the selected drill bit into the drill machine. It’s time to carefully drill into the broken extractor along the marked center point. Apply consistent but gentle pressure as you advance through the metal.
Extract the Broken Extractor
- Switch to the Extractor or Pliers: Once you’ve drilled sufficiently into the broken extractor, switch to the extractor or pliers. Grip the broken piece firmly and rotate it counter-clockwise to ease it out. The lubricant can aid in smooth extraction.
- Repeat if Needed: In case the extractor breaks, you might need to repeat the drilling process with a larger bit. Be patient and systematic in your approach to avoid further complications.
- Inspect the Screw Hole: After removing the broken extractor, inspect the screw hole for any remaining debris. Clean the area thoroughly to ensure a proper fit for a new screw.
- Test the New Screw: Test with a new screw to verify that the extraction process was successful. Ensure the screw fits securely without any issues.
By following these structured steps, you can effectively drill out the broken extractor from a stuck screw, overcoming the challenge with confidence. Remember, patience and precision are key in achieving a successful extraction.
Safety Measures and Tips to Avoid Common Mistakes
When working on drilling out a broken extractor, it’s crucial to prioritize safety to prevent accidents and ensure a successful extraction process. Here are some essential safety measures and tips to help you avoid common mistakes:
Recommended Products

【Strong Compatibility】The nut bolt drill jig set is compatible with various thread sizes including M6x1.0mm, M8x1.0, M8x1.25mm, M10x1.25mm, M10x1.5mm, M12x1.5mm.
COMPLETE TAEKWONDO SPARRING GEAR SET Includes helmet, chest guard, arm guards, shin guards, gloves, and foot pads — everything you need for safe and confident training. Ideal for taekwondo, karate, and other martial arts.

Safety Gear
First and foremost, always wear appropriate safety gear to protect yourself from any potential hazards. Make sure to have the following items:
- Safety glasses: Protect your eyes from debris and metal particles.
- Work gloves: Provide grip and protection for your hands.
- Long sleeves: Shield your arms from any sharp edges or flying particles.
- Respirator mask: Prevent inhalation of dust or fumes while drilling.
Workspace Preparation
Before you start the extraction process, prepare your workspace accordingly:
- Clear the area: Remove any clutter or obstacles that could interfere with your work.
- Secure the workpiece: Ensure the piece is steady and won’t move during drilling.
- Adequate lighting: Proper illumination helps you see clearly and work safely.
Drill Machine Safety
When using a drill machine for extracting the broken extractor, remember these safety tips:
- Secure the workpiece: Use clamps or a vice to hold the object firmly in place.
- Select the correct drill bit size: Match the bit size to the extractor to avoid damaging the screw hole.
- Maintain a stable stance: Stand firmly and balance your body to control the drill better.
Drilling Tips
During the drilling process, keep the following in mind to avoid common mistakes:
- Start with a center punch: Use a center punch to create a starting point for accurate drilling.
- Use low speed: Begin drilling at a slow speed to maintain control and prevent slippage.
- Apply constant pressure: Keep a steady hand while drilling to guide the bit smoothly.
Extracting Tips
When extracting the broken extractor, follow these tips for a successful removal:
- Use the right tool: Choose the appropriate extractor type based on the screw size and material.
- Rotate slowly: Turn the extractor slowly to prevent it from breaking inside the screw.
By following these safety measures and tips, you can navigate the extraction process effectively and complete the task with confidence. Remember to work carefully and methodically to achieve the best results while safeguarding your well-being.
Testing and Verifying the Drilled Out Extractor
After successfully drilling out the broken extractor, the next crucial step is to ensure that the extraction was done properly. This phase is vital to confirm that the extractor is fully removed and that the screw is free from any remnants that could hinder future work. Here’s how to test and verify the success of the extraction process.
- Visual Inspection:
- Inspect the Screw: Start by visually checking the drilled hole and the screw to ensure that the broken extractor has been completely removed. Look for any remaining bits of the extractor or debris that might impede the next steps.
- Physical Examination:
- Probe the Hole: Use a small tool or a thin wire to probe the hole and verify its depth. This will help you confirm that the extractor is no longer lodged inside and that the path is clear for the screw to be reinserted.
- Screw Fit Test:
- Test Fit a Screw: Take a new screw that matches the size of the original one and carefully fit it into the drilled hole. The screw should go in smoothly without any obstructions. If you encounter resistance or the screw doesn’t align properly, revisit the drilling process.
- Turn Test:
- Turn the Screw: Gently turn the test screw clockwise to check if it screws in smoothly. If you feel any unusual resistance or the screw doesn’t thread correctly, stop immediately to avoid damaging the workpiece.
- Torque Test:
- Apply Torque: Using an appropriate tool, apply slight torque to the test screw. Ensure that it holds securely without any wobbling or slipping. This step confirms that the screw can secure the materials effectively.
- Final Examination:
- Check Stability: Verify the stability of the screw by gently tugging it to assess its hold. If the screw stays firmly in place, you’ve successfully removed the broken extractor, and the screw is ready for use in your project.
By meticulously examining the extracted area and conducting thorough tests, you can be confident in the completion of the drilling process and proceed with your DIY project without concerns about a compromised screw or extractor remnants.
Conclusion
You’ve now learned the essential steps to drill out a broken extractor effectively. By following the safety measures and tips provided, you can tackle this challenging DIY situation with confidence. Remember to wear proper safety gear, prepare your workspace diligently, and use the drill machine safely. Testing and verifying the extraction process is crucial to ensure the successful removal of the broken extractor. With visual inspections, physical examinations, screw fit tests, turn tests, torque tests, and final examinations, you can confirm that the screw is ready for further use in your project. Stay patient and focused, and you’ll conquer the task of drilling out a broken extractor like a pro.
Frequently Asked Questions
How common is it for extractors to break off in screws during DIY projects?
Extractors breaking off in screws is a common issue in DIY projects, especially when dealing with rusted or stubborn screws.
What steps can I take to drill out a broken extractor effectively?
To drill out a broken extractor effectively, first center punch the broken extractor, use a sharp cobalt drill bit of appropriate size, drill slowly and steadily, and apply cutting oil to reduce friction and heat.
What safety measures should I consider when drilling out a broken extractor?
Ensure to wear safety goggles, gloves, and a face mask, secure the workpiece properly, keep the work area well-lit and ventilated, and handle the drill machine with caution.
How can I verify the successful extraction of a broken extractor?
To verify the successful extraction of a broken extractor, conduct visual inspections for any remnants, perform physical examinations, conduct screw fit, turn, and torque tests, and perform final examinations.