Have you ever found yourself struggling to figure out the right drill bit size for your pop rivets? Imagine starting a project, only to realize you’re not sure which size to use – frustrating, right? Well, worry no more! In this article, we’ll guide you through the process of determining the perfect drill bit size for your pop rivets effortlessly.
Picture this: You’re in your workshop, eager to get started on a new DIY project. You have your pop rivets ready, but selecting the correct drill bit seems like a daunting task. That’s where we come in to simplify things for you. By the end of this article, you’ll be equipped with the knowledge to confidently choose the right drill bit size, saving you time and effort on your projects.
Key Takeaways
- Pop rivets, also known as blind rivets, consist of a smooth, cylindrical shaft with a mandrel through the center for securing materials.
- Choosing the right drill bit size matching the rivet shaft diameter is crucial for a proper fit and secure connection.
- Proper hole preparation, material alignment, and correct drill bit size are essential for successful pop rivet installations.
- Using the right size drill bit prevents structural damage, ensures a secure fit, and enhances efficiency in the riveting process.
- Prioritizing precision in drill bit selection leads to improved project outcomes, increased joint durability, and overall quality of work.
Understanding the Basics of Pop Rivets
When it comes to working with pop rivets, understanding the basics is essential to ensure a successful project. Here are key points to help you navigate this process smoothly:
Pop Rivets Overview
Pop rivets, also known as blind rivets, are a type of fastener used to join two materials together. They consist of a smooth, cylindrical shaft with a mandrel through the center. When the mandrel is pulled, the rivet expands, creating a secure connection.
Pop Rivet Sizing
Choosing the right size drill bit for your pop rivets is crucial for a proper fit. The drill bit size should match the diameter of the rivet shaft, not including the mandrel. For example, if you have 3/16-inch pop rivets, you’d typically use a 3/16-inch drill bit for the hole.
Proper Hole Preparation
Before inserting a pop rivet, it’s essential to prepare the hole correctly. Use a drill bit of the appropriate size to create a clean hole through both materials. Ensure the surfaces are aligned properly before inserting the rivet.
Installation Process
To install a pop rivet, insert it into the prepared hole and then use a rivet gun to pull the mandrel. As the mandrel is pulled, the rivet expands, securing the materials together. Once the mandrel breaks off at the predetermined point, the installation is complete.
Common Mistakes to Avoid
- Using the wrong size drill bit can lead to loose or tight rivet fits.
- Not aligning the materials properly before riveting can result in misalignments.
- Over or under-gripping the rivet gun may affect the rivet’s integrity.
- Easy and quick installation process.
- Ideal for applications where access is limited.
- Provide a strong and reliable fastening solution.
By understanding these fundamental concepts of pop rivets, you’ll be better equipped to tackle your projects with confidence and precision. Remember to double-check your drill bit size and preparation steps to ensure seamless rivet installations.
Importance of Using the Right Size Drill Bit
When it comes to pop rivets, ensuring you use the correct size drill bit is crucial. The precision of your hole preparation directly impacts the rivet’s performance and the overall strength of the joint. Let’s explore why using the right size drill bit is so important:
Recommended Products

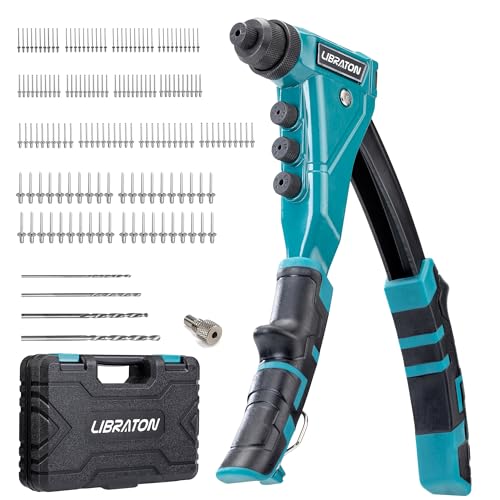
【4 Interchangeable Rivet Heads】Our professional riveter tool comes with 4 tool-free interchangeable rivet heads:3/32"(2.4mm), 1/8" (3.2mm), 5/32"(4mm), and 3/16"(4.8mm).Other types of rivet heads placed on the handle, which creates more convenient to use and save more space.And each size is equipped with 50 pcs rivets, which meets all your needs while riveting

ONE-STOP SOLUTION: This rivet gun kit includes a rivet gun, 200 pcs aluminum rivets( 50pcs per size), 4 drill bits, a user manual, and a rugged carrying box, to provide you with everything you need to start riveting.

【Multiple Sizes】: This rivet gun tool is available in various sizes, including 2.4mm, 3.2mm, 4.0mm, and 4.8mm threaded heads, which can be changed according to different riveting needs, providing users with more flexible options.
Ensuring a Secure Fit
Using the proper drill bit size guarantees a snug fit between the rivet and the workpiece. A hole that is too small can cause the rivet to deform, leading to a weak connection. Conversely, a hole that is too large may not provide enough tension for the rivet to hold firmly. By matching the drill bit size to the rivet, you create a secure and reliable fastening.
Preventing Structural Damage
Incorrect drill bit sizes can result in structural damage to the materials being joined. A hole that is too small might cause the rivet to distort the surrounding area, weakening the overall integrity of the assembly. Conversely, an oversized hole can lead to rattling, loosening, and potential failure of the joint over time. Using the right drill bit size helps maintain the structural integrity of the components.
Enhancing Efficiency and Accuracy
Selecting the appropriate drill bit size streamlines the installation process. It allows for smooth insertion of the rivet without unnecessary force or adjustments. This not only saves time but also ensures accuracy in aligning the components for a professional finish. Working with the correct drill bit size boosts efficiency and minimizes the risk of errors during installation.
Improving Project Outcomes
By prioritizing the use of the right size drill bit for pop rivets, you set the foundation for successful project outcomes. Optimal hole preparation ensures that the rivets perform as intended, contributing to the overall quality and durability of your work. Consistently using the correct drill bit size enhances the structural integrity of your assemblies and leads to reliable results.
The importance of using the right size drill bit for pop rivets cannot be overstated. It directly affects the fit, strength, and overall success of your riveting projects. Prioritize precision in your hole preparation to achieve secure, durable, and professional results every time.
Choosing the Correct Drill Bit for Pop Rivets
When it comes to selecting the appropriate drill bit for pop rivets, precision is key. The size of the drill bit directly impacts the quality of the hole preparation, influencing the effectiveness of the riveting process and the overall strength of the joint. Ensuring the drill bit matches the pop rivet size is crucial for achieving optimal results in your projects.
Recommended Products
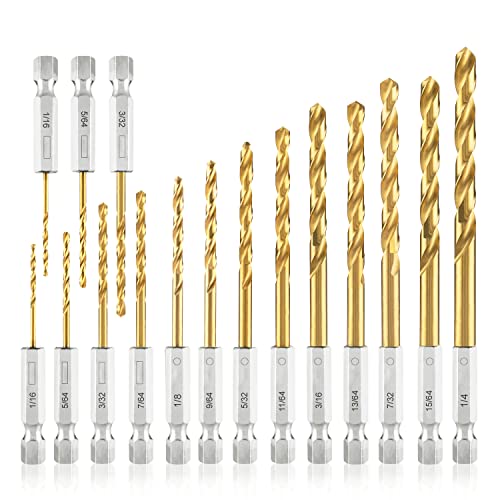
Wide Applications - compatible with power screwdrivers, impact drivers, and other tools that accept 1/4" hex shanks, allowing for quick changing between multiple drill bits and screwdriver bits with just one power tool;

Complete Wood Drilling Set: 21-piece set includes brad point, spade bits, and hole saws; tackle various drilling tasks in wood, plastic, PVC, and drywall with ease

Ergonomic Design: The ergonomic thickened TPR cover one-handed handle provides a more comfortable hold, and the higher leverage ratio makes the rivet gun more labor-saving. The safety lock makes it easy to store and carry.
Importance of Correct Sizing
Selecting the right drill bit size for your pop rivets is essential for a variety of reasons:
- Secure Fit: Using the correct size drill bit ensures that the pop rivet fits snugly in the prepared hole, reducing the risk of loosening or failure.
- Prevention of Structural Damage: Matching the drill bit size to the pop rivet diameter helps prevent structural damage during installation, maintaining the integrity of the materials being joined.
- Enhanced Efficiency: Proper sizing leads to smoother installation processes, allowing for quicker and more efficient completion of riveting tasks.
Impact on Project Outcomes
The precision of the hole preparation directly affects the strength of the joint created by the pop rivets. A well-matched drill bit size contributes to:
- Improved overall project outcomes
- Increased durability of the joint
- Enhanced quality of the finished work
Tips for Selecting the Right Drill Bit
To ensure you choose the correct drill bit size for your pop rivets, follow these practical tips:
- Refer to Manufacturer Guidelines: Check the manufacturer’s recommendations for the specific pop rivets you are using to determine the appropriate drill bit size.
- Test Fit: Before riveting, test the compatibility of the drill bit size with the pop rivet to verify a secure fit.
- Consider Material Thickness: Adjust the drill bit size based on the thickness and type of materials being joined to achieve optimal results.
By prioritizing precision in selecting the drill bit size for your pop rivets, you can significantly improve the efficiency, effectiveness, and long-term durability of your riveting projects.
Step-by-Step Guide on Drilling Pop Rivets
In drilling pop rivets, precision is key to ensuring a secure fit and optimal project outcomes. Here’s a simple step-by-step guide to help you with this process.
Recommended Products
Simple To Use: LIBRATON heavy-duty rivet gun kit comes with 4PCs tool-free interchangeable nozzles 3/32"(2.4mm), 1/8"(3.2mm), 5/32(4mm) and 3/16"(4.8mm), each size is equipped with 40PCs aluminum rivets. Easily replacement and maintenance, keeping riveting work more efficient.

【1/4'' Heavy Duty Rivet Gun】 Pop rivet gun kit is designed to make the riveting process a breeze. With reinforced 13'' long handles, it allows for maximum leverage to easily tackle aluminum blind rivets up to 1/4", making squeezing simple and quick. Its ergonomic handles design gives you comfortable and efficient riveting work!

【Sturdy Material】 Libraton rivet gun uses all-steel construction, Reinforced carbon steel heat treatment handle increase the rivet gun body strength and service life.
Check Pop Rivet Size
Start by determining the size of the pop rivets you’ll be using for your project. Pop rivets come in various sizes, so it’s crucial to match the drill bit size to the specific rivet size for a proper fit.
Select the Correct Drill Bit
Once you know the size of the pop rivets, choose a drill bit that matches the rivet’s diameter. Using the wrong drill bit size can lead to issues such as loose rivets or damaged materials. Refer to the manufacturer’s guidelines for the recommended drill bit sizes for different rivet diameters.
Mark the Drilling Spot
Mark the precise spot where you’ll be drilling the hole for the pop rivet. This marking ensures accuracy and helps you avoid any unnecessary errors during drilling.
Drill the Hole
Carefully drill the hole using the selected drill bit. Make sure to hold the drill steady and perpendicular to the surface to create a clean and accurate hole. Take your time to drill slowly and steadily for the best results.
Test Fit the Rivet
Before inserting the pop rivet, perform a test fit by inserting it into the drilled hole. The rivet should fit snugly without being too loose or too tight. If the fit is not optimal, you may need to adjust the drill bit size and re-drill the hole.
Install the Pop Rivet
Once you’ve confirmed the fit, it’s time to install the pop rivet. Place the rivet in the hole and use a rivet gun to secure it in place. Ensure that the rivet is fully seated and that the mandrel is properly set before completing the installation process.
Tips for Ensuring Proper Riveting
When riveting, ensuring accuracy and precision is key to a successful outcome. Here are some essential tips to help you achieve proper riveting results:
- Check Rivet Size First
Before starting the riveting process, always double-check the size of the pop rivets you’ll be using. This step is crucial as it determines the appropriate drill bit size you need for the job. - Select the Correct Drill Bit
Match the drill bit size to the diameter of the pop rivet. Using the right drill bit ensures that you create a hole that perfectly fits the rivet, leading to a secure and robust joint. - Mark the Drilling Spot Accurately
Take your time to mark the precise spot where you intend to drill the hole. Accuracy in marking ensures that the rivet will be placed correctly, reducing the risk of errors during installation. - Drill the Hole Carefully
When drilling, maintain a steady hand and apply consistent pressure to create a clean and accurate hole. Avoid rushing this step as it directly impacts the quality of the riveted joint. - Test Fit the Rivet
Before finalizing the riveting process, always test fit the pop rivet in the drilled hole. This step ensures that the rivet fits snugly without any unnecessary play, guaranteeing a strong connection. - Securely Install the Pop Rivet
Use a rivet gun to securely install the pop rivet in place. Ensure that the rivet is fastened correctly and tightened appropriately to achieve a durable and reliable joint.
By following these tips meticulously, you can ensure that your riveting project is executed with precision, efficiency, and durability. Proper riveting techniques are essential for creating strong and long-lasting joints for a variety of DIY or professional projects.
Conclusion
Selecting the right drill bit size for pop rivets is essential for precise hole preparation and successful project outcomes. By following the step-by-step guide provided in this article, you can ensure strong joints and efficient riveting. Remember to check the rivet size, match the drill bit diameter, mark the drilling spot accurately, drill carefully, test fit the rivet, and securely install it using a rivet gun. These simple yet crucial steps will guarantee accuracy, efficiency, and durability in your riveting projects, whether you’re working on DIY tasks or professional endeavors. Make sure to adhere to these guidelines for robust and long-lasting joints every time you use pop rivets.
Frequently Asked Questions
What is the importance of selecting the correct drill bit size for pop rivets?
Choosing the right drill bit size for pop rivets is crucial for creating precise holes that match the rivet diameter. This ensures a strong joint and successful project outcomes.
How do I drill pop rivets correctly?
- Check the rivet size.
- Match the drill bit to the rivet’s diameter.
- Mark the drilling spot accurately.
- Drill carefully.
- Test fit the rivet.
- Securely install it using a rivet gun.
What are some tips for ensuring proper pop riveting?
- Check the rivet size.
- Select the correct drill bit.
- Mark the drilling spot accurately.
- Drill carefully.
- Test fit the rivet.
- Securely install it.