Ever been in the middle of a project, and your trusty Milwaukee hammer drill suddenly decides to call it quits? It’s frustrating, isn’t it? You’re left with a half-done job and a broken tool. But fret not, as we’ve got your back! In this article, we’ll walk you through the steps to fix your Milwaukee hammer drill like a pro.
Imagine this: you’re all geared up to tackle that DIY project you’ve been putting off, and your hammer drill decides to throw a wrench in your plans. It’s a scenario many of us have faced, but the good news is, you don’t have to rush to the repair shop just yet. With a bit of know-how and some simple tools, you can get your Milwaukee hammer drill back up and running in no time.
By the end of this article, you’ll have the confidence and skills to troubleshoot and repair your Milwaukee hammer drill on your own. Say goodbye to costly repairs and lengthy downtimes. Get ready to roll up your sleeves and learn how to fix your trusty tool with ease.
Key Takeaways
- Common Issues with Milwaukee Hammer Drills: Be aware of overheating, battery charging problems, loss of power, and chuck jamming as common issues and their solutions.
- Tools You’ll Need for Repair: Ensure you have the necessary tools like screwdriver set, multimeter, hammer and punch set, replacement parts, grease, cleaning supplies, and safety gear for effective troubleshooting.
- Step-by-Step Guide to Fixing Your Drill: Follow a systematic approach by inspecting the drill, checking power source and battery, troubleshooting common problems, disassembling if needed, identifying faulty parts, replacing components, reassembling, and conducting maintenance and safety checks.
- Testing Your Repaired Hammer Drill: Thoroughly test your repaired drill by checking the power source, functionality including speed settings and torque, chuck functionality, trigger and switch inspection, battery performance (if applicable), and adhering to safety precautions to ensure successful repair and safe operation.
Common Issues with Milwaukee Hammer Drills
When dealing with your Milwaukee hammer drill, encountering common issues can be frustrating. Knowing how to identify these problems and address them promptly can save you time and money. Here are some prevalent issues you might face and how to resolve them effectively:
Recommended Products

Part Number: 42-76-0068 Head Service Kit
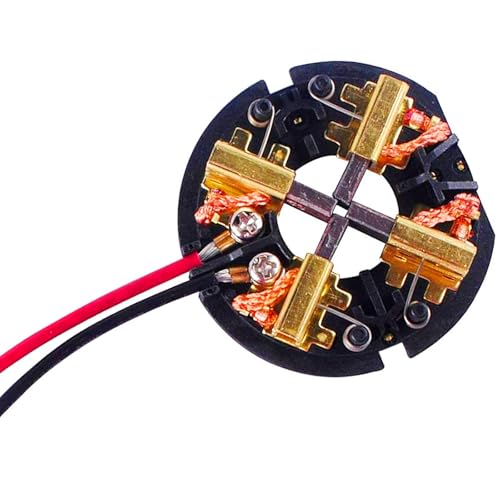
✰【GOOD REPLACEMENT】 - Carbon Brush Holder Brush Card Assembly Compatible with AEG, Milw-aaukee ETC. This is Non-Original Aftermarket Parts.
1. Overheating
If you notice your Milwaukee hammer drill getting excessively hot during use, it could indicate a problem with the motor or the gears. To address this issue:
- Action: Immediately stop using the drill.
- Solution: Allow the drill to cool down before continuing. Check for any debris obstructing the ventilation slots and clean them if necessary.
2. Battery Charging Problems
Issues with battery charging can hinder the performance of your Milwaukee hammer drill. To tackle this problem:
- Action: Ensure the battery is properly inserted.
- Solution: Check the charger and battery connections for any dirt or damage. Verify that the charger is plugged into a working power source.
3. Loss of Power
Experiencing a sudden loss of power during operation can be a common concern with hammer drills. To regain the drill’s functionality:
- Action: Stop the drill to prevent further damage.
- Solution: Check the power source, battery charge level, and wiring connections for any issues. Replace the battery if needed.
4. Chuck Jamming
A jammed chuck can prevent you from changing drill bits or using the drill effectively. To address this issue:
- Action: Avoid forcing the chuck to turn.
- Solution: Apply lubricant to the chuck and try loosening it gently. Clean any debris that may be causing the jam.
By being aware of these common issues with Milwaukee hammer drills and knowing how to troubleshoot them efficiently, you can ensure that your tool remains in optimal working condition for your projects. Regular maintenance and timely problem-solving are key to prolonging the life of your drill and maximizing its performance.
Tools You’ll Need for Repair
When repairing your Milwaukee hammer drill, having the right tools at your disposal is crucial to successfully troubleshoot and fix the issues you may encounter. Here’s a list of essential tools you’ll need for the repair process:
- Screwdriver Set: A set of screwdrivers with various head types and sizes.
- Multimeter: This device helps you check electrical components for continuity and voltage.
- Hammer and Punch Set: Useful for disassembling parts and removing stubborn components.
- Replacement Parts:
- Chuck: In case your chuck is damaged or jammed.
- Power Switch: If the drill doesn’t turn on/off correctly.
- Carbon Brushes: To replace worn-out brushes that affect motor performance.
- Grease and Lubricant: For lubricating moving parts like gears and bearings to prevent friction.
- Cleaning Supplies:
- Compressed Air: To blow out debris and dust from internal components.
- Cleaning Brush: Helps remove grime and dirt buildup for smoother operation.
- Safety Gear:
- Safety Glasses: Protect your eyes from debris or particles when working.
- Work Gloves: For better grip and to shield your hands.
Having these tools ready before you start diagnosing and repairing your Milwaukee hammer drill can save you time and ensure a successful fix. Remember, safety should always be a top priority when handling tools and working on power equipment.
Recommended Products

Compact design: provides excellent balance and control, ideal for overhead applications or work in tight spaces.

Drills 3/8 in. x 2 in. holes faster than corded 1 in. D-handle rotary hammers

Milwaukee Shockwave Impact Duty 10Pc Carbide Hammer Drill Bit Set, ¼” Hex Shank, 4X Faster Drilling, Dynamic Cutting Edges, Faster Starts, Less Walking, Extended Life, for Concrete, Block & Brick
Step-by-Step Guide to Fixing Your Drill
When addressing issues with your Milwaukee hammer drill, follow these steps meticulously to get it back in working order. Ensuring you have the right tools and approach is crucial for successful troubleshooting and repair.
Recommended Products

Includes M18 cordless lithium-ion 1/2 in. hammer drill/driver (2607-20), M18 1/4 in. hex compact impact driver (2656-20), two 48-11-1828 M18 XC high-capacity REDLITHIUM batteries, M18 lithium-ion battery charger (48-59-1801) and contractor bag

1/2" all-metal chuck with carbide teeth for maximum durability, grip and bit retention

INCLUDES: • (1) 3404-20 M12 FUEL™ Hammer Drill Driver Bare Tool • (1) 3
Inspect the Drill
Start by visually inspecting your drill for any visible damage or loose parts. Check the power cord, switches, and the chuck for any anomalies. Make sure the drill is unplugged before proceeding.
Check the Power Source
Verify that the power source is working correctly. Test the outlet with another device to rule out any electrical issues. If the power source is functioning, move on to the next steps.
Examine the Battery
If your drill is cordless, check the battery. Ensure it is charged properly and making a secure connection. Clean the battery terminals and contacts if needed.
Test the Functionality
Turn on the drill and test its different functions. Listen for any unusual noises, check the speed settings, and observe the drilling action. Note any irregularities for further investigation.
Troubleshoot Common Problems
If you encounter overheating, poor performance, or chuck jamming, refer to the earlier troubleshooting solutions in this guide. Addressing common issues promptly can prevent further damage.
Disassemble the Drill
If the problem persists, consider disassembling the drill using the appropriate screwdrivers and tools. Carefully follow the manufacturer’s instructions or consult online guides for disassembly steps.
Identify Faulty Parts
Examine the internal components, such as the chuck, carbon brushes, or motor, for signs of wear or damage. Use a multimeter to test the continuity of electrical connections.
Replace Faulty Components
If you identify any faulty parts, replace them with compatible replacements. Ensure you use genuine Milwaukee parts or high-quality alternatives to maintain the drill’s performance.
Reassemble and Test
Once you’ve replaced any defective components, reassemble the drill following the disassembly steps in reverse order. Test the drill to ensure the issue has been resolved.
Maintenance and Safety
Regularly clean and lubricate your drill to prevent future issues. Follow safety guidelines, wear protective gear, and always work in a well-ventilated area when repairing power tools.
By following these steps diligently, you can troubleshoot and fix your Milwaukee hammer drill efficiently. Remember to prioritize safety and thoroughness in your repair efforts.
Testing Your Repaired Hammer Drill
To ensure that your repaired Milwaukee hammer drill is working correctly, you need to conduct thorough testing. Here’s how to test your drill after the repair process:
- Power Source Check: First, ensure your drill is connected to a power source that provides adequate power. Check the power outlet, extension cord (if used), or battery charge to guarantee a stable power supply.
- Functional Testing:
- Speed Settings: Turn on your drill and test all speed settings. Ensure that the drill operates smoothly at different speeds without any unusual noises or vibrations.
- Torque Check: Test the torque settings if your drill has this feature. Make sure the torque adjustments work correctly for different applications.
- Chuck Functionality: Test the chuck to verify that it securely holds drill bits. Insert a drill bit and tighten the chuck properly. Ensure the chuck grips the bit firmly without any slippage during operation.
- Trigger and Switch Inspection:
- Variable Speed Check: Test the trigger to ensure variable speed control functions properly. The drill should start and stop smoothly based on your trigger pressure.
- Forward/Reverse Switch: Verify that the forward and reverse switch shifts smoothly and the drill rotates in the correct direction.
- Battery Performance (if applicable):
- Charging Test: If your drill uses a rechargeable battery, test its charging functionality. Ensure the battery charges fully and holds the charge adequately for usage.
- Runtime Test: Run your drill on a full battery to check its runtime. Make sure the battery provides sufficient power for your drilling tasks without depleting rapidly.
- Safety Precautions:
- Safety Gear: Always wear appropriate safety gear like safety glasses and gloves when testing power tools.
- Operational Safety: Follow safety guidelines provided by Milwaukee for operating the hammer drill safely.
By meticulously testing each function of your repaired Milwaukee hammer drill, you can confirm that the repair was successful and the drill is ready for regular use. Remember to prioritize safety during testing and operation to prevent accidents and ensure efficient drill performance.
Conclusion
You’ve now successfully navigated through troubleshooting and fixing common issues with your Milwaukee hammer drill. By following the step-by-step guide provided in this article, you’ve learned how to inspect for damage, check power sources, and identify faulty parts. Remember to prioritize maintenance and safety to keep your drill in top condition. Thoroughly testing the repaired drill ensures it’s ready for efficient and safe use. Keep up with regular maintenance practices to prolong the life of your Milwaukee hammer drill. Happy drilling!
Frequently Asked Questions
What are the common issues with Milwaukee hammer drills discussed in the article?
The article addresses common problems like overheating, battery issues, power loss, and chuck jamming, highlighting the crucial role of regular maintenance.
What tools are necessary for repairing a Milwaukee hammer drill as mentioned in the article?
Tools needed for repair include screwdrivers, pliers, voltage testers, lubricants, cleaning materials, replacement parts, and safety equipment.
What steps are outlined for fixing the Milwaukee hammer drill in the new content?
The step-by-step guide covers damage inspection, power and battery checks, functionality testing, troubleshooting, disassembly, faulty part identification and replacement, and maintenance tips.
What does the testing process after drill repair involve?
Thorough testing includes checks on power sources, speed settings, torque, chuck functionality, trigger and switch inspection, battery performance (if applicable), and safety measures.