Ever found yourself in the middle of a project, only to have your trusty DeWalt impact driver suddenly stop working? Frustrating, isn’t it? You’re not alone. The good news is, you don’t have to let a malfunctioning tool derail your progress. What if you could easily troubleshoot and fix your DeWalt impact driver issues on your own, saving time and money?
Key Takeaways
- Battery drainage, weak impact, overheating, chuck malfunction, trigger problems, and LED light failure are common issues with DeWalt impact drivers.
- Troubleshooting steps include checking battery connections, adjusting torque settings, allowing the tool to cool down, tightening the chuck, cleaning the trigger mechanism, and inspecting LED connections.
- Essential tools for fixing Dewalt impact drivers include a screwdriver set, multimeter, impact driver bit set, hex key set, lubricant, and safety gear.
- Prioritize safety when fixing the impact driver by wearing protective gear, ensuring the tool is unplugged, and following proper disassembly and reassembly procedures.
Common Issues with Dewalt Impact Drivers
Facing problems with your DeWalt impact driver can disrupt your project. Identifying common issues can help you troubleshoot and fix them efficiently. Here are some typical problems you may encounter with Dewalt impact drivers:
- Battery Drainage: If your Dewalt impact driver doesn’t hold a charge for long or loses power quickly, it could indicate a battery issue. Ensure your battery is fully charged before use. If the problem persists, you may need to replace the battery.
- Weak Impact: When your impact driver lacks the necessary force or impact power, it can make driving screws or fasteners challenging. Check the torque settings and adjust them accordingly. Using the correct torque setting for different tasks can improve performance.
- Overheating: Continuous use of the impact driver can lead to overheating. If you notice the tool getting excessively hot, allow it to cool down before further use. Overheating can damage internal components, affecting the tool’s efficiency.
- Chuck Malfunction: The chuck is essential for holding the bits securely. If you experience wobbling or looseness in the chuck, it can affect the tool’s precision. Ensure the chuck is properly tightened when changing bits to prevent this issue.
- Trigger Problems: Issues with the trigger, such as sticking or not engaging properly, can hinder the tool’s functionality. Clean the trigger mechanism regularly to prevent debris buildup that may cause these problems.
- LED Light Failure: The LED light on the impact driver is useful for illuminating work areas. If the light doesn’t turn on or flickers, it could indicate a wiring issue. Check the connections and replace the LED if necessary.
Identifying these common problems with Dewalt impact drivers and addressing them promptly can help you maintain the tool’s efficiency and prolong its lifespan. By understanding these issues, you can troubleshoot your impact driver effectively, keeping your projects on track.
Recommended Products

【Long-Lasting 2-Pack 8Ah High Capacity】Power up your tools with this upgraded 8Ah (8000mAh) replacement for Dewalt 20V Max batteries. Delivers consistent, high performance and extended run time. This 2-pack ensures your workflow remains uninterrupted, keeping you ready for any task.

Brushless motor for increased runtime and durability

【Battery Specification】Capacity: 8.0Ah | Battery type:Lithium ion | Package:2Packs | Voltage:20 Volt Max | Compatible with a range of 20V DCD/DCF/DCG/DCS series tools and DCB102/DCB107/DCB115/DCB118 ect chargers.
Troubleshooting Steps for Dewalt Impact Driver
When your DeWalt impact driver unexpectedly halts during a project, troubleshooting the issue on your own can save both time and money. Follow these steps to identify and resolve common problems, ensuring your tool operates efficiently and remains reliable throughout your projects.
Recommended Products

BRUSHLESS MOTOR delivers 1825 in-lbs of torque and 3400 RPM to drive large diameter screws

Our quietest impact driver: Reduce noise disturbances with up to 57% quieter** operation

Brand New DeWalt N474539 Anvil ASM Fits DCF885 DCF886 Impact Driver Model Series OEM...
Battery Drainage
If your impact driver struggles with battery drainage, start by checking the battery connections. Ensure the battery is fully charged and securely attached to the tool. If the issue persists, consider replacing the battery with a new one to maintain optimal performance.
Weak Impact
In case your impact driver is not delivering the expected impact strength, inspect the driver’s anvil and fastener. Tighten or replace the anvil if it’s loose or damaged. Additionally, ensure you’re using the correct size and type of fastener for the task at hand to maximize the impact driver’s efficiency.
Overheating
To address overheating, allow your impact driver to cool down if it becomes too hot during prolonged use. Check for any obstructions blocking the airflow vents and clear them if necessary. Using the tool in shorter bursts with breaks in between can also help prevent overheating issues.
Chuck Malfunction
If you encounter chuck malfunction where the drill bit doesn’t stay secure, inspect the chuck for any debris or damage. Clean the chuck thoroughly and make sure it’s properly tightened around the drill bit. Consider lubricating the chuck mechanism to improve its functionality.
Trigger Problems
For trigger-related issues like the trigger not responding or being too sensitive, check for any debris or dirt around the trigger mechanism. Clean the trigger area carefully to restore its proper function. Avoid applying excessive force on the trigger to prevent premature wear and tear.
LED Light Failure
If the LED light on your impact driver stops working, verify the connection between the light and the power source. Replace the LED bulb if it’s burned out or damaged. Keep the LED area clean and free of debris to ensure proper illumination during your projects.
By following these troubleshooting steps, you can address common problems with your DeWalt impact driver effectively, keeping it in optimal working condition for your tasks. Remember to prioritize regular maintenance and timely repairs to extend the lifespan of your tool.
Essential Tools for Fixing Dewalt Impact Driver
When it comes to fixing your Dewalt impact driver, having the right tools at your disposal is crucial to ensure a smooth repair process. Here are the essential tools you’ll need to effectively address common issues with your Dewalt impact driver:
Recommended Products

Spring Kit N078434 WITH N089668 steel ball., has good elasticity and durability.
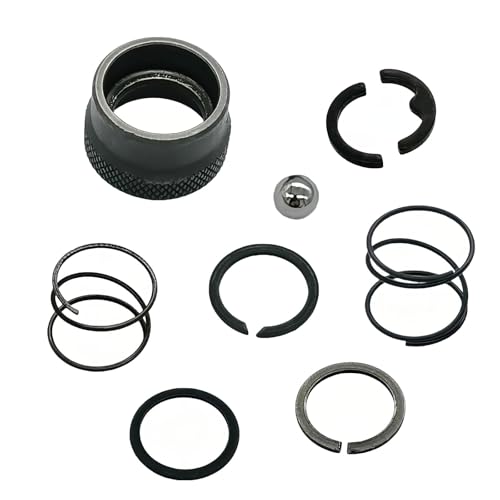
The replacement part number is N864734 NA202231 N921819.

Part Numbers: N078434 spring and N089668 steel ball, has good elasticity and durability.
1. Screwdriver Set
Having a complete set of screwdrivers with various head types and sizes is essential for disassembling the impact driver and accessing internal components for inspection and repair.
2. Multimeter
A multimeter is a versatile tool for troubleshooting electrical issues in your impact driver. It can help you test the continuity of wires, check for short circuits, and verify voltage levels, ensuring electrical components are functioning correctly.
3. Impact Driver Bit Set
An impact driver bit set with a variety of sizes and types allows you to replace worn-out or damaged bits, ensuring your impact driver delivers optimal performance during operation.
4. Hex Key Set
Hex keys are necessary for tightening or loosening hex screws and bolts commonly found in impact drivers. Having a set of hex keys ensures you can securely fasten components after repair.
5. Lubricant
Applying lubricant to moving parts, such as the chuck or collet, helps reduce friction, ensuring smooth operation of the impact driver. It’s essential to use the appropriate lubricant recommended by Dewalt for optimal performance.
6. Safety Gear
Protecting yourself during repairs is crucial. Ensure you have safety glasses, gloves, and ear protection to prevent injuries and maintain a safe working environment while fixing your impact driver.
Having these essential tools at hand will empower you to troubleshoot and fix common issues that may arise with your Dewalt impact driver effectively. Remember to follow proper safety protocols and manufacturer guidelines when conducting any repairs to ensure the longevity and optimal performance of your tool.
Step-by-Step Guide to Fixing a Dewalt Impact Driver
Gather Necessary Tools
Before beginning any repairs on your DeWalt impact driver, ensure you have the required tools handy. You’ll need a screwdriver set for disassembling the unit, a multimeter to test electrical components, an impact driver bit set for replacing worn-out bits, a hex key set for tightening screws, lubricant for lubricating moving parts, and of course, safety gear to protect yourself during repairs.
Safety First
Always prioritize safety when working on power tools like the DeWalt impact driver. Make sure the tool is unplugged or the battery is removed before starting any repair work. Wear safety goggles, gloves, and a dust mask to protect yourself from debris and potential hazards.
Disassembly
Carefully disassemble the impact driver using the screwdriver set, following the manufacturer’s guidelines if available. Keep track of the components and screws you remove to facilitate reassembly later.
Troubleshooting
Once the impact driver is disassembled, it’s time to troubleshoot the issue. Use the multimeter to test the electrical connections and components for any faults. Check the motor, switches, and wiring for continuity and proper functioning.
Bit Replacement
If the problem lies with the bit or chuck, use the impact driver bit set to replace the worn-out or damaged bits. Ensure the new bit is compatible with your specific DeWalt impact driver model.
Lubrication
Lubricate the moving parts of the impact driver as per the manufacturer’s recommendations. Applying lubricant to the gears, chuck, and motor can help improve performance and extend the tool’s lifespan.
Reassembly
Carefully reassemble the impact driver, referring to any notes or pictures you took during disassembly. Make sure all components are correctly positioned and securely fastened.
Testing
After reassembly, test the impact driver to ensure the issue has been resolved. Trigger the tool to check for smooth operation, proper impact function, and any abnormal sounds or vibrations.
By following these step-by-step instructions and utilizing the necessary tools, you can successfully fix common issues with your DeWalt impact driver, keeping it in optimal working condition for your various projects.
Conclusion
You now have the knowledge and tools to troubleshoot and fix common issues with your DeWalt impact driver. By following the step-by-step process outlined in this guide, from identifying the problem to testing the tool after repairs, you can ensure your impact driver functions optimally. Remember to prioritize safety by wearing protective gear and unplugging the tool before starting any repairs. With patience and the right tools at hand, you can easily address battery drainage, weak impact, chuck malfunction, and other issues that may arise. Regular maintenance and timely repairs will help prolong the life of your DeWalt impact driver and keep it in top condition for all your projects.
Frequently Asked Questions
Why is my DeWalt impact driver not working properly?
Your DeWalt impact driver may not be working properly due to issues like battery drainage, weak impact, or chuck malfunction. Follow the troubleshooting methods listed in the article to resolve these common problems.
What tools do I need to fix my DeWalt impact driver?
To fix your DeWalt impact driver, you will need essential tools such as a screwdriver set and multimeter. Make sure to gather all necessary tools before starting the repair process.
How can I ensure safety while fixing my impact driver?
Ensure your safety while fixing your impact driver by wearing protective gear, such as safety goggles and gloves. Remember to unplug the tool before starting any repairs to prevent accidents.
What steps are involved in fixing the impact driver?
The step-by-step process for fixing your impact driver includes disassembly, troubleshooting electrical components, replacing bits, lubricating moving parts, and reassembly. Follow each step carefully to effectively address the issues.
Why is testing the impact driver after repairs important?
Testing the impact driver after repairs is essential to ensure that the issues have been successfully resolved and that the tool functions correctly. This step helps in verifying the effectiveness of the repairs done.