Ever found yourself tackling a DIY project, only to realize you’re missing a crucial piece of information? Picture this: you’re ready to install an M6 helicoil, but you’re unsure about the right drill bit size. Frustrating, isn’t it?
Key Takeaways
- Understanding Helicoil inserts is essential for successful thread repairs and reinforcements.
- Selecting the correct drill bit size (6.3mm or 1/4-inch) for an M6 Helicoil ensures proper fit and thread integrity.
- Using the right drill bit size avoids installation issues and maintains robust threaded connections.
- Precision in drill bit selection and adherence to manufacturer guidelines are crucial for project success.
- High-quality drill bits and testing fit before installation are key steps for a successful M6 Helicoil application.
- Proper drilling and tapping procedures, along with seeking professional assistance when needed, ensure effective Helicoil installations.
Understanding Helicoil Inserts
When it comes to working with Helicoil inserts, knowing the ins and outs of these threaded inserts is essential for a successful project. Helicoil inserts are designed to repair damaged threads or create stronger threads in materials like metal. Here’s what you need to understand about Helicoil inserts:
What Helicoil Inserts Offer
Helicoil inserts provide a reliable solution for situations where the original threads have been stripped or need reinforcement. By using a Helicoil insert, you can restore the integrity of the threads and ensure a secure connection. These inserts are available in various sizes to accommodate different thread requirements.
Installation Process
To install a Helicoil insert, you typically need to drill out the old damaged threads using a specific drill bit size compatible with the Helicoil insert. The drilled hole is then tapped to create new threads, followed by inserting the Helicoil insert using a special tool. This process creates strong and durable threads that can withstand substantial loads.
Determining the Drill Bit Size
When deciding on the appropriate drill bit size for an M6 Helicoil insert, it’s crucial to match the drill bit diameter to the external diameter of the Helicoil insert. For an M6 Helicoil, you’d typically use a 6.3mm or 1/4-inch drill bit. This ensures a proper fit for the Helicoil insert and allows for successful installation without compromising the integrity of the threads.
Advantages of Helicoil Inserts
Helicoil inserts offer several advantages, including improved thread strength, wear resistance, and the ability to create new threads in materials that may not support traditional tapping. They are versatile and widely used in automotive, aerospace, and other industries where secure and reliable threading is essential.
Common Applications
Helicoil inserts are commonly used in various applications, such as automotive engine repairs, machinery maintenance, and equipment assembly. Their ability to provide robust threads in thin-walled materials makes them a go-to choice for professionals and DIY enthusiasts alike.
Understanding Helicoil inserts is key to successfully incorporating them into your projects. By following the recommended drill bit size guidelines and installation procedures, you can ensure that your threaded connections are durable and reliable.
Importance of Using the Right Drill Bit Size
Selecting the correct drill bit size is crucial when working with Helicoil inserts. Using the right drill bit ensures a proper fit for the M6 Helicoil, maintaining the integrity of the threads and ensuring a successful repair or reinforcement.
Maintaining Thread Integrity
By using the appropriate drill bit size, you avoid damaging the surrounding threads when creating the hole for the Helicoil. Incorrect sizes can lead to oversized holes, weakening the threaded connection and compromising its effectiveness. Ensuring a precise fit with the M6 Helicoil is essential for a secure and durable repair.
Proper Fit for Helicoil Insert
Choosing the right drill bit size, such as a 6.3mm or 1/4-inch bit for an M6 Helicoil, is essential for creating a hole that accommodates the insert snugly. A well-fitted Helicoil insert helps prevent stripping or loosening of threads, which are common issues in fastening applications. This precision in sizing guarantees a reliable and robust threaded connection.
Avoiding Installation Issues
Using an incorrect drill bit size can result in difficulties during the installation of the Helicoil insert. It may not seat properly in the hole, leading to misalignment or instability in the threaded joint. By adhering to the recommended drill bit size for the M6 Helicoil, you minimize the risk of installation challenges and ensure a smooth and efficient repair process.
Enhancing Project Success
By paying attention to the drill bit size and selecting the appropriate one for your M6 Helicoil application, you set yourself up for project success. A proper fit from the outset reduces the likelihood of future repairs or adjustments, saving you time and effort in the long run. Prioritizing the correct drill bit size is key to achieving reliable and durable threaded connections in your projects.
Following Manufacturer Guidelines
To guarantee optimal results, always refer to the manufacturer’s instructions for the recommended drill bit size when working with Helicoil inserts. These guidelines are designed to help you achieve the best outcomes and maintain the quality of your threaded connections. Adhering to the specified drill bit size ensures that your M6 Helicoil installation meets the necessary standards for performance and longevity.
Finding the Correct Size Drill Bit for M6 Helicoil
To determine the appropriate drill bit size for your M6 Helicoil installation, you must match the bit to the Helicoil insert’s specifications precisely. This ensures a snug fit and effective thread repair or reinforcement. Follow these steps to find the right drill bit for your M6 Helicoil:
- Check the Manufacturer’s Guidelines: Start by consulting the Helicoil manufacturer’s instructions for the recommended drill bit size. These guidelines are crucial for achieving the best results.
- Use the Correct Size: For M6 Helicoil inserts, a drill bit with a diameter of 6.3mm (or approximately 1/4 inch) is typically the correct size. Using this specific bit ensures compatibility with the M6 Helicoil threads.
- Precision Matters: It’s essential to be precise when selecting the drill bit size. Even a slight deviation can lead to improper threading, affecting the overall strength and integrity of the repair.
- Opt for High-Quality Bits: Invest in high-quality drill bits to ensure clean and accurate drilling. Quality bits reduce the risk of damaging the material and help create precise holes for the Helicoil insert.
- Check Fit Before Installation: Before proceeding with the Helicoil installation, test the drill bit size by ensuring the insert fits snugly into the drilled hole. If there is any looseness or difficulty fitting the insert, reevaluate the drill bit size.
- Consider Professional Assistance: If you’re unsure about the drill bit size or the installation process, don’t hesitate to seek advice from professionals or workshops experienced in working with Helicoil inserts.
By following these steps and being meticulous in your drill bit selection, you can ensure a successful M6 Helicoil installation with a proper fit and robust threaded connection. Remember, precision and adherence to manufacturer guidelines are key to achieving optimal results.
Recommended Products

【Package Includes】:You will receive 1 x installation tool, 1 x 3.96 inch twist drill bit, 1 x lug breaking tool, 1 x M6 tap, 1 x wrench, and 25 x M6 threaded inserts for your repair needs.

COMPLETE REPAIR SOLUTION:This M6x1.0 helicoil kit is your all-in-one fix for stripped or worn threads. It includes 25 inserts, HSS drill bits, taps, hex wrench, installation & break-off tools—everything needed to restore threads to like-new condition

【Premium Material】: The drill bit in this thread repair tool set is constructed from A3 grade high-speed steel for superior performance with your drill, while the handle is made of red plastic for a comfortable grip and does not rub hands. Each insert is made of 304 stainless steel for greater strength and longevity.
Steps to Drill and Tap for M6 Helicoil
To successfully drill and tap for an M6 Helicoil, follow these precise steps:
- Identify the Correct Drill Bit Size: The drill bit size you need for an M6 Helicoil is M6 or 6mm. Ensure you have the correct bit size to match the Helicoil you plan to install. Using the wrong size can lead to poor thread engagement.
- Secure the Right Tools: Gather the necessary tools for drilling and tapping, including the M6 drill bit, tap wrench, cutting lubricant, and safety gear like goggles and gloves. Having the correct tools ensures a smooth installation process.
- Mark the Drilling Spot: Use a center punch to mark the center of the hole where you plan to install the Helicoil. This step helps guide the drill bit for precise drilling and ensures proper alignment.
- Drill the Hole: Carefully drill the hole using the M6 drill bit. Ensure the drill is held straight to avoid damaging the threads. Apply steady pressure and periodically withdraw the bit to clear chips for a clean hole.
- Tap the Thread: After drilling, use the tap wrench and cutting lubricant to tap threads into the newly drilled hole. Start slowly to create accurate threads aligned with the Helicoil. Remember to periodically clean the tap to prevent chip buildup.
- Test the Fit: Once tapped, check the fit of the Helicoil by inserting it into the threaded hole. The Helicoil should fit smoothly and securely. If the fit is too tight or loose, reassess the drilling and tapping process.
- Consider Professional Help: If you encounter difficulties or feel unsure about the process, don’t hesitate to seek assistance from a professional. Proper installation is crucial for the Helicoil to function effectively.
By following these steps diligently and ensuring precision in each stage, you can successfully drill and tap for an M6 Helicoil, enhancing the durability and strength of threaded connections.
Recommended Products
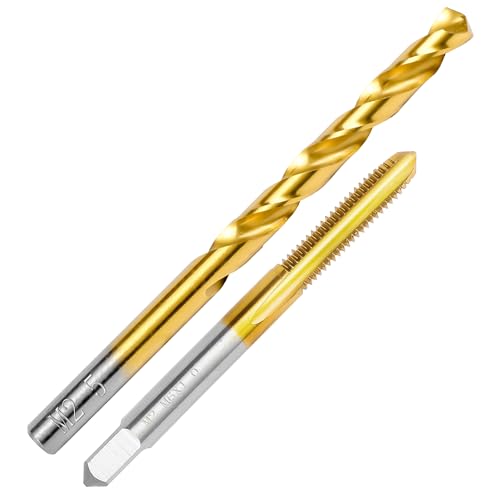
【Size】Include M6x1.0 M2 steel tap and 5.0mm M2 HSS drill bit with round shank,all stored in a storage box for easy carrying.

6-Piece Metric Drill Tap Set Includes M3x0.5-M10x1.5 sizes. Perfect for aluminum, zinc, brass, copper, plastic and wood materials.

COMBINE DRILL and TAP at the same time - All in one and works great and save a lot of time and trouble when doing threads for hinges or other projects; No more using a drill to drill the hole and then tapping it out later with another tool
Conclusion
Selecting the correct drill bit size is key to a successful M6 Helicoil installation. By following the precise steps outlined in this article, you can ensure a proper fit and maintain the integrity of the threaded connection. Remember to secure the right tools, drill carefully, tap accurately, and test the fit of the Helicoil. Your attention to detail in each stage will lead to enhanced durability and strength in your projects. If you encounter any difficulties, don’t hesitate to seek professional assistance. Happy drilling and tapping!
Frequently Asked Questions
What are Helicoil inserts used for?
Helicoil inserts are used to repair damaged threads or reinforce weaker ones in materials like metal.
Why is selecting the correct drill bit size important for Helicoil installation?
Selecting the correct drill bit size, such as a 6.3mm or 1/4-inch bit for an M6 Helicoil, ensures a proper fit and maintains thread integrity.
What are the steps for drilling and tapping for an M6 Helicoil?
The steps include identifying the correct drill bit size, securing the right tools, marking the drilling spot, drilling the hole carefully, tapping the thread accurately, testing the fit of the Helicoil, and considering professional help if needed.
Why is precision crucial for successful M6 Helicoil installations?
Precision in each stage of the process is crucial for successful Helicoil installations to enhance durability and strength of threaded connections.