

Ever struggled with finding the right way to hang that plant or light fixture from your ceiling without causing a mess? Picture this: you have the perfect spot in mind, but drilling into the ceiling seems like a daunting task. What if you could effortlessly install a ceiling hook to elevate your space without the hassle?
In this article, you’ll discover the simple steps to master the art of drilling a ceiling hook like a pro. Say goodbye to the frustration of uneven hooks or damaged ceilings. With our easy-to-follow guide, you’ll learn the tricks to securely hang your decorations in no time. Elevate your decor and transform your living space with this essential skill at your fingertips.
Key Takeaways
- Understanding the different types of ceiling hooks, their weight capacity, materials, and placement is crucial before drilling to ensure stability and safety.
- Using the right tools like a power drill, stud finder, appropriate screws, and safety gear is essential for a successful and secure installation process.
- Following a step-by-step guide that includes locating the ideal spot, measuring and marking, wearing safety gear, drilling the hole, installing the hook, testing its strength, and hanging the item will help you master the art of drilling a ceiling hook with ease.
- Practical tips such as choosing the right type of hook, locating a secure spot, measuring accurately, using the correct tools, securely installing the hook, and testing its strength are key to a successful installation and efficient hanging of decorations or fixtures.
Understanding Ceiling Hooks
When it comes to hanging plants or light fixtures from your ceiling without causing damage, ceiling hooks are your best friend. Understanding ceiling hooks is crucial before you start drilling. Here’s what you need to know:
Types of Ceiling Hooks
Ceiling hooks come in various types, including screw hooks, swag hooks, and cup hooks. Each type serves a different purpose, so ensure you choose the right one for your hanging needs.
Weight Capacity
Before drilling a ceiling hook, always check its weight capacity. Exceeding this limit can lead to the hook pulling out from the ceiling, risking damage to your decorations and potentially causing harm.
Material and Durability
Ceiling hooks are commonly made of materials like stainless steel, brass, or zinc-plated steel for durability. Select a hook that suits the weight of the item you plan to hang.
Placement and Alignment
Correct placement and alignment of the ceiling hook are essential for stability. Ensure the hook is installed directly into a ceiling joist or a sturdy anchor to support the weight of your hanging object.
Tools Required
When drilling a ceiling hook, you’ll typically need a power drill, a stud finder to locate ceiling joists, screws appropriate for your ceiling type, and a sturdy ladder for safe access to the ceiling.
Safety Measures
Ensure you wear appropriate safety gear, such as goggles and gloves, to protect yourself during the drilling process. Always follow the manufacturer’s instructions for both the ceiling hook and your tools.
By understanding the different aspects of ceiling hooks, you can confidently proceed with installing them to elevate your space without any mishaps. Mastering the art of using ceiling hooks will allow you to hang decorations securely and effortlessly.
Required Tools and Materials
To successfully drill a ceiling hook, you’ll need the following tools and materials:
Recommended Products

Premium Material: Constructed with heavy-gauge iron for industrial-grade durability, featuring matte white baked enamel coating that resists scratches and corrosion. J-hooks utilize single-mold die-cast construction – 3x thicker than standard hooks – securely holding chandeliers, pendant lights, or 20lbs decor.


Easy To Install : There are two holes in the base of the hammock hanging kit and use screws through this hole to fix it on the concrete ceiling or wooden beam. The swing ring can be detached, even if your chain, rope or connecting buckle is closed, it can be connected. So it can be easily connected to items such as the hammock, swing chair or sandbag that you need to hang.hammock hooks heavy duty,porch swing hanging kit,hanging chair hardware,swing hanger,ceiling swing hooks
Tools:
- Drill: You’ll need a drill to create a hole in the ceiling for the ceiling hook.
- Ladder: A stable ladder or step stool will help you reach the ceiling safely.
- Pencil: Use a pencil to mark the spot where you want to install the ceiling hook.
- Tape Measure: Measure the correct distance between ceiling hooks for even hanging.
- Safety Glasses: Protect your eyes from debris while drilling.
- Dust Mask: Prevent inhalation of dust particles during the drilling process.
- Stud Finder: Use a stud finder to locate ceiling joists for secure installation.
- Screwdriver: You may need a screwdriver to assist in tightening the ceiling hook securely.
- Ceiling Hooks: Choose the appropriate type and size of the ceiling hook based on the item’s weight you plan to hang.
- Potted Plant or Light Fixture: Prepare the item you wish to hang from the ceiling hook.
- Anchors (if necessary): Depending on your ceiling type, you may need anchors for added support.
- Screws: Ensure you have the right screws for attaching the ceiling hook securely.
With these tools and materials at hand, you’ll be well-equipped to drill a ceiling hook and elevate your space with ease and confidence.
Step-by-Step Guide to Drill a Ceiling Hook
To effectively drill a ceiling hook, follow these simple steps:
Recommended Products
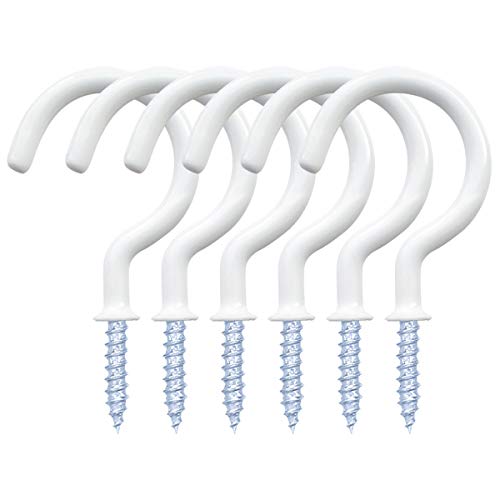
If you are fed up with the problem of easy peeling of adhesive hooks, then try this vinyl coated cup hooks
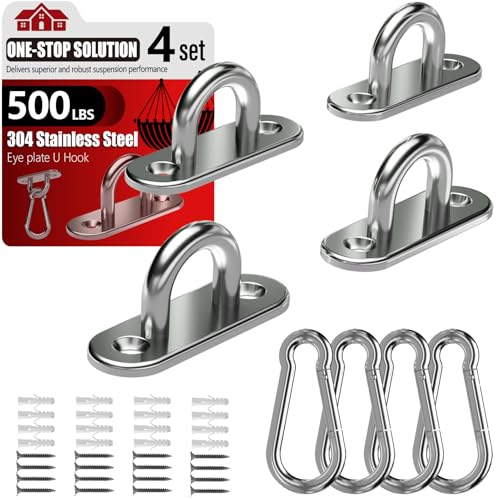
Premium Materials: Ceiling hooks are made from high-strength stainless steel and expertly welded to ensure each connection is secure and flawless. The pad eye hooks offer exceptional rust and corrosion resistance, ensuring reliable performance and durability even in harsh environments
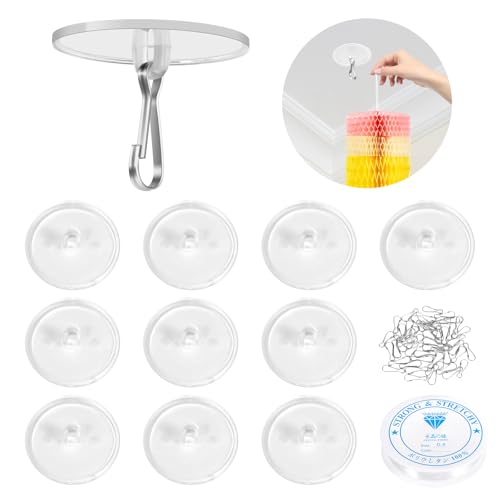
AFFORDABLE SET: Includes 10 non-marking ceiling discs, 10 metal hooks, and 80ft of fishing line. Sufficient quantity to meet your versatile decoration hanging needs, with a nearly invisible look when in use.
Prepare the Tools and Materials
Gather the necessary items before starting to ensure a smooth process:
- Drill
- Ladder
- Pencil
- Tape measure
- Safety glasses
- Dust mask
- Stud finder
- Screwdriver
- Appropriate ceiling hooks
- Item to hang
- Anchors (if required)
- Screws
Locate the Ideal Spot
Use a stud finder to locate a ceiling joist for secure installation. Once found, mark the spot with a pencil.
Measure and Mark
Measure the distance from the nearest wall to ensure proper placement. Mark the exact spot where you’ll drill the hole.
Wear Safety Gear
Put on your safety glasses and dust mask before starting to protect yourself from debris.
Drill the Hole
Choose the appropriate drill bit size for the ceiling hook. Carefully drill a hole at the marked spot.
Install the Ceiling Hook
Screw the ceiling hook into the hole until it’s securely fixed in place.
Test the Strength
Once installed, gently tug on the hook to test its strength and ensure it can support the intended weight.
Hang Your Item
You can confidently hang your decoration or light fixture from the ceiling hook.
Tips and Tricks for Successful Installation
Understanding the nuances of installing a ceiling hook can make a significant difference in the outcome. Here are some practical tips and tricks to ensure a successful installation process:
Recommended Products

Premium 304 Stainless Steel – 1200LB Capacity: Hammock hanging kit is made of high quality 304 stainless steel, Load Capacity 1200LB, all parts made of high quality heavy-duty 304 stainless steel, with no oxidation, no rust, corrosion resistance strong enough and high toughness to ensure safety use.
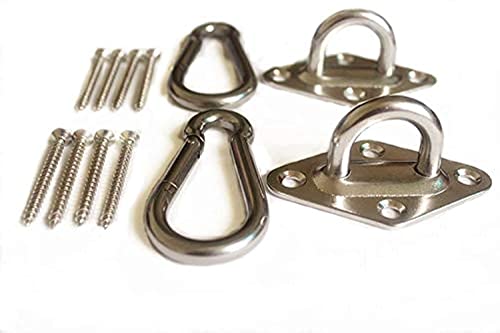
Please don’t install the screws on the tree. Please make the screws all went into the wood, if the screws don't all went into the wood, the screws will easily broken. This Hammock Kit for hammock stand includes 2 Stainless Steel Rhombus pad, 8 Stainless screws and 2 spring snap hooks,304 Stainless Steel provide the highest quality,the Stainless screws is 50mm long.

Package include: the package include 6 set ceiling swag hooks ,include 6 x Metal Pointed screws, 6 x Metal bolts ,6 x Spring toggle wing , enough for your home hanging use.
1. Choose the Right Type of Ceiling Hook
Selecting the appropriate type of ceiling hook is crucial for the successful hanging of your desired item. Ensure that you match the hook type with the weight capacity and material of what you plan to hang. For heavier objects, consider using a sturdy metal hook, while lighter items may require a smaller plastic hook.
2. Locate a Secure Spot for Installation
Before drilling the ceiling hook, use a stud finder to locate a secure spot where you can attach the hook. Finding a ceiling joist or beam will provide the necessary support for your hanging item, ensuring it stays in place without causing damage to the ceiling.
3. Measure and Mark the Drilling Spot Accurately
Precision is key when drilling a ceiling hook. Measure the exact placement of the hook and mark the spot with a pencil or tape to guide your drilling. Double-check the markings to prevent any errors that could affect the final installation.
4. Use the Right Tools for the Job
Having the correct tools on hand can make the installation process smoother. Ensure you have a reliable drill, the appropriate drill bit size for the hook, a ladder for reaching the ceiling, and any safety gear such as goggles and gloves to protect yourself during drilling.
5. Securely Install the Ceiling Hook
When drilling the hole for the hook, make sure to follow the marked spot accurately and use steady pressure to create a clean opening. Once the hole is ready, gently screw the ceiling hook into place until it is firmly secured. Avoid overtightening to prevent damaging the ceiling.
6. Test the Strength of the Installation
After installing the ceiling hook, test its strength by gently pulling on it to confirm it can support the weight of the hanging item. This step is crucial to ensure that the installation is secure and stable before hanging any decorations or fixtures.
By following these tips and tricks, you can master the art of drilling a ceiling hook successfully and enjoy the convenience of effortlessly hanging items from your ceiling.
Conclusion
You’ve now learned the ins and outs of drilling a ceiling hook for hassle-free hanging of plants or light fixtures. Understanding the different types, weight capacity, materials, and safety measures is key to a successful installation. Remember to choose the right hook, locate a secure spot, measure accurately, use the correct tools, install the hook securely, and test its strength. By following these tips, you can effortlessly elevate your space with beautiful decorations. Happy decorating!
Frequently Asked Questions
What is the main challenge when hanging plants or light fixtures from the ceiling?
The main challenge is ensuring a secure installation that can support the weight of the item without damaging the ceiling or risking safety concerns.
What is a ceiling hook and how can it help with installation?
A ceiling hook is a hardware device designed to securely hang items from the ceiling. It simplifies installation by providing a stable anchor point for hanging plants, light fixtures, or decorations.
What factors should I consider when choosing a ceiling hook?
Consider the weight capacity of the hook, material (e.g., metal, plastic), placement location for optimal support, tools needed for installation, and safety precautions.
How do I securely install a ceiling hook?
To securely install a ceiling hook, locate a solid ceiling beam, measure the spot accurately, use appropriate tools for installation, ensure a snug fit, and conduct a strength test before hanging any items.
What are some practical tips for successful installation using a ceiling hook?
Choose the right type of hook for the item’s weight, find a secure spot in the ceiling, measure accurately for placement, use the correct tools for installation, securely attach the hook, and test its strength before hanging anything.
