Do you find yourself struggling to keep your Dyson vacuum organized and out of the way? Picture this: your Dyson taking up valuable floor space, causing clutter in your home. What if there was a simple solution to free up that space and keep your Dyson easily accessible whenever you need it?
In this article, you’ll discover the step-by-step process of securely drilling your Dyson into the wall. By learning this technique, you’ll not only save space but also have a tidy home with your Dyson always within reach. Ready to say goodbye to the clutter and hello to a more organized living space? Let’s dive in and make your life easier with this practical solution.
Key Takeaways
- Selecting the Right Tools for Drilling: Ensure you have the necessary tools such as a drill, correct drill bits, quality wall anchors, screwdriver, level, measuring tape, and safety gear for a successful installation.
- Preparing the Dyson for Installation: Gather the required tools, remove attachments from the Dyson, check wall compatibility, mark drill points accurately, secure wall anchors, attach the mounting bracket, and mount the Dyson following the steps provided.
- Drilling Process: Determine the drill location, mark drill points accurately, drill pilot holes, insert wall anchors securely, attach the mounting bracket firmly, and hang your Dyson on it ensuring stability and secure mounting.
- Securing the Dyson on the Wall: Prioritize checking wall compatibility, marking drill points accurately, drilling pilot holes, inserting wall anchors securely, attaching the mounting bracket firmly, and hanging the Dyson vacuum ensuring stability and safety.
- Testing the Installation: Conduct a thorough test to check alignment, secure fit, weight distribution, power test, and safety to confirm that your Dyson is securely mounted and ready for regular use.
Selecting the Right Tools for Drilling
To successfully drill your Dyson into the wall, you’ll need the right tools for the job. Here’s what you’ll need:
Recommended Products

NOT LIKE OTHER ANCHORS: These heavy duty drywall anchors have strong ribs which can holds 75lbs weight and will keep our anchors stable in your drywall. Made of high-quality nylon plastic mixes with highly robust glass fibers.

PREMIUM NYLON MATERIALS PLUS GLASS FIBER – Made of high-quality hard nylon plastic mixed with highly robust glass fibers, these self drilling wall anchors are super hard, durable, anti-aging and wear resistant. They can hold objects with maximum weight of 75lbs and provide strong and sturdy grip into the wall, and the anchor will not damage the dry wall. 70 premium galvanized Phillips screws ensures reliable installation and hanging.

【📌 HEAVY DUTY & EXTRA STRONG SUPPORT】Engineered with premium 1.38" (1-3/8") heavy duty self drilling drywall anchors and screws. This robust wall anchors kit effortlessly supports up to 66 lbs+, making it versatile for hanging heavy picture frames, floating shelves, mirrors, artwork, clocks, and small home decor without any risk of bending or falling
What You’ll Need:
- Drill: Make sure you have a drill with a suitable power level for wall drilling, typically a power drill with variable speed settings.
- Drill Bits: Select the correct drill bit size based on the type of wall material you’re drilling into (e.g., concrete, drywall, brick).
- Wall Anchors: Invest in quality wall anchors to securely fasten your Dyson to the wall without damaging it.
- Screwdriver: Have a screwdriver or drill bit that matches the screws you’ll be using to attach your Dyson.
- Level: A level will help ensure your Dyson is mounted straight and doesn’t end up lopsided.
- Measuring Tape: Measure and mark the exact drill points to avoid any mistakes during installation.
- Safety Gear: Safety first! Wear protective gear like goggles and gloves to prevent injuries while drilling.
- Drill Selection: Opt for a drill that offers variable speeds, making it easier to control the drilling process.
- Drill Bit Size: Choose the drill bit size based on the material of your wall to ensure a proper fit for the wall anchors.
- Quality Wall Anchors: Invest in sturdy wall anchors that can support the weight of your Dyson vacuum.
- Level Accuracy: Use a level to ensure your Dyson is mounted evenly and looks professional on the wall.
- Precise Measurement: Accurate measurements using a measuring tape are crucial to avoid unnecessary holes or misalignments.
- Safety First: Always wear safety gear like goggles and gloves to protect yourself during the drilling process.
By having the right tools on hand and following these tips, you’ll be well-prepared to drill your Dyson into the wall efficiently and securely.
Preparing the Dyson for Installation
To successfully mount your Dyson vacuum to the wall, follow these steps to ensure a smooth and secure installation process.
Gathering the Necessary Tools
Before you begin, gather the following tools to prepare your Dyson for installation:
- Drill: Ensure you have a suitable drill for the wall type you are working with to make the process efficient.
- Correct Drill Bits: Use the appropriate drill bits that match the wall material to avoid damaging the surface.
- Quality Wall Anchors: Select sturdy wall anchors that can support the weight of the Dyson to prevent it from falling.
- Screwdriver: Have a screwdriver on hand to secure the wall anchors and brackets in place.
- Level: Use a level to ensure that the Dyson is mounted straight on the wall for a neat appearance.
- Measuring Tape: Accurately measure the spacing and placement for drilling holes to avoid unnecessary mistakes.
- Safety Gear: Prioritize your safety by wearing protective gear such as goggles and gloves to prevent injuries during the installation process.
Steps for Preparing the Dyson
Follow these steps to prepare your Dyson for wall installation:
- Prepare the Vacuum: Remove any attachments or accessories from the Dyson to make it easier to handle during installation.
- Check Wall Compatibility: Ensure the wall material and thickness are suitable for mounting the Dyson by verifying it can support the weight.
- Mark Drill Points: Use a pencil to mark the spots where you will drill holes for the wall anchors, ensuring accurate placement.
- Double-Check Measurements: Reconfirm the measurements before drilling to avoid errors and ensure proper alignment.
- Secure Wall Anchors: Insert the wall anchors into the drilled holes and tap them gently with a hammer until they sit flush with the wall.
- Attach Mounting Bracket: Secure the mounting bracket to the wall anchors using a screwdriver, ensuring a tight fit.
- Mount the Dyson: Lift the Dyson onto the bracket and secure it in place according to the manufacturer’s instructions.
By following these steps and using the recommended tools, you can effectively prepare your Dyson for wall installation, creating a more organized living space while keeping your vacuum easily accessible.
Drilling Process
To efficiently mount your Dyson vacuum on the wall, follow these steps carefully:
Recommended Products

Complete Value Pack: each kit includes 20 durable mirror clips, 20 heavy duty screws, and 20 sturdy wall anchors; With enough hardware for multiple projects, it's the nice all in one solution for your home renovation needs

Packed in a Box:Store and organize mounting accessories in one place. Not only does this box keep screws, washers, and spacers neatly categorized, it also ensures that they are protected, dust-free, and ready to use

【Wide range of sizes】Our air conditioner brackets are suitable for small split units, heat pumps and AC compressors ranging from 9,000 to 18,000 BTU. Its dimensions are 14.9 "x 17.7", making it a versatile and accessible option for air conditioners of many sizes.
Determine Drill Location:
- Choose a suitable location on the wall to mount your Dyson.
- Ensure it’s at a convenient height for easy access.
- Confirm there are no electrical wires or pipes behind the wall.
Mark Drill Points:
- Use a pencil to mark the spots where you’ll drill holes for the mounting bracket.
- Double-check the measurements to ensure accuracy.
- Use a level to make sure the points are aligned correctly.
Drill Pilot Holes:
- Start by drilling pilot holes at the marked points.
- Use the appropriate drill bit size for the wall type.
- Keep the drill steady and apply consistent pressure.
Insert Wall Anchors:
- After drilling the pilot holes, gently tap the wall anchors into place.
- Ensure the anchors are flush with the wall surface for a secure fit.
- Use a screwdriver to tighten the anchors securely.
Attach Mounting Bracket:
- Align the mounting bracket with the installed wall anchors.
- Secure the bracket in place using screws provided in the kit.
- Ensure the bracket is firmly attached to the wall.
- Once the bracket is securely in place, hang your Dyson vacuum on it.
- Ensure the vacuum is stable and properly seated on the bracket.
- Give it a gentle tug to confirm it’s securely mounted.
By following these clear steps, you can successfully drill your Dyson vacuum into the wall, creating a neat and organized space in your home.
Securing the Dyson on the Wall
When securing your Dyson on the wall, you want to ensure it’s stable and safe. Here are the steps to help you achieve that:
Recommended Products

Compatible with Dyson V10 Handheld Vacuum Cleaner, does not fit Dyson v11 Vacuum Cleaner

Accepts all 18V LXT hand vacuums
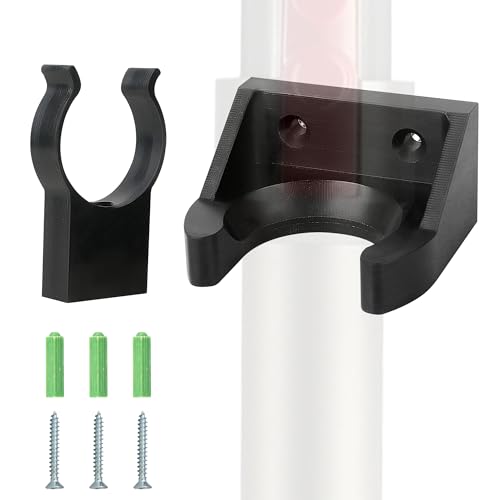
COMPATIBLE WITH DYSON VACUUM CLEANER: This wall mount holder is for stick tube compatible with Dyson V15, V11, V10, V8, and V7 vacuum cleaners. The wall mount bracket is designed to securely hold for your wand tube or stick. Wall hook hanger offers a snug and stable fit without tools or complicated setup
Checking Wall Compatibility
Before drilling, verify that your wall can support the weight of the vacuum. Solid walls like concrete or wood are ideal for mounting. Avoid drywall or plasterboard unless you locate a stud for anchoring.
Marking Drill Points Accurately
Use a measuring tape and level to determine the precise placement of the wall mount. Mark the spots where you’ll drill to align with the mounting bracket.
Drilling Pilot Holes
Start by drilling pilot holes at the marked points. Use an appropriate drill bit size based on the wall material and recommended by the anchor manufacturer.
Inserting Wall Anchors Securely
Gently tap the wall anchors into the pilot holes until flush with the wall surface. Ensure they are snug and won’t loosen over time.
Attaching the Mounting Bracket Firmly
Fix the mounting bracket over the wall anchors and insert the screws provided. Tighten them securely to hold the bracket in place.
Hanging the Dyson Vacuum
Finally, hang your Dyson on the mounting bracket. Ensure it sits evenly and doesn’t wobble. Test its stability by gently nudging it to verify it’s well-secured.
By following these steps diligently, you can securely mount your Dyson on the wall, keeping it organized and easily accessible.
Testing the Installation
After mounting your Dyson vacuum to the wall, the next crucial step is testing the installation to ensure its stability and secure placement. Here’s how you can conduct a reliable test:
- Check the Alignment:
- Verify that the vacuum is level and correctly aligned within the mounting bracket. An unbalanced vacuum can lead to instability and potential damage.
- Secure Fit:
- Gently push and pull the Dyson to check for any movement or wobbling. A securely mounted vacuum should not shift or shake when tested.
- Weight Distribution:
- Confirm that the weight of the Dyson is evenly distributed on the bracket. An uneven distribution could strain the mounting and cause it to detach from the wall.
- Power Test:
- Turn on the vacuum and observe its operation while mounted. Ensure that vibrations or movements during operation do not affect the stability of the installation.
- Safety Check:
- Double-check all screws, wall anchors, and mounting points to ensure everything is securely fastened. Loose fittings can compromise the integrity of the installation.
By conducting a thorough test of your Dyson wall mount, you can rest assured that your vacuum is securely in place and ready for regular use. It’s essential to prioritize safety and stability to maintain a clutter-free and organized living space.
Remember, a successful test confirms that your Dyson is securely mounted, providing efficiency and convenience in your cleaning routine.
Conclusion
Now that you’ve successfully mounted your Dyson vacuum on the wall, you’ve created a more organized and spacious living area. By following the detailed steps provided in this article, you’ve ensured that your Dyson is securely in place, ready for convenient use whenever needed. Remember to conduct a final stability and safety check to guarantee that your vacuum is properly installed and safe for everyday use. Enjoy the benefits of having your Dyson easily accessible while freeing up valuable floor space. Keep up the good work in maintaining a tidy and efficient living space with your newly wall-mounted Dyson!
Frequently Asked Questions
Can I mount my Dyson vacuum on the wall for better organization?
Yes, wall-mounting your Dyson vacuum is a great space-saving solution. Choose the right tools for drilling and follow safety precautions.
What tools do I need for wall-mounting my Dyson vacuum?
You will need a drill, appropriate drill bit size, wall anchors, level for accuracy, measuring tape for precise measurements, and safety gear.
How do I prepare and mount my Dyson vacuum on the wall?
Check your wall compatibility, mark drill points, secure wall anchors, attach the mounting bracket, and hang the vacuum following the provided instructions.
What steps should I take after mounting the Dyson to ensure stability and safety?
Test the installation for stability, alignment, weight distribution, power operation, and safety checks to confirm a securely mounted Dyson.