Do you ever find yourself struggling to drill a hole in slate without cracking it? Picture this: you’re excited to hang up a beautiful slate sign or create a unique piece of art, but the thought of damaging the slate holds you back. What if I told you there’s a simple technique that can make drilling into slate a breeze?
In this article, you’ll discover the secrets to drilling a perfect hole in slate without any mishaps. You’ll learn the step-by-step process and essential tips to ensure a clean and precise outcome every time. Say goodbye to shattered slate and hello to flawless results with our expert guidance. Let’s dive in and unleash your creativity on this versatile and stunning natural material.
Key Takeaways
- Understand the characteristics of slate: Natural variations, layered structure, grain orientation, hardness levels, moisture content, and fracture risks influence the drilling process.
- Tools and materials needed for drilling into slate: Safety goggles, diamond-tipped drill bit, water bottle, and clamps are essential for a successful drilling experience.
- Follow a step-by-step guide: Preparing the workspace, marking the spot, choosing the right drill bit, adding water for lubrication, and completing the drilling process meticulously.
- Important tips for successful drilling: Secure the slate, choose the right drill bit size, apply masking tape, lubricate with water, maintain the drilling technique, control the drilling depth, remove debris, and inspect the hole.
- Common mistakes to avoid: Inadequately securing the slate, using the wrong drill bit, neglecting masking tape, forgetting to lubricate with water, inconsistent drilling technique, lack of depth control, and failure to inspect for debris can lead to drilling mishaps.
Understanding Slate
Slate, a natural stone formed from shale, is a popular choice for various purposes due to its durability and unique aesthetic appeal. Understanding the characteristics of slate is crucial when drilling into it to ensure successful outcomes with minimal damage. Here’s what you need to know:
Natural Variations
Slate comes in various colors and textures, showcasing its natural beauty. Each piece of slate may have slight variations in hardness and composition, affecting the drilling process. Be prepared to adjust your drilling technique based on the specific slate piece you are working with.
Layered Structure
Slate’s layered structure can make it challenging to drill smoothly without causing cracks. The layers can delaminate if not approached carefully. When drilling, aim to penetrate through the layers gradually to reduce the risk of damaging the stone.
Grain Orientation
Unlike uniform materials, slate has a directional grain that influences its drilling behavior. Pay attention to the grain orientation of the slate piece you are working with. Drilling parallel to the grain typically requires less force and reduces the likelihood of cracks.
Hardness Levels
Slate varies in hardness depending on its geographic origin. Some slates are softer and easier to drill, while others are harder and more prone to cracking. Adjust your drilling speed and pressure based on the hardness of the slate to achieve clean and precise holes.
Moisture Content
The moisture content of slate can impact its drilling properties. Avoid drilling into excessively damp or wet slate, as it may lead to uneven holes and potential breakage. Opt for drilling slate that is adequately dried for better results.
Fracture Risk
Slate is susceptible to fracturing if not handled with care during the drilling process. Minimize the risk of fractures by using sharp drill bits specifically designed for drilling stone. Keep the drill speed steady and avoid sudden movements that could stress the slate.
Natural Clefts
Slate may contain natural clefts or fissures that can affect the drilling process. Take time to inspect the slate surface for any existing cracks or weaknesses before drilling. Adjust your drilling technique to avoid exacerbating these natural features.
Understanding the unique characteristics of slate is essential for successful drilling outcomes. By being mindful of its variations in composition, grain orientation, hardness, and moisture content, you can approach the drilling process with confidence and precision.
Tools and Materials Needed
To drill a hole in slate effectively, you’ll need the following tools and materials:
- Safety goggles: Protect your eyes from any debris that may be generated during the drilling process.
- Dust mask or respirator: Keep yourself safe from inhaling slate dust, which can be harmful.
- Clamp or vice: Secure the slate piece in place to prevent it from moving during drilling.
- Drill with a diamond-tipped bit: Use a drill specifically designed for stone materials like slate.
- Masking tape: Helps to mark the drilling spot and prevents the drill bit from slipping.
- Water bottle or spray bottle: Keep the drilling area wet to reduce heat and dust while drilling.
- Sponge or rag: Use to clean excess water and dust from the slate surface.
- Marker or pencil: Mark the spot where you intend to drill.
By having these tools and materials ready before starting the drilling process, you can ensure a smoother and safer experience while working with slate.
Recommended Products
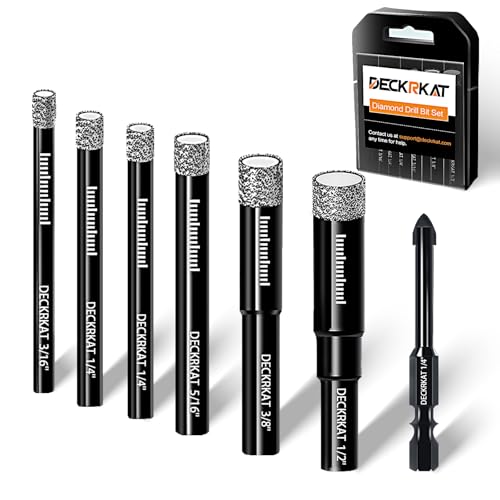
Complete Set of Diamond Drill Bits: This 7-pack includes sizes 3/16", 1/4" (X2), 5/16", 3/8", 1/2", and 1/4" Masonry Bit making it great for a wide range of drilling needs, including glass, tile, ceramics, stones, and masonry brick.

【Precision sizes for standard anchors】This 6-piece set provides the exact diameters needed for common installation tasks: 2x 1/4" (6mm), 5/16" (8mm), 3/8" (10mm), 1/2" (12mm) diamond bits plus a 1/4" (6mm) carbide-tipped bit for centering. Perfect for precisely installing towel bars, mirrors, floating shelves, and brackets into standard anchor sizes.

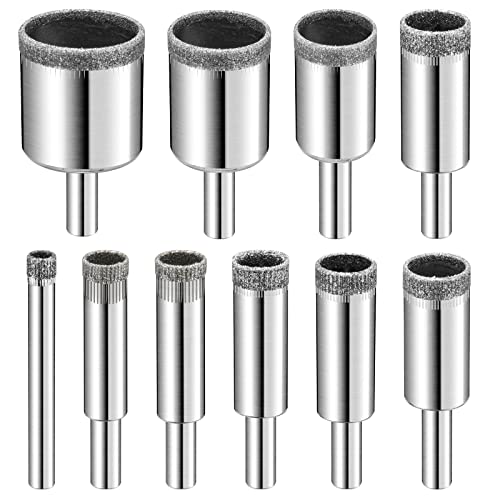
12 PCS DIAMOND HOLE SAW DRILL BIT SET INCLUDES: 0.16“/4mm(2pcs), 0.23“/6mm, 0.31“/8mm, 0.39“/10mm, 0.47”/12mm, 0.55“/14mm, 0.62”/16mm, 0.7“/18mm, 0.78”/20mm, 0.86”/22mm, 1.18“/30mm. The different sizes glass cutting drill bit to meet you various demands!
Step-by-Step Guide on Drilling a Hole in Slate
Recommended Products
【Diamond Drill Bits】These drill bit kits are made of upgraded carbon steel with smooth nickel plating surface to resist corrosion, sharp and durable without edge collapse.

【Specifications】Hex Shank Diamond Drill Bits 1/4"(x2), 5/16"(x2), 3/8"(x2), 1/2"(x1); Ti & Tungsten Carbide Bit 1/4"(x2). Features hex shank for anti-slip grip and optimal torque transfer, ensuring stable, precise holes without cracking.

Complete Set of Diamond Core Drill Bits: This 10-pack includes sizes 3/16"(X2), 1/4"(X3), 5/16", 3/8", 1/2", and 1/4"(X2) Masonry Bit making it great for a wide range of drilling needs, including glass, tile, ceramics, stones, and masonry brick.
Preparing the Workspace
Begin by selecting a suitable location for drilling the hole in the slate. Make sure that the area is well-ventilated and adequately lit. Secure the slate piece firmly in place using a clamp or vice to prevent it from moving during the drilling process.
Marking the Spot
Using a marker or pencil, mark the precise location on the slate where you intend to drill the hole. This step is crucial as it helps ensure accuracy and prevents any unwanted drilling mistakes.
Choosing the Right Drill Bit
Select a drill with a diamond-tipped bit specifically designed for drilling into hard materials like slate. The diamond-tipped bit is essential for effectively penetrating the tough surface of the slate without causing damage.
Applying Masking Tape
To further protect the slate from potential damage, place a piece of masking tape over the marked spot on the slate. This tape will help prevent any chipping or splintering during the drilling process.
Adding Water for Lubrication
Before starting to drill, lightly spray water onto the area where the hole will be drilled. This water acts as a lubricant, cooling the drill bit and reducing the risk of overheating while also minimizing dust production.
Commencing the Drilling Process
Position the drill perpendicular to the marked spot on the slate. Start drilling at a slow and steady pace, applying gentle pressure. Avoid exerting too much force to prevent cracking or shattering the slate.
Maintaining a Consistent Speed
Continue drilling at a consistent speed to ensure a clean and precise hole. Remember to periodically stop and add more water to the drilling area to keep the drill bit cool and prevent any damage to the slate.
Completing the Drilling
Once the drill bit has penetrated through the slate, gradually decrease the pressure on the drill as you near the completion of the hole. Withdraw the drill carefully to avoid any rough edges around the newly drilled hole.
Final Checks
Inspect the drilled hole to ensure it meets your requirements. Remove any remaining debris and dust using a sponge or rag. Your perfectly drilled hole in the slate is now ready for its intended purpose.
By following these step-by-step instructions, you can efficiently drill a hole in slate with precision and care. Remember to prioritize safety by wearing protective gear throughout the drilling process.
Tips for Successful Drilling
Ensuring successful drilling into slate requires attention to detail and following specific guidelines. Here are important tips to help you achieve precise and safe drilling results:
Recommended Products

【10PCS Full Sizes Coverage】 Includes 5/32"-1/2" sizes, 6-inch length for 15cm deep drilling. Works on concrete, tile, brick, cement, glass – fits professional construction and home DIY projects
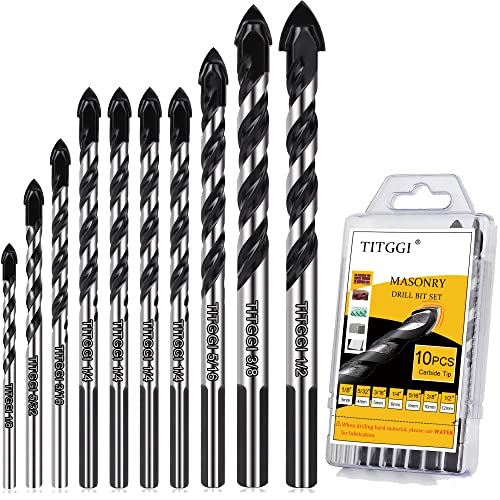
HIGH QUALITY DRILL BIT SET; TITGGI Masonry drill bit set, industrial strength carbide drill bit tip, excellent abrasion resistance, make the drilling much more easier. this cement drill bits can easily penetrate various material (glass, ceramic, cement, wood, brick, travertine, hard plastic, etc.)

PROFESSIONAL CARBIDE DRILL BIT SET:This masonry drill bit set includes 12PCS carbide drill bit, suitable for cement, brick, ceramic, tile, wood, plastic, marble, etc
1. Secure the Slate
- Place: Lay the slate on a stable surface to prevent movement during drilling.
- Clamp: Use clamps or a vice to secure the slate firmly in place for stability.
2. Choose the Right Drill Bit
- Type: Opt for a masonry bit specifically designed for drilling into slate.
- Size: Select a bit size suitable for the diameter of the hole needed.
3. Apply Masking Tape
- Purpose: Cover the area to be drilled with masking tape to reduce chipping.
- Mark: Use a pen to mark the spot where you want to drill.
4. Lubricate with Water
- Constant Supply: Keep a small amount of water nearby to lubricate the drilling area continuously.
- Reduce Heat: Water helps to cool down the drill bit and reduce friction.
5. Drilling Technique
- Steady Pressure: Apply consistent and moderate pressure while drilling to avoid cracking the slate.
- Slow Speed: Drill at a low to medium speed to maintain control and prevent damage.
6. Depth Control
- Marking: Use tape on the drill bit to indicate the desired drilling depth.
- Check Regularly: Periodically stop drilling to check depth and adjust if needed.
- Remove Debris: Clear any debris from the drilled hole using a brush or compressed air.
- Inspect: Check the hole for smoothness and accuracy before proceeding with the project.
By following these tips, you’ll increase the chances of a successful drilling experience in slate while maintaining precision and safety throughout the process. Remember to prioritize safety by wearing appropriate gear and working in a well-ventilated area.
Common Mistakes to Avoid
When drilling a hole in slate, it’s crucial to be mindful of potential missteps that can impact the outcome of your project. Here are common mistakes to steer clear of to ensure successful drilling:
- Not Securing the Slate Adequately: Failing to secure the slate properly before drilling can lead to cracks, fractures, or the slate shattering during the drilling process. It’s essential to use clamps or an appropriate stabilizing method to keep the slate firmly in place.
- Using the Wrong Drill Bit: Selecting the incorrect drill bit type or size for the slate can result in inefficiency and potential damage to the material. Ensure you choose a carbide-tipped masonry bit designed for drilling into tough surfaces like slate.
- Neglecting Masking Tape: Forgetting to apply masking tape over the area where you plan to drill can cause the slate to chip or splinter. Use masking tape to create a buffer that helps prevent the surface from cracking as you drill.
- Forgetting to Lubricate with Water: Dry drilling into slate can generate excessive heat, leading to the bit overheating and becoming dull quickly. Always lubricate the drilling area with water to keep the bit cool and prolong its lifespan.
- Inconsistent Drilling Technique: Inconsistency in drilling pressure or speed can result in uneven holes or damage to the slate surface. Maintain a steady hand, apply consistent pressure, and use a controlled speed throughout the drilling process.
- Lack of Depth Control: Drilling too shallow or too deep into the slate can affect the stability of the hole and the overall integrity of the material. Pay attention to the drilling depth by marking the bit or using depth control features on the drill.
- Failure to Inspect for Debris: After drilling the hole, overlooking debris remnants left behind can hinder the installation of screws or anchors securely. Always clean the hole thoroughly to remove any remaining debris before proceeding with the next steps.
Avoiding these common mistakes will help you achieve a clean, precise hole in slate without compromising the integrity of the material or the success of your project. By being mindful of these potential pitfalls, you can enhance the efficiency and quality of your drilling work on slate surfaces.
Conclusion
You now have the knowledge and skills to drill into slate confidently. By understanding the characteristics of slate and following the step-by-step guide provided, you can tackle this task effectively. Remember to secure the slate properly, choose the correct drill bit, use masking tape, lubricate with water, control the drilling depth, and inspect for debris. Avoid common mistakes like inadequate securing, using the wrong drill bit, dry drilling, and neglecting depth control. With these tips in mind, you can achieve clean, precise holes in slate without compromising the material’s integrity. Happy drilling!
Frequently Asked Questions
What are the important considerations when drilling into slate?
When drilling into slate, it’s crucial to understand its natural variations, grain orientation, and hardness levels. These characteristics influence how the slate will react to drilling and affect the hole’s precision.
How can I effectively drill into slate?
To drill into slate effectively: prepare your workspace, choose the right drill bit designed for masonry or tile, prioritize safety with eye protection and gloves, secure the slate firmly, apply masking tape to prevent chipping, lubricate with water during drilling, control drilling depth, and inspect for debris.
What are some additional tips for successful drilling in slate?
For successful drilling in slate: secure the slate with clamps or a non-slip mat, opt for diamond-tipped drill bits, use masking tape to mark hole location and prevent chipping, lubricate with water to reduce heat and friction, employ a slow and steady drilling motion with intermittent breaks, maintain consistent pressure, control drilling depth to avoid damage, and inspect for any remaining debris.
What common mistakes should be avoided when drilling into slate?
Common mistakes to avoid when drilling into slate include: inadequately securing the slate, using the wrong drill bit type, forgetting to apply masking tape, dry drilling without water lubrication leading to overheating and cracking, inconsistent drilling technique causing uneven holes, lack of depth control resulting in damage, and failure to inspect for debris obstructing the hole. By steering clear of these errors, you can achieve clean, precise holes while preserving the integrity of the slate and ensuring project success.