Ever struggled with excess water pooling around your outdoor spaces, causing a mess and potential damage? You’re not alone. Whether it’s your patio, garden, or driveway, improper drainage can be a real headache. But fear not, as we’ve got a simple solution for you.
Imagine enjoying your outdoor gatherings without worrying about water stagnating on your concrete surfaces. By learning how to drill drainage holes in concrete, you’ll be able to bid farewell to those pesky puddles and hello to a cleaner, safer environment.
Key Takeaways
- Drilling drainage holes in concrete is crucial to prevent water accumulation, protect against damage, and enhance safety in outdoor areas.
- Properly maintained drainage holes improve the aesthetics of concrete surfaces and prolong their lifespan.
- To drill drainage holes, gather necessary tools, mark drilling spots, drill at an angle for water flow, clean the holes, and test water flow.
- Regularly inspect and clean drainage holes, consider sealing them, and monitor surface discoloration for effective maintenance.
- Use tools like a cordless drill, masonry drill bits, safety gear, measuring tape, duct tape, vacuum cleaner, water source, and concrete sealant for drilling.
- Preparation steps include cleaning the surface, marking hole locations accurately, wetting the concrete, and optionally applying a concrete sealant before drilling.
Overview of Drainage Holes in Concrete
When dealing with excess water buildup on your outdoor concrete surfaces like patios, gardens, or driveways, understanding how to drill drainage holes is crucial. These holes play a fundamental role in ensuring water doesn’t stagnate, preventing potential damage and creating a safer environment for your outdoor activities.
Importance of Drainage Holes
Drainage holes in concrete allow water to flow freely, preventing it from pooling on the surface. Without proper drainage, water accumulation can lead to erosion, cracks, and even mold growth.
Benefits of Proper Drainage
- Prevention of Damage: Drainage holes protect your concrete from water-related issues, prolonging the lifespan of your outdoor surfaces.
- Enhanced Safety: By avoiding slippery surfaces caused by stagnant water, you reduce the risk of accidents in your outdoor areas.
- Improved Aesthetics: Well-drained concrete surfaces look neater and are more visually appealing, enhancing the overall look of your outdoor spaces.
How to Drill Drainage Holes
- Gather Your Tools: You’ll need safety goggles, a drill with a masonry bit, a broom, and a hose.
- Mark the Spot: Identify the areas where water tends to accumulate and mark where you’ll drill the holes.
- Drill the Holes: Using the drill and masonry bit, carefully drill holes at an angle to facilitate water flow.
- Clean the Holes: Remove any debris from the holes using a broom or compressed air.
- Test the Drainage: Run water over the surface with a hose to ensure proper water flow through the holes.
- Regular Inspection: Check the drainage holes periodically to ensure they are clear of dirt and debris.
- Cleaning: Use a brush or compressed air to clear any blockages that may impede water flow.
- Sealing: Consider sealing the holes to prevent water from seeping into the concrete and causing damage.
By incorporating drainage holes in your concrete surfaces and maintaining them properly, you can effectively manage water runoff, protect your outdoor areas, and enjoy a clean and safe environment for your various activities.
Tools and Materials Needed for Drilling
To successfully drill drainage holes in concrete, you’ll need the following tools and materials:
- Cordless Drill: A cordless drill provides the mobility and power needed for drilling into concrete surfaces.
- Masonry Drill Bits: Choose high-quality masonry drill bits specially designed to drill into concrete without getting damaged.
- Safety Gear: Ensure you have safety goggles, gloves, and a dust mask to protect yourself from concrete dust and debris.
- Measuring Tape and Marker: These tools help you accurately mark the drilling spots for precise hole placement.
- Extension Cord: In case your cordless drill’s battery runs out, keep an extension cord handy for uninterrupted drilling.
- Duct Tape or Masking Tape: Use tape to create a barrier to prevent the drill bit from sliding during the drilling process.
- Vacuum Cleaner or Brush: Clean up the dust and debris generated during drilling with a vacuum cleaner or brush.
- Water Source: Having a water source nearby can help keep the drill bit cool and prevent overheating.
- Concrete Sealant: After drilling the holes, seal them with concrete sealant to prevent water seepage and enhance durability.
By having these tools and materials ready, you’ll be well-equipped to drill precise and effective drainage holes in concrete surfaces.
Recommended Products

PROFESSIONAL CARBIDE DRILL BIT SET:This masonry drill bit set includes 12PCS carbide drill bit, suitable for cement, brick, ceramic, tile, wood, plastic, marble, etc
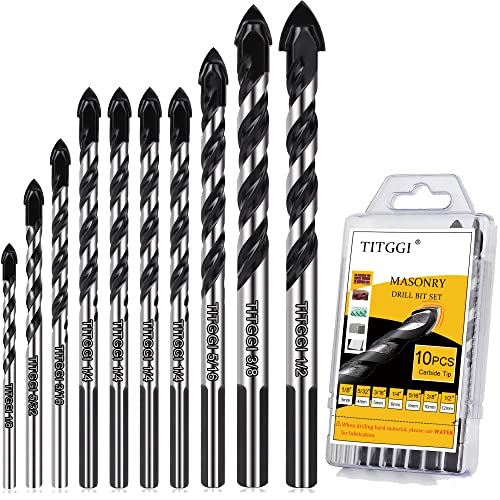
HIGH QUALITY DRILL BIT SET; TITGGI Masonry drill bit set, industrial strength carbide drill bit tip, excellent abrasion resistance, make the drilling much more easier. this cement drill bits can easily penetrate various material (glass, ceramic, cement, wood, brick, travertine, hard plastic, etc.)

2 cutter carbide tip of masonry drill bit set maximizes carbide surface contact for longer bit life.
Preparing the Concrete Surface
Before drilling drainage holes in concrete, it’s crucial to prepare the surface properly to ensure successful and effective hole creation. Here’s how you can adequately prepare the concrete surface:
- Clean the Concrete Surface: Start by cleaning the concrete surface thoroughly. Remove any dirt, debris, or loose particles using a broom or a vacuum cleaner. Ensuring a clean surface will help in achieving precise and clean holes during the drilling process.
- Mark the Hole Locations: Use a measuring tape and a pencil to mark the locations where you intend to drill the drainage holes. Ensure that the markings are accurately placed according to your drainage plan to avoid any errors during drilling.
- Wet the Concrete: Before drilling, dampen the concrete surface with water. This step helps in reducing dust production during drilling and promotes better drilling efficiency.
- Use Concrete Sealant (Optional): If desired, apply a concrete sealant on the marked areas before drilling. The sealant can help in reducing potential cracking and can provide a smoother drilling experience.
By following these preparation steps, you can set the stage for successful drilling of drainage holes in concrete. Proper preparation not only ensures a smoother drilling process but also contributes to the longevity and effectiveness of the drainage system in managing water runoff efficiently.
Recommended Products

Turbo wet look sealer protects exterior concrete/masonry surfaces for ultimate durability

Ready to use commercial grade formula can be applied using a standard garden pump sprayer

Surface Applications: Ideal for pavement, asphalt, concrete, parking lots, warehouses, factories, playgrounds, and outdoor courts (tennis, basketball).
Drilling Techniques for Concrete
To drill drainage holes in concrete effectively, you need to follow specific techniques to ensure accurate and efficient hole creation. Here are the key steps to help you drill drainage holes in concrete surfaces successfully:
Recommended Products

【10PCS Masonry Drill Bit Set】Includes 10 commonly used sizes from 5/32" to 1/2" for different drilling needs. A practical carbide drill bit set for installing wall anchors, screws, shelves, fixtures, bathroom hardware, kitchen accessories, and general home repair projects.

Optimized U-Flute Design - Removes dust faster, keeping the carbide tip cooler for ultimate strength and durability. Made for aggressive starts that produce clean, fast holes.
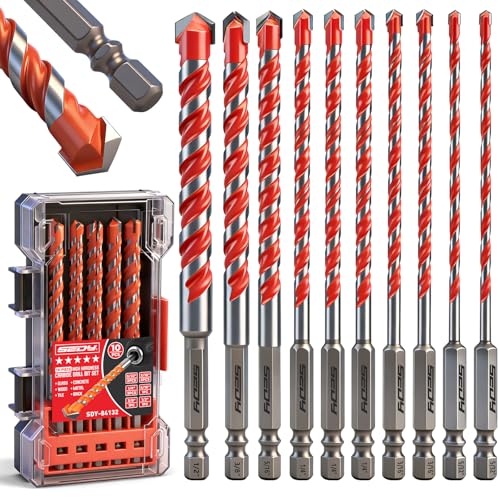
HIGH HARDNESS - Engineered with premium YG6X carbide tips, these masonry drill bits deliver exceptional hardness and long-lasting durability, maintaining sharp cutting edges for powerful performance in concrete, brick, and demanding drilling applications
1. Selecting the Right Drill Bit
Start by choosing the appropriate drill bit for concrete surfaces. Match the drill bit with the type of concrete you are working with. For regular concrete, a masonry drill bit is suitable. For harder concrete, such as reinforced concrete, a carbide-tipped masonry bit is more effective.
2. Marking and Positioning
Once you have the right drill bit, it’s crucial to mark the precise locations where you want to drill the drainage holes. Utilize a pencil or chalk to mark the spots accurately. Ensure even spacing between the holes for uniform drainage.
3. Setting up the Drill
Secure the appropriate drill bit in the drill chuck and tighten it properly. Double-check the bit alignment before moving forward. Plug in your drill and ensure you have a reliable power source nearby for convenience.
4. Drilling Technique
Start drilling at a low speed to create an initial groove or dent in the concrete surface. Once the groove is formed, gradually increase the speed. Apply steady pressure as you drill to maintain a consistent and straight hole.
5. Cooling and Cleaning
To prevent overheating and ensure smooth drilling, pause periodically to let the drill bit cool down. You can also sprinkle water over the drilling area while working to reduce friction and clear away debris.
6. Depth Control
Pay attention to the required depth of the drainage hole. Use tape markers on the drill bit to gauge when you’ve reached the desired depth. Avoid drilling too deep to maintain the structural integrity of the concrete.
7. Finishing Touches
Once you’ve drilled all the necessary holes, clean the area to remove any concrete dust or debris. Inspect each hole to ensure they meet the required specifications and are clear of obstructions.
By following these drilling techniques for concrete, you can create effective drainage holes that help manage water runoff efficiently, prevent damage, and maintain a safe outdoor environment.
Testing and Maintaining Drainage Holes
After drilling drainage holes in your concrete surface, it’s crucial to perform testing and maintenance to ensure the proper functionality of the drainage system. Here’s how you can test and maintain your drainage holes effectively:
Inspecting Drainage Holes Regularly
Regular inspection of the drainage holes is essential to prevent clogging and ensure efficient water flow. Check the holes periodically, especially after heavy rainfall or when you notice water pooling on the surface. Use a flashlight to look inside the holes and clear any debris or dirt that might be obstructing the drainage pathways.
Testing Water Flow
To test the water flow through the drainage holes, simply pour a small amount of water onto the concrete surface near the holes. Observe how quickly the water drains through the holes. If you notice any slow drainage or backup, it’s a sign that the holes may be blocked and require cleaning.
Clearing Debris and Blockages
If you encounter any blockages during the water flow test or inspection, use a small brush or a specialized tool to clear the debris from the drainage holes. Avoid using sharp objects that could damage the holes or the surrounding concrete. Keeping the holes free of debris will ensure optimal water drainage and prevent water accumulation on the surface.
Applying Sealant (Optional)
Consider applying a concrete sealant around the drainage holes to protect the surrounding concrete from water damage and extend the lifespan of the drainage system. Choose a high-quality sealant designed for outdoor use and follow the manufacturer’s instructions for application. Regularly inspect the sealant for wear and reapply as needed to maintain its effectiveness.
Monitoring Surface Discoloration
Keep an eye out for any signs of surface discoloration around the drainage holes, as this could indicate water leakage or improper drainage. Discoloration may suggest underlying issues with the drainage system that require immediate attention. Address any discoloration promptly to prevent further damage to the concrete surface and ensure efficient water runoff.
By following these testing and maintenance practices, you can keep your drainage holes clear, functional, and effective in managing water runoff on your concrete surface. Regular upkeep will help prevent water accumulation, protect the structural integrity of the concrete, and maintain a safe outdoor environment.
Conclusion
You now have all the tools you need to drill drainage holes in concrete like a pro. Remember to regularly check and maintain these holes to keep your outdoor spaces safe and free of water buildup. By following these simple steps, you can ensure that your drainage system remains effective and your concrete surfaces stay in top condition. Happy drilling!
Frequently Asked Questions
Why is it important to drill drainage holes in concrete surfaces?
Drilling drainage holes in concrete surfaces helps prevent water pooling, which can lead to safety hazards and damage.
What techniques are recommended for drilling drainage holes?
Use a masonry drill bit with a hammer drill to create clean and precise holes in concrete surfaces.
How should one maintain drainage holes?
Regularly inspect and clean drainage holes to ensure optimal water flow and prevent blockages.
What are some optional steps for maintaining drainage holes?
Consider applying a sealant to the holes to enhance durability and monitoring surface discoloration for signs of potential issues.