Have you ever struggled with hanging curtains or installing blinds on your window frame? Picture this: you have the perfect set of window treatments, but you’re hesitant to drill into the frame for fear of damaging it. What if I told you there’s a simple and effective way to tackle this task without any stress or worry?
Key Takeaways
- Understand the varying techniques required for drilling into different window frame materials like wood, metal, vinyl, and fiberglass to avoid damage.
- Choose the right drill bit specific to the window frame material for clean and precise holes.
- Employ proper techniques such as starting with pilot holes, holding the drill steady, and monitoring drilling depth for successful installations.
- Use essential tools like a drill/driver, appropriate drill bits, masking tape, pencil, level, safety gear, vacuum cleaner, screwdriver, and lubricant for an efficient drilling process.
- Prepare the window frame by marking drill spots accurately, creating pilot holes, and using steady drilling techniques for a secure installation of window treatments.
- Secure fixtures and anchors by selecting suitable anchors, drilling pilot holes, inserting anchors carefully, tightening screws firmly, checking for stability, and using screw covers for a polished finish.
Exploring Window Frame Materials
When drilling into window frames, it’s essential to understand the materials you’re working with. Different window frame materials require varying techniques to ensure a successful installation without causing damage. Here’s a breakdown of common window frame materials and how to approach drilling into them:
Identifying Window Frame Materials
- Wooden Frames
Wood window frames are classic and versatile. When drilling into wooden frames, ensure you use sharp drill bits to avoid splintering the wood. Pre-drilling pilot holes can also help prevent cracking. - Metal Frames
Metal window frames, such as aluminum or steel, are durable but require special care when drilling. Use metal drill bits designed for the specific type of metal frame you have. Lubricating the drill bit can ease the process and prevent overheating. - Vinyl Frames
Vinyl window frames are popular for their low maintenance. When drilling into vinyl frames, be cautious not to overtighten screws, as it can distort the frame. Use a drill bit slightly smaller than the screw diameter to create pilot holes. - Fiberglass Frames
Fiberglass window frames are weather-resistant and energy-efficient. When drilling into fiberglass frames, avoid using excessive force to prevent cracking. A slow and steady drilling pace is recommended for best results.
- Choose the Right Drill Bit: Select a drill bit suitable for the specific window frame material to achieve clean and precise holes without causing damage.
- Use Proper Technique: Hold the drill steady and perpendicular to the window frame surface to avoid angled holes or misalignment.
- Start with Pilot Holes: Creating pilot holes can guide the drill bit and prevent the material from splintering or cracking during drilling.
- Mind the Depth: Determine the required depth for the screws or anchors and mark the drill bit accordingly to avoid over-drilling.
Understanding the characteristics of the window frame materials you’re working with is crucial for a successful installation. By choosing the right tools, employing proper techniques, and being mindful of each material’s specific requirements, you can drill into window frames with confidence and precision.
Necessary Tools for Drilling
When it comes to drilling into window frames, having the right tools is essential for a successful and hassle-free experience. Here are the necessary tools you’ll need to ensure you can drill into your window frames effectively:
- Drill/Driver: It’s crucial to use a drill/driver that suits your window frame material. You may consider a cordless drill for easier maneuverability.
- Drill Bits: Select the appropriate drill bits based on the window frame material. For wood frames, opt for sharp, carbide-tipped drill bits.
- Masking Tape: Use masking tape to mark the drill spots and prevent any splintering or paint chipping.
- Pencil: A pencil will help you mark the exact points where you want to drill on the window frame accurately.
- Level: Ensure your window treatments are straight by using a level to mark correct drilling positions.
- Safety Gear: Safety should always come first. Wear goggles and gloves to protect your eyes and hands from debris.
- Vacuum Cleaner: Keep a vacuum cleaner handy to clean up any wood shavings or debris for a tidy workspace.
- Screwdriver: Have a screwdriver ready for fixing screws into the drilled holes securely.
- Lubricant: For metal window frames, consider using a lubricant to ease the drilling process and prevent damage.
By having these essential tools at your disposal, you’ll be well-equipped to drill into your window frames with precision and care, ensuring your window treatments are installed securely without causing any unnecessary damage.
Recommended Products

100% Blackout Roller Shade: Made of polyester fabric coated with blackout backing. Blocking out 100% light for complete privacy, light control and UV protection for bedrooms, children’s rooms and movie rooms. Excellent for deeper and longer sleepers.

Inside Mount ONLY. For better internal installation, a standard 3/8 inch deduction is made to the width for a proper INSIDE MOUNT fit. The actual blind size is 21 5/8" W x 36" H, perfect for window 22" W x 36" H. The unique spring rod can extend 1 inch in total, allow the blind to fit for window size W21.7-22.6 X H36".
Preparing the Window Frame for Drilling
Now that you have the necessary tools, it’s time to prepare the window frame for drilling. Proper preparation ensures a successful and damage-free installation of your window treatments.
Recommended Products
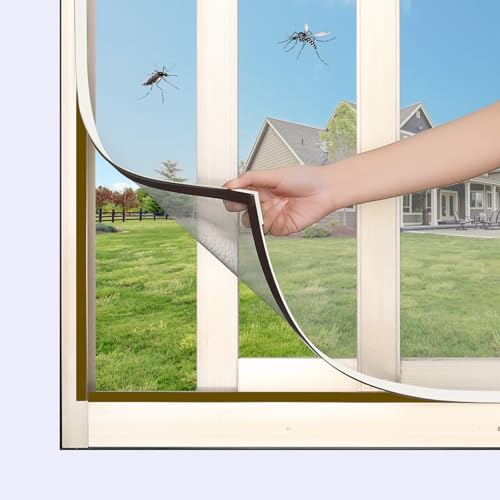
Strong magnetic seal: Upgraded thick magnetic strip, with a 30% increase in retention force, ensuring firmness.
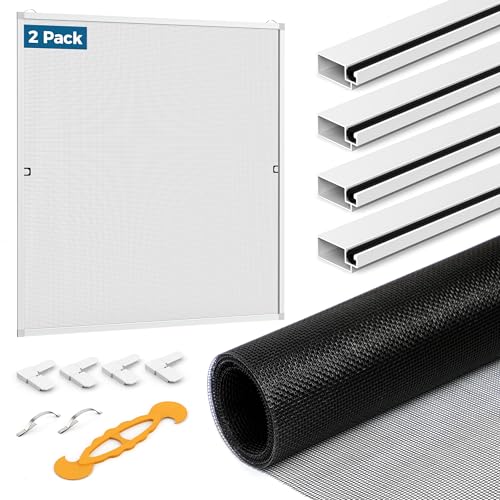
Complete Window Screen Kit: Augblinds frame kits include everything needed to build two new frame for your window screen. Frame 5/16 inch x 3/5 inch, 1 roll of 48" x 99" screen mesh, 0.2 inch spline, 8 plastic corners, 4 frame springs, and 4 plastic pull tabs. The frame kit can be cut to fit any size window for a custom fit.

❄Fits Casement, Crank & Skylight Windows:Designed for casement, crank-out, push-out and skylight windows, this portable AC window seal kit fits window perimeters up to 300CM/118". A practical solution for homes and apartments where standard sliding window kits do not fit.
Marking Drill Spots
- Gather your tools: Grab your masking tape, pencil, and level.
- Position the bracket: Align the bracket on the frame and mark the spots where you’ll drill.
- Use the level: Ensure the bracket is straight by checking with the level before marking.
Creating Pilot Holes
- Select the right drill bit: Choose a bit slightly smaller than the screws you plan to use.
- Drill the pilot holes: With a steady hand, drill guide holes where you marked your spots.
- Avoid splintering: For wood frames, place a small piece of masking tape over the drill spot before drilling.
Drilling into the Frame
- Secure the frame: Hold the frame firmly to prevent any movement during drilling.
- Start drilling: Use a slow and steady pace to avoid damaging the frame.
- Apply gentle pressure: Let the drill do the work; avoid pushing too hard.
- Clean as you go: Use a vacuum cleaner to remove any wood or metal shavings for a neat finish.
- Screw in the brackets: With the pilot holes in place, attach the brackets securely.
- Check alignment: Ensure the brackets are level and adjust if needed.
- Tighten the screws: Use a screwdriver to tighten the screws firmly but not over-tighten.
- Enjoy your new window treatments: Step back and admire your handiwork.
By following these steps, you’ll be well-prepared to drill into your window frame effectively and securely install your window treatments without causing any damage.
Step-by-Step Guide to Drilling into a Window Frame
Recommended Products
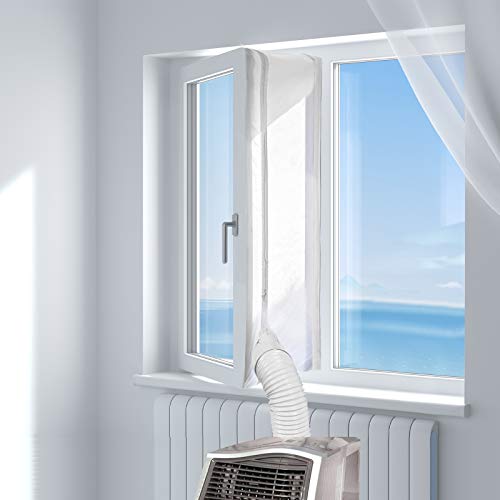
EFFECTIVE WINDOW SEALING: HOOMEE window seal closes the gap around the exhaust hose of portable air conditioner between the window frame and window, helping block the hot air out and keep cool indoor
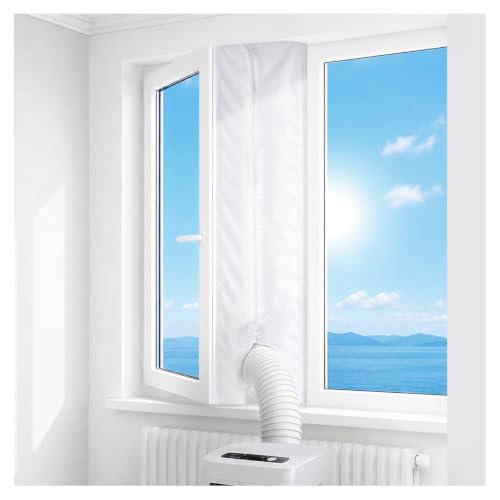
Portable AC Window Vent Kit: This portable AC window vent kit is fitted between the window frame and the window using a hose. It effectively expels hot air generated by the air conditioner out of the window whilst trapping cool air inside, keeping your room cool for longer

THE ULTIMATE WINDOW SCREEN REPLACEMENT KIT: Get more than just the basics with this all-inclusive screen frame kit. It includes 1 full sets, premium window mesh(110g/Square), spline, tools, and 4 exclusive Screen Clips to hold the mesh taut for a wrinkle-free finish
Mark the Drill Spots
Start by marking the precise spots on the window frame where you want to drill. Use a pencil and a tape measure to ensure accuracy. Double-check the positions before proceeding to the next step.
Create Pilot Holes
Next, create pilot holes at the marked spots. Choose a drill bit that matches the size of the screws you’ll be using for your window treatments. Gently drill the pilot holes to guide the screws in later without causing damage to the frame.
Drill into the Frame Carefully
It’s time to drill into the window frame. Hold the drill steadily perpendicular to the frame surface. Apply gentle pressure and start drilling at a slow, consistent speed. Avoid exerting too much force to prevent splintering or cracking the frame.
Secure the Frame
To prevent any accidental movement during drilling, ensure the window frame is securely held in place. This will enhance precision and help avoid any potential mishaps that could damage the frame or your drill.
Slow and Steady Wins the Race
Remember, patience is key when drilling into a window frame. Rushing through the process can lead to mistakes or accidents. Maintain a steady pace while drilling to ensure a clean and precise outcome.
Clean as You Go
Keep a damp cloth handy to wipe away any wood or debris generated during the drilling process. This will help maintain a neat work area and prevent any debris from interfering with the installation of your window treatments.
Final Checks and Adjustments
After drilling, test the fit of your screws in the pilot holes to ensure they align correctly. Make any necessary adjustments to the hole size if needed. Once everything is in place, proceed with installing the brackets for your window treatments securely.
By following these steps meticulously, you’ll be able to drill into your window frame effectively and securely, ensuring a successful installation of your window treatments without causing any harm.
Securing Fixtures and Anchors
To ensure a secure installation of your window treatments, proper anchoring is crucial in securing fixtures. Here are the steps to effectively secure fixtures and anchors for your window treatment installation:
- Select the Right Anchors: Choose anchors suitable for your window frame material, whether wood, metal, vinyl, or fiberglass. Using anchors designed for the specific material prevents damage and ensures a sturdy hold.
- Drill Pilot Holes: Before inserting anchors, drill pilot holes slightly smaller than the anchor size. This step helps in preventing cracks or splintering in the frame and allows for easier insertion of the anchors.
- Insert Anchors Carefully: Gently tap the anchors into the pilot holes using a hammer until they sit flush with the frame surface. Be cautious not to damage the frame during this process.
- Securing the Fixtures: Once the anchors are in place, attach the fixtures using screws designed for the anchors. Make sure the fixtures are aligned correctly and tighten the screws firmly to ensure a secure attachment.
- Check for Stability: Test the stability of the fixtures by giving them a gentle tug. If they feel loose, reinforce the anchors by either replacing them with larger ones or adding additional anchoring support.
- Cover Screw Heads: For a neat finish, consider using screw covers or caps to hide the screw heads. This not only enhances the aesthetics but also provides a finished look to your window treatments.
By following these steps, you can securely install fixtures and anchors for your window treatments without damaging the frame material. Proper anchoring ensures that your window treatments stay in place for a long time, giving your space a polished and well-organized look.
Conclusion
You’ve now learned the essential steps to confidently drill into various window frame materials for a seamless installation of window treatments. By choosing the right drill bit, mastering the proper techniques, and ensuring the correct screw depth, you can achieve a professional-looking result without any damage. Remember to mark drill spots accurately, create pilot holes, and drill carefully into the frame. Secure your fixtures and anchors effectively by selecting the appropriate anchors, drilling pilot holes, inserting anchors with care, and securing fixtures properly. Check for stability, cover screw heads for a polished finish, and enjoy a secure installation that enhances the aesthetic appeal of your space. With these tips and tricks, you’ll be able to tackle your window treatment projects with ease and confidence.
Frequently Asked Questions
What are the key considerations when installing window treatments without causing damage to window frame materials?
When installing window treatments, it’s crucial to choose the right drill bit, mark drill spots accurately, create pilot holes, drill into the frame carefully, secure the frame properly, maintain a slow drilling pace, and clean debris as you progress.
How do you effectively secure fixtures and anchors when installing window treatments?
To secure fixtures and anchors effectively, choose the right anchors, drill pilot holes, insert anchors carefully, secure fixtures properly, check for stability, and cover screw heads for a polished finish.
Why is it important to follow these steps during the installation process?
Following these steps ensures a secure installation of window treatments without causing damage to the window frame material, providing a well-organized and aesthetically pleasing look to your space.