Ever wondered how to securely install your Ring camera on a sturdy brick wall without breaking a sweat? Picture this: you’ve got the perfect spot picked out to monitor your home, but the daunting task of drilling into brick leaves you feeling a bit uncertain. Don’t fret – we’ve got you covered!
Key Takeaways
- Understanding the basic features and types of Ring cameras is crucial for a successful installation on brick walls.
- Prioritize safety by wearing protective gear like safety glasses and gloves when drilling into brick to install the camera.
- Properly prepare the brick surface by cleaning it, marking drill points accurately, and checking for obstructions before installation.
- Use essential tools such as a power drill, masonry drill bits, spirit level, and safety gear to drill into brick effectively.
- Follow a precise drilling process, including marking drill points, drilling to the required depth, and mounting the camera securely for a stable installation.
- Test the installed Ring camera by powering it on, checking its view, testing motion detection, verifying two-way audio functionality, assessing night vision, and ensuring remote access for optimal performance.
Overview of Ring Cameras
When considering installing a Ring camera on a brick wall, understanding the basic features and functionality of Ring cameras can be beneficial. Here’s a quick overview to help you become familiar with these devices and make the installation process smoother:
Understanding Ring Cameras
Ring cameras are versatile security devices that offer features such as motion detection, two-way audio, and live video streaming. They are designed to provide you with peace of mind by allowing you to monitor your property remotely.
Types of Ring Cameras
Ring offers a variety of camera options, including the Ring Stick Up Cam, Ring Floodlight Cam, and Ring Spotlight Cam. Each type is designed for specific purposes, such as outdoor surveillance or monitoring specific areas of your property.
Key Installation Considerations
Before drilling into brick to install your Ring camera, it’s essential to consider factors such as the camera’s field of view, the optimal mounting height, and ensuring a stable connection to your home’s Wi-Fi network.
Compatibility with Brick Walls
Ring cameras are suitable for installation on brick walls, but it’s crucial to use the right tools and techniques to ensure a secure and long-lasting mount. Brick can be a durable material, providing a sturdy surface for mounting your camera.
Weatherproofing and Maintenance
Since Ring cameras are often installed outdoors, they are built to withstand various weather conditions. However, regular maintenance, such as cleaning the lens and checking for debris, can help ensure optimal performance.
Additional Accessories
To enhance the functionality of your Ring camera, consider additional accessories like solar panels for charging, mounting brackets for adjustable viewing angles, or protective skins for customization and protection.
Expert Tip: Before drilling into brick, always check the manufacturer’s guidelines and recommendations to ensure you install your Ring camera correctly and securely.
By understanding the basics of Ring cameras and the considerations for installing them on brick walls, you’ll be better prepared to set up your security system effectively and enjoy the benefits of enhanced home monitoring.
Necessary Tools for Drilling into Brick
When it comes to drilling into brick to install your Ring camera securely, having the right tools is essential for a successful and hassle-free experience. Here’s a list of necessary tools you’ll need:
Recommended Products
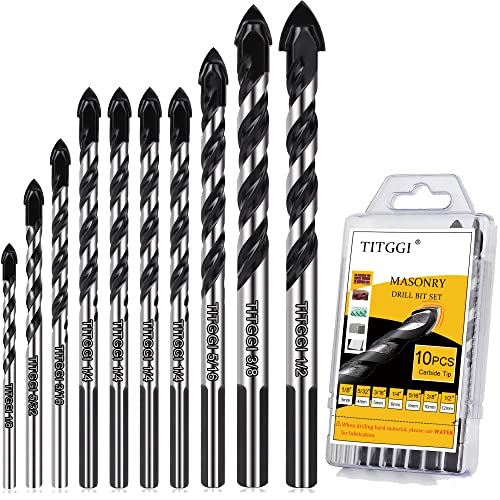
HIGH QUALITY DRILL BIT SET; TITGGI Masonry drill bit set, industrial strength carbide drill bit tip, excellent abrasion resistance, make the drilling much more easier. this cement drill bits can easily penetrate various material (glass, ceramic, cement, wood, brick, travertine, hard plastic, etc.)

PROFESSIONAL CARBIDE DRILL BIT SET:This masonry drill bit set includes 12PCS carbide drill bit, suitable for cement, brick, ceramic, tile, wood, plastic, marble, etc

【10PCS Masonry Drill Bit Set】Includes 10 commonly used sizes from 5/32" to 1/2" for different drilling needs. A practical carbide drill bit set for installing wall anchors, screws, shelves, fixtures, bathroom hardware, kitchen accessories, and general home repair projects.
1. Power Drill:
A power drill is a must-have tool for drilling into brick efficiently. Ensure you have a reliable power drill with variable speed settings to adapt to the density of the brick you’re working with.
2. Masonry Drill Bits:
To effectively drill into brick, you’ll require masonry drill bits specifically designed to penetrate hard materials like brick. These sturdy bits are essential for creating clean and precise holes.
3. Spirit Level:
To ensure your Ring camera is installed correctly and level on the brick wall, a spirit level is indispensable. It helps you maintain the desired alignment during the installation process.
4. Pencil or Marker:
Marking the drilling points on the brick accurately is crucial for a neat and professional installation. A pencil or marker will help you outline the positions for drilling before you start.
5. Dust Mask and Safety Glasses:
Drilling into brick can create dust and debris that may be harmful if inhaled. Protect yourself by wearing a dust mask and safety glasses to prevent any potential hazards.
6. Work Gloves:
Brick surfaces can be rough, and handling them during installation can be tough on your hands. Wearing work gloves will provide you with a better grip and protect your hands from scratches or cuts.
Ensuring you have these essential tools at your disposal before starting the installation process will make drilling into brick to mount your Ring camera a smooth and successful endeavor.
Preparing the Brick Surface
Now that you’ve gathered all the necessary tools for drilling into brick, it’s important to ensure that you prepare the brick surface properly. An adequately prepared surface is crucial for a secure and successful installation of your Ring camera.
Recommended Products

POWERFUL MOTOR: Struggling with slow drilling or hard concrete? The Seesii rotary hammer drill packs a 1500W copper motor, 6J impact energy, and 4000 BPM impact rate—enough to power through concrete, brick, stone, wood, and metal without stalling. With max drilling sizes of 1.26" (concrete), 1.57" (wood), and 0.51" (metal), it saves time and effort on every project.

21V Upgraded Brushless Motor : Our cordless hammer drill built-in a high-efficiency brushless motor, with a maximum torque of up to 1060 In·lbs(120N·m), making power hammer drill`s performance more stable, more powerful, quieter, and longer service life
1. Built for Brutal Jobs, Not Boring Breaks: Tackle concrete, brick, and metal like a pro with this 1100W SDS Plus rotary hammer drill—3 functions (drill only, hammer only, hammer drill), 7 joules impact energy, and a 12.5Amp motor that won't quit. Perfect for contractors, DIYers, and weekend warriors who hate stopping mid-job to cool down or swap tools.
Cleaning the Surface
Before you start drilling, make sure the brick surface is clean. Remove any dirt, dust, or debris from the area where you plan to mount the camera. A clean surface will ensure better adhesion and a more stable installation. You can use a brush or a damp cloth to clean the brick surface thoroughly.
Marking the Drill Points
Next, use a pencil or marker to mark the points where you’ll be drilling. Measure the distances accurately to ensure that the camera will be level once installed. Use a spirit level to double-check the markings and ensure that they are straight and aligned.
Wearing Safety Gear
Safety should always be a top priority when working with tools and drilling into hard surfaces like brick. Remember to wear a dust mask, safety glasses, and work gloves to protect yourself from dust, debris, and any potential hazards during the installation process.
Weather Considerations
Take into account the weather conditions when preparing the brick surface. Ideally, choose a day with moderate temperatures and low humidity to ensure the best conditions for drilling into brick. Extreme temperatures or wet conditions can affect the drilling process and the adherence of the camera mount.
Checking for Obstructions
Before you start drilling, check for any obstructions behind the brick surface. Ensure there are no pipes, cables, or other hidden elements that could be damaged during the drilling process. Use a stud finder or similar tool to detect any hidden obstacles behind the brick.
By following these steps to prepare the brick surface, you’ll create a solid foundation for installing your Ring camera securely and effectively. Proper preparation sets the stage for a successful installation process and ensures that your camera is mounted correctly for optimal performance.
Drilling Process
To securely mount your Ring camera on a brick wall, you need to follow a precise drilling process to ensure a stable and long-lasting installation. Here’s how you can drill into brick effectively:
Recommended Products

8Pcs Masonry Drill Bit Set: Package includes 1 X 5/32“、2 X 3/16”、3 X 1/4“、1 X 5/16”、1 X 3/8", 5 different sizes of cement drills to easily meet your drilling needs

2 cutter carbide tip of masonry drill bit set maximizes carbide surface contact for longer bit life.
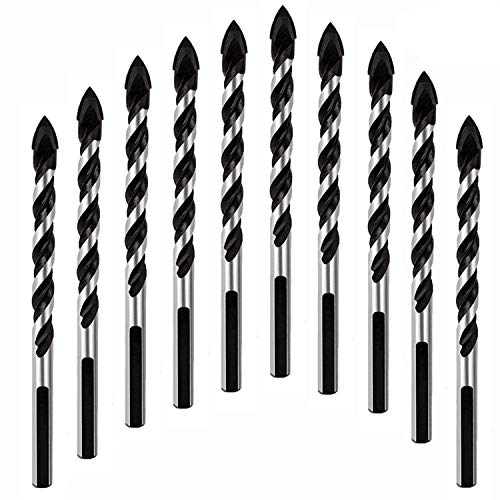
★Multi-material Drill Bit For Drilling in Tile, Glass, Concrete, Brick, Wood, and Plastic. Many in 1 easy install and using
Step 1: Gather the Required Tools
Before starting the drilling process, make sure you have all the necessary tools at hand:
- Masonry drill bit: Opt for a high-quality masonry drill bit specifically designed for brick.
- Power drill: Use a drill with hammer function for better penetration into the brick.
- Safety gear: Wear safety goggles to protect your eyes from debris and gloves for a firm grip.
- Marker: Use a marker to accurately mark the drilling points on the brick surface.
Step 2: Mark the Drill Points
Using a marker, mark the exact points on the brick wall where you plan to drill the holes for mounting the camera. Ensure the markings are level and spaced according to the mounting requirements of your Ring camera.
Step 3: Start Drilling
With the masonry drill bit inserted into the power drill, position the drill perpendicular to the brick surface at the marked points. Apply gentle pressure and start drilling at a slow speed to prevent the brick from cracking.
Step 4: Drill to the Required Depth
Continue drilling into the brick until you reach the required depth for the mounting screws. The depth will depend on the length of the screws provided with your Ring camera for a secure attachment.
Step 5: Clean the Holes
After drilling, remove the excess dust and debris from the holes using a brush or compressed air. Clean holes ensure a better fit for the mounting screws.
Step 6: Mount the Camera
Once the holes are clean and ready, attach the mounting bracket or base of the Ring camera to the brick wall using the appropriate screws. Make sure the camera is securely fastened and level before finalizing the installation.
By following these steps carefully and accurately drilling into the brick, you can ensure a stable and secure mounting for your Ring camera, providing you with reliable surveillance and peace of mind.
Mounting the Ring Camera
When mounting your Ring camera on a brick wall, you need to follow a few key steps to ensure a secure and reliable installation. Below are the detailed instructions to help you drill the Ring camera into brick effectively:
Gather the Necessary Tools
Before you start the mounting process, make sure you have all the required tools in hand. You will need:
- Drill with masonry bit
- Screwdriver
- Wall anchors
- Screws
- Level
- Pencil
- Tape measure
Mark the Drill Points
Using a pencil and a level, mark the exact points on the brick where you intend to drill holes for mounting the camera. Ensure that the marks are aligned correctly and at the desired height for optimal camera placement.
Drill into the Brick
With the masonry bit attached to your drill, carefully drill into the marked points on the brick wall. Apply steady but gentle pressure to avoid damaging the brick. Make sure to drill to the necessary depth to accommodate the wall anchors securely.
Clean the Holes
After drilling, remove any brick dust or debris from the holes using a small brush or compressed air. This step is crucial to ensure a proper fit for the wall anchors and screws.
Mount the Camera Securely
Insert the wall anchors into the drilled holes, ensuring they sit flush with the brick surface. Then, align the mounting holes on the camera with the anchors and drive the screws through the camera bracket into the anchors. Tighten the screws securely to ensure the camera is firmly mounted.
Testing the Installation
Once you’ve successfully mounted your Ring camera on the brick wall, it’s crucial to test the installation to ensure its proper functionality and stability. Testing allows you to confirm that the camera is securely in place and functioning as expected.
- Power On the Camera: Begin by powering on the Ring camera and connecting it to your Wi-Fi network. Ensure that the camera’s LED lights up, indicating that it’s receiving power and ready for operation.
- Check the Camera’s View: Use the Ring app on your smartphone or computer to verify the camera’s view. Ensure that the camera angle covers the desired area for surveillance. Adjust the camera if needed to optimize the viewing angle.
- Test Motion Detection: Walk in front of the camera to test its motion detection capabilities. Confirm that the camera accurately detects motion and sends you notifications as configured in the app settings.
- Two-Way Audio Functionality: Test the two-way audio feature by speaking through the app while standing within the camera’s range. Check if the audio is clear on both ends to ensure effective communication.
- Night Vision Testing: Wait until nighttime or simulate low-light conditions to verify the camera’s night vision capabilities. Ensure that the camera switches to night mode automatically and provides clear video footage in the dark.
- Weather Resistance: If possible, expose the camera to different weather conditions to test its durability. Check if it remains operational and unaffected by rain, wind, or extreme temperatures.
- Remote Access: Test the camera’s remote access feature by monitoring live footage and receiving alerts from anywhere using the Ring app. Ensure that you can access the camera seamlessly without any connectivity issues.
By following these testing steps, you can ensure that your Ring camera installation on the brick wall is secure, functional, and ready to provide reliable surveillance for your home or property. Conducting thorough tests helps in identifying any issues early on and guarantees optimal performance in monitoring your surroundings.
Conclusion
You’re now equipped with the knowledge to confidently drill your Ring camera into a brick wall. By following the detailed steps outlined in this guide, you can ensure a secure and reliable installation. Remember to use the right tools, weatherproof effectively, and conduct thorough testing to guarantee optimal performance. With motion detection, two-way audio, and other advanced features, your Ring camera will provide you with peace of mind and enhanced security for your property. Enjoy the benefits of remote access, night vision, and weather resistance that come with a properly installed Ring camera. Stay vigilant and make the most of your surveillance system!
Frequently Asked Questions
What are the key features of Ring cameras?
Ring cameras offer features like motion detection, two-way audio, night vision, and remote access for surveillance.
What types of Ring cameras are available?
Ring offers various types of cameras including the Ring Stick Up Cam, Doorbell Cam, Floodlight Cam, and Spotlight Cam.
How should I install a Ring camera on a brick wall securely?
To install a Ring camera on a brick wall securely, use proper tools, weatherproof the connections, mark drilling spots accurately, drill into the brick with care, and mount the camera ensuring a secure fit.