Do you find yourself struggling with a jammed keyless drill press chuck, unable to proceed with your projects? Picture this: you’re in the middle of a DIY task, and your drill chuck suddenly refuses to cooperate, leaving you stuck. Fret not, as we’ve got you covered with simple yet effective solutions to get your keyless drill press chuck back in working order swiftly. By following the steps outlined in this article, you’ll soon be back to smoothly operating your drill press without any hiccups. Let’s dive in and equip you with the knowledge and skills to tackle this common issue like a pro.
Key Takeaways
- Understand the components of a keyless drill press chuck: body, jaws, and sleeve.
- Know how a keyless chuck works by twisting the sleeve to adjust the jaws for quick bit changes.
- Common issues with keyless chucks include jamming, slipping, wobbling, and stiffness.
- Utilize preventive maintenance tips such as regular cleaning, proper lubrication, and avoiding overtightening.
- Have essential tools like Allen wrench set, cleaning supplies, lubricant, chuck key, and replacement parts for effective chuck repairs.
- Follow a step-by-step guide for repairing a keyless drill press chuck, including disassembly, cleaning, lubrication, reassembly, and testing for smooth operation.
- Maintain a healthy keyless drill press chuck by regular cleaning, inspection, proper lubrication, correct storage, avoiding excessive force, using balanced drill bits, and following a maintenance schedule for optimal performance.
Understanding the Keyless Drill Press Chuck
When it comes to your keyless drill press chuck, understanding its components and functionality is crucial for proper maintenance and repair. The chuck is the part of the drill that holds the bit securely in place. Unlike traditional chucks that require a key to tighten or loosen the bit, a keyless chuck can be adjusted by hand, making it convenient but also prone to certain issues like jamming. Here’s what you need to know:
Components of a Keyless Chuck
The keyless chuck consists of three main parts: the body, jaws, and sleeve. The body is the main housing that encases the internal components of the chuck. The jaws are the parts that grip the drill bit, holding it securely in place. The sleeve is the outer part that you twist to adjust the jaws and tighten or loosen the bit.
How a Keyless Chuck Works
When you twist the sleeve of the chuck, it activates a mechanism inside that moves the jaws either inward or outward. This movement allows you to insert or remove a drill bit with ease. The keyless design eliminates the need for a key to tighten or loosen the chuck, providing quick bit changes during your drilling tasks.
Common Issues with Keyless Chucks
One of the most common issues with keyless chucks is jamming. This can occur when the chuck becomes dirty, debris gets stuck inside, or the internal mechanism malfunctions. A jammed chuck can make it difficult to change drill bits, causing frustration during your projects.
Preventive Maintenance Tips
To keep your keyless chuck in good working condition, it’s essential to perform regular maintenance. Clean the chuck regularly to remove dirt and debris that may cause jamming. Avoid overtightening the chuck when securing a bit to prevent strain on the mechanism. Lubricate the chuck occasionally to ensure smooth operation.
Avsluttende tanker
By understanding the key components, functionality, and potential issues of your keyless drill press chuck, you can effectively maintain and troubleshoot any problems that may arise. Regular maintenance and proper handling will ensure that your drill press operates smoothly, allowing you to focus on your DIY projects without interruptions.
Common Issues with Keyless Drill Press Chucks
When dealing with keyless drill press chucks, a few common issues can arise that may hinder your DIY projects. Understanding these issues and knowing how to address them swiftly is essential to maintain seamless operation of your drill press. Here are some of the common problems you might encounter:
Recommended Products

Heavy duty heat-treated drill chuck operates with less than 0.004 inches of runout (0.1 mm)

Clamping Range: 1/32" - 5/8"; Shank thread size: 7/16-20; Accuracy: 0.005"
Chuck Slipping
If you notice that the drill bit keeps slipping in the chuck, it’s a sign that the chuck jaws may not be gripping the bit properly. This can lead to inaccuracies in drilling and can be frustrating. To resolve this issue, ensure that you tighten the chuck properly using the keyless mechanism. Also, clean the chuck jaws regularly to remove any debris that might affect their grip.
Chuck Jamming
Chuck jamming is a prevalent issue that can occur when the chuck becomes stiff and difficult to operate. If you experience this problem, it could be due to a lack of lubrication or buildup of dirt and debris inside the chuck mechanism. To address chuck jamming, apply a small amount of lubricant to the chuck jaws and the internal components. Additionally, clean the chuck thoroughly to remove any built-up grime.
Chuck Wobbling
A wobbling chuck can affect the precision of your drilling and lead to uneven holes. This issue often arises from an imbalanced drill bit or chuck assembly. To correct chuck wobbling, make sure your drill bits are in good condition and properly seated in the chuck. You can also try removing the chuck, cleaning it, and reseating it securely to reduce wobbling during operation.
Chuck Stiffness
When the chuck is hard to turn or adjust, it can slow down your workflow and make drilling tasks more challenging. Stiffness in the chuck can be caused by dried lubricant, dust accumulation, or internal misalignment. To combat chuck stiffness, clean the chuck thoroughly, remove any obstructions inside, and apply a suitable lubricant to ensure smooth operation.
By being aware of these common issues with keyless drill press chucks and knowing how to troubleshoot them effectively, you can maintain optimal performance and efficiency in your DIY projects. Regular inspection, cleaning, and proper maintenance of your drill press chuck will help prevent these problems and ensure a seamless drilling experience.
Tools Required for Repairing a Keyless Drill Press Chuck
To repair a keyless drill press chuck effectively, you’ll need a specific set of tools to address common issues properly. Having the right tools on hand will streamline the repair process and ensure optimal performance from your drill press chuck. Here are the essential tools you’ll need:
- Allen Wrench Set: This set includes various sizes of Allen wrenches that are crucial for disassembling and reassembling components of the drill press chuck accurately.
- Cleaning Supplies: Utilize cleaning materials such as a soft brush, cloth, and degreaser to remove any dirt, grime, or debris that may be affecting the chuck’s functionality.
- Lubricant: A high-quality lubricant like WD-40 or specific chuck lubricant will help reduce friction and ensure smooth operation of the chuck.
- Chuck Key: If your drill press chuck requires a key for adjustments, make sure you have it readily available to make any necessary changes.
- Replacement Parts: In case any components of the keyless chuck are damaged beyond repair, having replacement parts such as jaws or springs on hand can be beneficial.
By having these tools available, you’ll be well-equipped to tackle various issues that may arise with your keyless drill press chuck. Remember to follow manufacturer guidelines and safety precautions when performing repairs to maintain the longevity and efficiency of your equipment.
Recommended Products

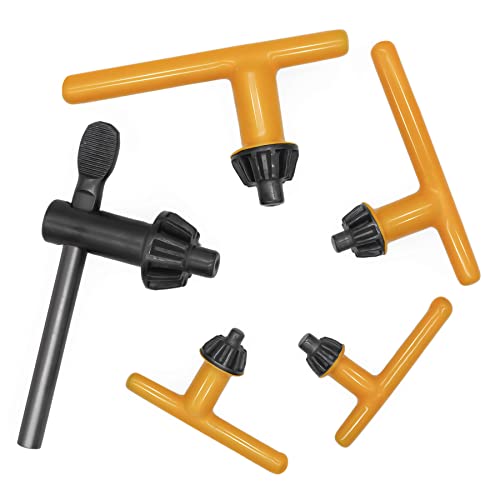
This 4-in-1 drill chuck key comes in 4 different sizes and can conveniently fit various electric drill locks, allowing you to handle various work requirements with just one drill key

What you Get: The 8pcs Drill Chuck Key Wrench set contains 3/4" (20mm), 5/8" (16mm), 1/2" (13mm), 3/8" (10mm), 1/4" (6mm), 5/32" (4mm) drill chuck key wrench, 1pc drill chuck key tools, 1pc 16 teeth chuck key, meeting a variety of drill chuck fastening and loosening needs.

DRIVER TO DRILL: This unique converter will turn any 1/4” cordless power screwdriver into a drill or grinder for all your drill bits up to 3.8 mm (0.15 inches) in diameter. This tool gives you the freedom of one-handed drilling with both left- and right-hand rotation.
Step-by-Step Guide to Repairing a Keyless Drill Press Chuck
To successfully repair a keyless drill press chuck, follow these step-by-step instructions carefully:
Recommended Products

Features heat treated jaws for maximum accuracy and performance

[Size and Grip]: Accommodates drill bits from 1/32 inch to 3/8 inch (0.8mm - 10mm) with carbide jaw-inserts to minimize slippage.
【Easy to Use】: Drill chuck wrench for most of electric drill clamping tool. Long handle for good leverage, can easily tighten or loosen a drill chuck. Allows for quick changing of your drill bit heads
1. Gather Necessary Tools and Supplies
Before starting the repair process, ensure you have the following tools and supplies ready:
- Allen wrench set
- Cleaning supplies (such as a brush or cloth)
- Lubricant (appropriate for drill presses)
- Chuck key
- Replacement parts (if needed)
2. Disassemble the Chuck
- Unplug the drill press from the power source.
- Using the correct-sized Allen wrench, locate the chuck screw at the base of the chuck.
- Rotate the chuck screw counterclockwise to loosen and remove it.
- With the chuck key, open the jaws of the chuck as wide as possible to remove it from the spindle.
3. Clean the Chuck Components
- Use cleaning supplies to remove any dirt, debris, or old lubricant from the chuck components.
- Ensure all parts are thoroughly cleaned, including the jaws, sleeve, and housing.
- Inspect for any signs of damage or wear that may require replacement.
4. Lubricate the Chuck
- Apply a small amount of the appropriate lubricant to the internal components of the chuck.
- Rotate the chuck several times to ensure the lubricant spreads evenly and reaches all moving parts.
- Wipe off any excess lubricant to prevent accumulation.
5. Reassemble the Chuck
- Slide the chuck back onto the spindle, ensuring it sits securely.
- Use the chuck key to close the jaws of the chuck.
- Replace the chuck screw and tighten it by rotating clockwise.
6. Test the Chuck
- Plug in the drill press and test the chuck by operating the drill.
- Check for smooth operation, proper tightening of drill bits, and absence of any unusual noises or movements.
- Ensure the chuck is securely attached to the spindle.
- Confirm that the chuck operates smoothly and securely grips drill bits.
- Make any necessary adjustments if the chuck still shows signs of issues.
By following these steps, you can effectively repair a keyless drill press chuck and ensure smooth and efficient operation for your DIY projects.
Tips for Maintaining a Healthy Keyless Drill Press Chuck
To keep your keyless drill press chuck in optimum condition and prevent common issues, follow these practical tips:
Regular Cleaning
Regularly clean the chuck using a toothbrush or a small brush to remove dust, debris, and metal shavings. This helps prevent jamming and ensures smooth operation.
Thorough Inspection
Periodically inspect the chuck for any signs of wear, cracks, or damage. Addressing these issues early can prevent further damage and maintain the chuck’s functionality.
Proper Lubrication
Apply a small amount of lubricant recommended by the manufacturer to the chuck to keep it operating smoothly. Avoid over-lubricating as it can attract more debris.
Correct Storage
Store your drill press chuck in a clean and dry environment when not in use. This helps prevent rust and maintains the chuck’s performance over time.
Avoid Excessive Force
When using the chuck, avoid applying excessive force when tightening the drill bit. Over-tightening can lead to chuck damage and affect its accuracy.
Balanced Drill Bits
Always use balanced drill bits to prevent unnecessary strain on the chuck. Unbalanced bits can cause wobbling and affect the chuck’s longevity.
Regular Maintenance Schedule
Create a regular maintenance schedule for your drill press chuck, including cleaning, inspection, and lubrication tasks. This proactive approach can help identify issues early on.
By following these simple maintenance tips, you can ensure that your keyless drill press chuck remains in good condition, operates efficiently, and lasts longer, making your DIY projects smoother and safer. Remember, a well-maintained chuck is key to successful drilling tasks.
Conclusion
By implementing the practical tips and solutions provided in this article, you can effectively maintain and repair your keyless drill press chuck. Regular cleaning, proper lubrication, and careful handling of drill bits are key to ensuring optimal performance and longevity for your DIY projects. Remember to inspect for wear and damage, avoid excessive force when tightening, and establish a maintenance schedule to keep your equipment in top condition. Following these guidelines not only enhances the efficiency of your drill press but also promotes safety and adherence to manufacturer recommendations. Keep these tips in mind to tackle any issues that may arise and enjoy seamless drilling experiences for years to come.
Frequently Asked Questions
Why is regular maintenance important for keyless drill press chucks?
Regular maintenance is crucial for keyless drill press chucks to prevent common issues like slipping, jamming, wobbling, and stiffness, ensuring optimal performance and longevity.
How can I troubleshoot a slipping keyless drill press chuck?
To troubleshoot a slipping keyless drill press chuck, ensure proper tightening of the chuck around the drill bit and inspect for any debris or dirt that might affect the grip.
What should I do if my keyless drill press chuck jams?
If your keyless drill press chuck jams, try cleaning the chuck thoroughly, removing any obstructions or debris, and then attempt to free up the mechanism by turning it in both directions.
How do I fix a wobbling keyless drill press chuck?
To fix a wobbling keyless drill press chuck, inspect the chuck for any damage or wear, make sure it is securely attached to the spindle, and use balanced drill bits to avoid uneven rotation.
What can I do if my keyless drill press chuck feels stiff?
If your keyless drill press chuck feels stiff, consider applying a suitable lubricant to the chuck mechanism to improve its overall movement and ensure smoother operation.