Have you ever found yourself struggling to get the right amount of power from your impact driver without damaging your materials? Picture this: you’re in the middle of a project, and the last thing you want is to over-tighten or under-tighten those screws. That’s where understanding how to set the torque on your impact driver can make all the difference.
In this article, you’ll discover the key steps to effectively adjust the torque settings on your impact driver. By mastering this skill, you’ll not only ensure precise fastening every time but also prolong the life of your tools and materials. Get ready to take your DIY game to the next level with this essential knowledge at your fingertips.
Key Takeaways
- Understanding torque is crucial for effectively using your impact driver and preventing damage to materials.
- Adjusting torque settings involves locating the adjustment collar, understanding the settings, setting the torque, testing it, and using appropriate torque for different projects.
- Setting torque correctly ensures precise fastening, prolongs the lifespan of tools and materials, and results in professional-looking DIY projects.
- Following steps such as selecting the desired torque, adjusting it accurately, testing it on scrap material, fine-tuning as needed, and maintaining consistent levels is essential.
- Tips for precision and accuracy include understanding torque requirements, selecting the right torque setting, fine-tuning gradually, testing on scrap material, maintaining consistency, and prioritizing safety measures.
Understanding Torque on Impact Driver
To effectively use your impact driver, understanding torque is essential. Torque refers to the rotational force applied to drive fasteners into materials. By adjusting the torque settings on your impact driver, you can control the force exerted on the fasteners, ensuring that they are driven in correctly without damaging the workpiece. Here’s how you can master this crucial aspect of operating your impact driver:
Importance of Torque Control
Knowing how to set the torque on your impact driver properly is crucial for ensuring the longevity of both your tools and the materials you work on. By setting the torque at the right level, you prevent over-tightening screws, damaging delicate surfaces, or stripping screw heads. This precision leads to professional-looking results in your projects and extends the lifespan of your tools.
Adjusting Torque Settings
- Locate the Torque Adjustment Collar: Most impact drivers have a torque adjustment collar near the chuck or the base of the tool.
- Understand the Settings: Different impact drivers have varying torque settings represented by numbers or symbols. Higher numbers indicate more torque, suitable for driving larger or tougher screws, while lower settings are ideal for delicate materials.
- Setting the Torque: Rotate the collar to align the desired torque setting with the indicator mark. Ensure it clicks into place for accurate adjustment.
- Testing the Torque: Before driving a screw, test the torque setting on a scrap piece of material to ensure it’s appropriate. Adjust if necessary.
Practical Examples
For instance, when assembling furniture, use a lower torque setting for assembling delicate parts to avoid damaging the wood. When working on outdoor projects like deck building, higher torque settings may be needed for driving screws into tough materials like hardwood.
Mastering the torque settings on your impact driver empowers you to tackle various projects with confidence, precision, and efficiency. By understanding and controlling torque, you enhance the quality of your work while safeguarding your tools and materials.
Importance of Setting Torque Correctly
Understanding the importance of setting torque correctly on your impact driver is crucial for efficient and effective fastening in your DIY projects. Proper torque control not only ensures precise results but also plays a significant role in safeguarding both your tools and materials. Here’s why setting the torque correctly matters:
Recommended Products

Complete a wide variety of fastening applications with 1030 ft-lbs of max fastening torque and 1400 ft-lbs of max breakaway torque

Brushless Motor delivers up to 1,500 in-lbs. of torque
Ensures Precise Fastening
Setting the torque accurately on your impact driver allows you to achieve consistent and precise fastening every time. By adjusting the torque settings to suit the specific requirements of each task, you can avoid over-tightening, under-tightening, or damaging the materials you are working with.
Prolongs Tool and Material Lifespan
By setting the torque correctly, you prevent the risk of applying excessive force that can damage both the fasteners and the materials you are working on. This thoughtful approach not only enhances the longevity of your tools but also protects delicate materials from cracking or splitting due to overtightening.
Professional Results in DIY Projects
Mastering the skill of adjusting torque settings on your impact driver elevates the quality of your DIY projects to a professional level. Achieving precise torque control ensures that your projects are completed with accuracy, reliability, and a high standard of craftsmanship.
Safeguards Tools and Materials
Proper torque setting is a proactive measure to protect your tools from unnecessary strain and wear. By using the right torque for each application, you prevent premature tool failure and maintain the performance and durability of your tools over time.
Efficient Project Completion
Accurate torque control streamlines your project workflow, saving you time and effort. When you set the torque correctly on your impact driver, you can work more efficiently, with confidence in the reliability and consistency of your fastenings.
Mastering the skill of setting torque correctly on your impact driver is not just about tightening screws—it’s about ensuring the longevity of your tools, the integrity of your materials, and the professional quality of your DIY projects. By understanding and controlling torque, you can achieve precise results, project after project.
Steps to Set Torque on an Impact Driver
To set torque on an impact driver accurately, follow these straightforward steps:
- Understanding Torque Settings:
- Locate the torque adjustment collar on your impact driver. It is usually near the chuck.
- Identify the torque levels marked on the collar or a separate torque control ring, usually indicated in numbers or symbols.
- Selecting the Desired Torque Setting:
- Decide on the torque level based on the fastening task at hand. Higher torque for larger screws or bolts, and lower torque for delicate materials.
- Refer to the user manual for recommended torque settings for different applications.
- Adjusting the Torque:
- Hold the chuck or spindle to prevent it from turning.
- Rotate the torque adjustment collar to align the desired torque level with the indicator mark.
- Testing the Torque Setting:
- Before use, test the selected torque setting on a scrap piece of the same material to ensure it’s suitable.
- Adjust the torque if the fastener isn’t driven correctly or if the material gets damaged.
- Fine-Tuning the Torque:
- For precise adjustments, turn the torque setting slightly higher or lower as needed until you achieve the ideal balance of force.
- Maintaining Consistent Torque Levels:
- Periodically check and readjust the torque settings as needed during prolonged use to ensure optimal performance and avoid over-torquing.
- Ensuring Safety Measures:
- Wear appropriate personal protective equipment, such as safety glasses and gloves, when operating the impact driver to prevent any accidents.
By following these simple steps, you can set the torque on your impact driver accurately, ensuring efficient fastening, protecting your materials, and achieving professional results in your DIY projects.
Recommended Products

Good Compatibility: There are 6 contacts between the inner hex screw and the wrench handle, produce a uniform stress and would not damage screw on the driver head
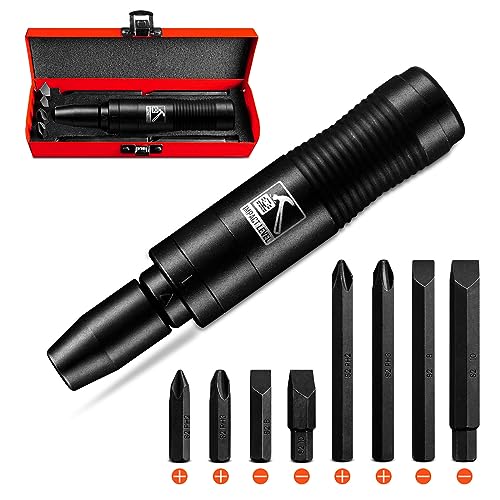
【Muti-Specification Bit Sets】10 Pieces impact screwdriver Bit Sets: 1/2 inch impact driver*1, 5/16 inch bit adapter*1, Phillips bits *4 (PH2 and PH3), Slotted bits*4 (SL8 and SL10).

【Compact Set】 This is a compact set of 36-piece precision 1/4" torque screwdriver set, including the high-precision torque screwdriver, 4 phillips bits, 6 slotted bits, 7 metric hex bits, 4 SAE hex bits, 8 torx bits, 5 1/4" drive sockets made of chrome vanadium steel and 1 socket adapter.
Tips for Precision and Accuracy
Understanding Torque Requirements:
To ensure precise fastening, familiarize yourself with the torque requirements of your project. Review the manufacturer’s guidelines to determine the specific torque settings needed for various tasks.
Selecting the Right Torque Setting:
Choose the torque setting on your impact driver based on the material and the fastener being used. Refer to torque charts provided by manufacturers for guidance.
Fine-tuning for Precision:
Adjust the torque setting gradually until you reach the desired level. Make small increments to avoid over-tightening or damaging the material.
Testing on Scrap Material:
Before proceeding with your project, test the torque setting on a scrap piece of material. Check the fastener’s tightness to ensure it meets the requirements without causing any damage.
Consistency is Key:
Maintain consistent torque levels throughout the project to achieve uniform results. Regularly check and adjust the torque settings as needed.
Ensuring Safety Measures:
Always prioritize safety by wearing appropriate gear and observing proper procedures when operating power tools. Follow safety guidelines to prevent accidents and injuries.
By following these tips, you can enhance your skills in setting torque on an impact driver with precision and accuracy. This will not only improve the quality of your projects but also extend the lifespan of your tools and materials.
Recommended Products

Brighten work areas - with an integrated 3-led work light for enhanced visibility in low-light areas

PROFESSIONAL BRUSHLESS MOTOR IMPACT WRENCH: Delivering an impressive 579Ft-lbs (800N.m)tightening torque and 665Ft-lbs (900N.m)loosening torque! With 3300 IPM and 2400 RPM. it installs truck wheel bolts in just 3 seconds and removes even the most stubborn rusted bolts from construction/machinery/scaffolding in 5 seconds. 90% more efficient than manual wrenches while reducing 80% physical effort. Upgrade now to experience professional-grade impact gun - where power meets effortless operation!

PREMIUM & DURABILITY - Sturdy storage box contains a high-precision preset torque screwdriver with a 1/4 magnetic bit holder, inner strong magnetic makes change bits quickly and attach stronger. Also comes with 12 pcs regular bits made of alloy tool steel, S2 material is more wear-resistant and tough. The entire set of tools is is heavy-duty quality and durable.
Conclusion
Mastering torque settings on your impact driver is key to achieving precise fastening results without causing damage. By understanding torque requirements, selecting the appropriate setting, fine-tuning for precision, and testing on scrap material, you can enhance your DIY projects. Consistent torque levels not only improve project quality but also extend the lifespan of your tools and materials. Remember, safety is paramount when working with power tools. By following these steps and tips, you’ll be able to set torque accurately, ensuring professional results and efficient project outcomes. Keep practicing and refining your torque-setting skills to enjoy long-lasting tools and successful project completions. Happy fastening!
Frequently Asked Questions
What is the importance of controlling torque on an impact driver?
Controlling torque on an impact driver is crucial for achieving precise fastening without causing damage. It helps in ensuring professional results in DIY projects and prolonging the lifespan of both tools and materials.
How can I set torque correctly for different tasks and materials?
To set torque correctly, first understand the torque requirements of the task at hand. Then select the appropriate torque setting based on the materials being used. Fine-tune the torque for precision, test on scrap material, maintain consistent torque levels, and follow necessary safety measures.
Why is mastering torque settings important for users?
Mastering torque settings is vital for maintaining tool longevity, preserving material integrity, and achieving precise and reliable fastenings. By mastering torque settings, users can enhance their skills, improve project quality, and extend the lifespan of their tools and materials.