

Do you find yourself in a DIY dilemma when your trusty Craftsman cordless drill suddenly stops working mid-project? Picture this: you’re in the middle of a home improvement task, and your go-to tool decides to take an unexpected break. Fret not, as we’ve got you covered with practical solutions to get your drill back in action swiftly.
In this article, we’ll walk you through simple steps to troubleshoot and repair your Craftsman cordless drill like a pro. No more frustrations or costly trips to the repair shop – with our easy-to-follow guide, you’ll be equipped with the knowledge to tackle common issues and restore your drill’s functionality in no time. Stay tuned to discover how a few simple fixes can save you both time and money on your next project.
Key Takeaways
- Familiarize yourself with the key parts of a Craftsman cordless drill, including the battery pack, motor, chuck, trigger switch, gear assembly, and LED light.
- Troubleshoot common issues like battery connection, motor overheating, chuck tightness, trigger switch problems, gear assembly malfunctions, and LED light failures.
- Have essential tools and supplies ready such as a multimeter, replacement batteries, screwdriver set, hex key set, wire strippers, replacement parts, and cleaning supplies for efficient repairs.
- Prioritize safety by wearing protective gear like safety goggles and gloves during the repair process.
Understanding the Parts of a Craftsman Cordless Drill
When it comes to repairing your Craftsman cordless drill, it’s crucial to familiarize yourself with its various parts to diagnose and fix any issues accurately. Here’s a breakdown of the essential components you’ll encounter:
1. Battery Pack
The battery pack powers your cordless drill, providing the necessary energy for operation. It’s typically detachable for easy recharging. If your drill is malfunctioning, check the battery pack’s connection or consider replacing it if it no longer holds a charge.
2. Motor
The motor is the heart of your drill, converting electrical energy into mechanical power. If your drill suddenly stops working, the motor might be the culprit. Look out for signs of overheating or unusual noises that could indicate a motor problem.
3. Chuck
The chuck holds the drill bit in place during operation. A faulty chuck can lead to wobbling or slipping of the bit, affecting the drilling precision. Make sure the chuck is securely tightened to avoid issues while working.
4. Trigger Switch
The trigger switch controls the drill’s speed and power. If you’re experiencing issues with variable speed or the drill not turning on, the trigger switch could be defective. Cleaning or replacing the switch might solve the problem.
5. Gear Assembly
The gear assembly regulates the speed and torque of the drill. Grinding noises or lack of power during operation could indicate issues with the gears. Inspect the assembly for any damage or wear and tear that may require replacement.
6. LED Light
Many modern cordless drills come with an LED light to illuminate the work area. If the light isn’t working, it could be a simple bulb replacement or a wiring issue. Ensure the connections are secure and replace the bulb if needed for improved visibility.
Understanding these key parts of your Craftsman cordless drill will empower you to troubleshoot and repair common issues effectively. By identifying the specific component causing the problem, you can quickly restore your drill’s functionality without extensive repair costs.
Troubleshooting Common Issues with Craftsman Cordless Drills
When troubleshooting common issues with your Craftsman cordless drill, understanding the key components and how they operate can help you diagnose and fix problems effectively. By identifying potential issues early on, you can address them promptly and ensure your drill functions optimally. Here are some common problems you may encounter and ways to troubleshoot them:
Recommended Products

Up to 30% more power* - work with up to 300 UWO from the electric drill / driver's powerful motor (cmcd702)

1/2inch Cordless drill/driver with high performance motor produces 280 unit watts out for completing a variety of applications

CMCD700: Power drill motor provides 280 uwo of power for demanding drilling and fastening tasks
Battery Pack
Check the battery connection to ensure it’s properly inserted and making a secure connection. If the drill lacks power or the battery doesn’t charge, try cleaning the contacts with a dry cloth. Consider testing the battery on another tool to verify if the issue lies with the battery or the drill.
Motor
If your drill suddenly stops during use, the motor might be overheating. Allow it to cool down before continuing. Excessive heat could indicate a motor issue that requires professional attention. Inspect the motor for any visible damage or debris that may impede its functioning.
Chuck
A loose or jammed chuck can hinder drilling performance. Tighten the chuck securely around the drill bit to ensure a stable grip. If the chuck doesn’t hold the bit firmly, it may need cleaning or lubrication. Avoid using excessive force when tightening to prevent damage.
Trigger Switch
Issues with the trigger switch can result in erratic operation or a non-responsive drill. Check for dirt or debris around the trigger and clean it with compressed air. If cleaning doesn’t resolve the problem, the switch may need replacement.
Gear Assembly
Unusual noises or vibrations while using the drill may indicate problems with the gear assembly. Inspect the gears for signs of wear or damage. Lubricate the gears according to the manufacturer’s recommendations to maintain smooth operation.
LED Light
If the LED light fails to illuminate while you’re using the drill, it could signal an electrical issue. Check the connections and wiring for any visible damage. Replacing the LED bulb may be necessary if it’s burnt out or broken.
By following these troubleshooting tips, you can address common issues with your Craftsman cordless drill efficiently, keeping it in optimal working condition for your DIY projects. Remember to follow safety precautions and consult a professional for complex repairs.
Tools and Supplies Needed for Repairing Craftsman Cordless Drills
When it comes to repairing your Craftsman cordless drill, having the right tools and supplies is essential to ensure a successful repair process. Here are the items you’ll need:
Recommended Products

Finish projects faster - complete long tasks quickly with up to 34% faster drilling and 23% more holes per charge.

8V Cordless Drill Driver: This 8V cordless drill driver is ideal for drilling wood & plastic, and tightening or loosening all kinds of screws. It features adjustable speed with a max no-load speed of 800 RPM, great for users of all experience levels. A built-in LED light also adds extra convenience for dim working areas.

Brushless motor: provide up to 25% more runtime and produces 350 unit watts out for improved durability.
1. Multimeter
- A multimeter is a vital tool for diagnosing electrical issues in your cordless drill. It helps you test the continuity, voltage, and resistance of various components.
2. Replacement Batteries
- If your cordless drill is experiencing power issues, having replacement batteries on hand can solve the problem efficiently.
3. Screwdriver Set
- You’ll need a set of screwdrivers with different types and sizes to disassemble and reassemble the parts of the drill.
4. Hex Key Set
- Hex keys are essential for loosening and tightening screws and bolts that hold the drill together.
5. Wire Strippers
- Wire strippers are handy for working on the electrical components of the drill and ensuring proper connections.
6. Replacement Parts
- It’s always good to have some common replacement parts such as chuck, gears, or trigger switches in case you need to replace any faulty components.
7. Cleaning Supplies
- Keeping your drill clean is crucial for its longevity. Have some cleaning supplies like a brush and compressed air to remove dust and debris.
- Don’t forget to prioritize safety. Wear protective gear such as safety goggles and gloves to prevent injuries during the repair process.
By ensuring you have these tools and supplies ready, you’ll be well-equipped to tackle any repairs needed on your Craftsman cordless drill efficiently and effectively.
Step-by-Step Guide to Repairing a Craftsman Cordless Drill
When it comes to repairing your Craftsman cordless drill, following a systematic approach can help you resolve common issues efficiently. Here’s a step-by-step guide to assist you in the repair process:
Recommended Products

Upgrade & Durable Toolbox: The Upgrade toolbox is a multi-functional solution that combines aesthetics and practicality. It features a storage compartment with a separate sliding drawer, offering greater capacity than standard toolboxes. This design allows for organized storage of various tool types, making it easier and quicker to find the tools you need

EXTENDED RUN TIME, Brushless motors provide up to 25% more runtime for the drill driver and up to 30% more runtime for the impact driver
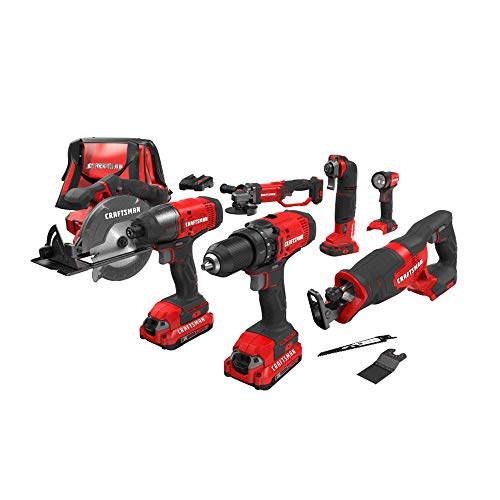
This CRAFTSMAN V20 Lithium 7 tool Combo kit provides the tools, batteries, charger, and accessories needed to get any job done
1. Diagnose the Problem
First, identify the specific issue affecting your cordless drill. Is it related to the battery, motor, chuck, trigger switch, gear assembly, or LED light? Understanding the root cause will help you target the repair accurately.
2. Gather Your Tools and Supplies
Before you begin the repair, ensure you have all the necessary tools and supplies handy. You’ll need a multimeter to test electrical components, replacement batteries if needed, a screwdriver set for disassembly, a hex key set for specific parts, wire strippers for electrical work, replacement parts for damaged components, and cleaning supplies to maintain your drill.
3. Prepare the Work Area
Create a well-lit and organized workspace for the repair process. Clear any clutter and ensure you have sufficient space to disassemble the drill. Use a clean surface to prevent small parts from getting lost.
4. Disassemble the Drill
Carefully disassemble the drill by following the manufacturer’s instructions or referencing repair guides. Keep track of the screws and parts you remove to facilitate reassembly later. Take note of any damaged or worn-out components that may require replacement.
5. Inspect and Test Components
Thoroughly inspect each component for signs of wear, damage, or malfunction. Use a multimeter to test the battery, motor, switch, and other electrical parts for continuity and proper function. Replace any faulty components with new ones.
6. Clean and Lubricate
Clean the internal components of the drill using appropriate cleaning supplies. Remove any dust, debris, or old lubricant that may impede the drill’s performance. Apply lubricant to moving parts to ensure smooth operation.
7. Reassemble the Drill
Once repairs are complete, carefully reassemble the drill in the reverse order of disassembly. Refer to your notes or photographs taken during disassembly to guide you through the reassembly process. Tighten screws securely but avoid over-tightening.
Conclusion
You’ve now equipped yourself with valuable insights into troubleshooting and repairing your Craftsman cordless drill. By identifying common issues early on and following the step-by-step repair guide provided, you can efficiently address any problems that may arise. Remember, having the right tools and safety equipment is key to successful repairs. With a systematic approach to diagnosing, disassembling, inspecting, and reassembling your drill, you’ll be able to maintain its optimal functionality for all your DIY projects and maintenance needs. Stay proactive in caring for your cordless drill to ensure it remains a reliable companion in your workshop. Happy drilling!
Frequently Asked Questions
What are some common issues with Craftsman cordless drills mentioned in the article?
The article addresses common issues such as battery pack problems, motor overheating, chuck issues, trigger switch malfunctions, gear assembly problems, and LED light failures.
Why is early identification and maintenance of cordless drill problems important?
Early identification and maintenance are crucial to prevent small issues from escalating, ensuring your cordless drill remains in good working condition for a longer period.
What tools and safety gear are highlighted for repair work in the article?
The article emphasizes the importance of having the necessary tools like screwdrivers, pliers, and safety gear such as gloves and goggles for conducting repairs safely.
Can you provide a brief overview of the repair process outlined in the article?
The repair guide in the article includes steps like diagnosing the issue, preparing the work area, disassembling the drill, inspecting and testing components, cleaning and lubricating, and carefully reassembling the drill for optimal functionality.
How does the systematic approach in the article help readers with drill repairs?
The systematic approach outlined in the article helps readers efficiently diagnose and resolve issues with their cordless drills, ensuring their tools remain functional for DIY projects and maintenance tasks.
